OAuth 2.0 Authorization Code in GravityWP API Connector
OAuth 2.0 Authorization Code is an authentication flow that lets API Connector connect to an API without pasting a permanent token into your site.
Instead of storing a static token, you authorize access in your browser. The provider asks you to approve access, then sends you back to your site through a redirect URL (also called a callback URL) so API Connector can finish the connection.
This method is commonly used for CRMs, marketing tools, and account-based platforms that require user approval.
When to use OAuth Authorization Code
Use this authentication method when an API provider:
- requires an OAuth app (client ID + client secret)
- requires a registered redirect URL
- uses a consent screen where you approve access
If the provider gives you a single static token, a Bearer Token connection is usually a better fit.
If the provider supports a “server-to-server” OAuth flow (no user consent), OAuth 2.0 Client Credentials may be the right fit.
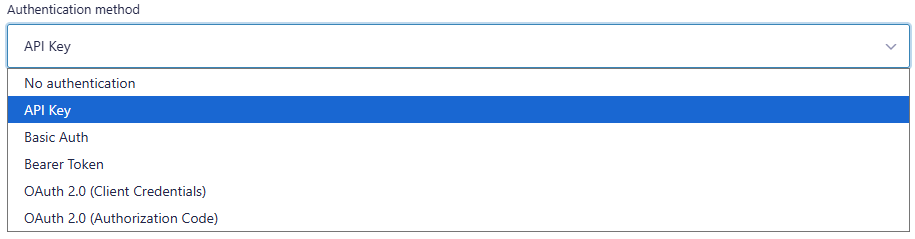
Authentication methods in API Connector
API Connector supports several authentication methods, including OAuth 2.0 Authorization Code.
Key terms (beginner-friendly)
Client ID
An identifier for your OAuth app in the provider’s developer settings.
Client Secret
A secret value for your OAuth app. Keep it private. API Connector uses it to complete the OAuth flow.
Authorization URL
The provider URL that starts the consent screen. This is where you approve access.
Token URL
The provider URL used to exchange the authorization code for tokens.
Scope
A permission string that limits what the connection can access. Always use the smallest scope that fits your use case.
Redirect URL (Callback URL)
The URL on your site that receives the browser after consent. Providers require an exact match.
PKCE
An optional security layer that some providers recommend for OAuth 2.0 Authorization Code.
OAuth Authorization Code setup overview
In this OAuth Authorization Code setup, you’ll register a redirect URL and authorize the connection in your browser.
Most providers follow the same setup pattern:
- Create an OAuth app in the provider’s developer area.
- Copy the Client ID and Client Secret.
- Create an OAuth 2.0 Authorization Code connection in API Connector.
- Get the redirect URL that API Connector uses and register it inside the provider app settings.
- Authorize the connection and confirm it shows as Authorized.
Create an OAuth Authorization Code connection
Go to the API Connector settings area in your WordPress admin and add a new API connection.
Fill in the required fields using values from your API provider:
- API Name: a label to recognize the connection
- Base URL: the API base domain you will call
- Authentication method: OAuth 2.0 (Authorization Code)
- Client ID: from your provider app
- Client Secret: from your provider app
- Authorization URL: from your provider’s OAuth documentation
- Token URL: from your provider’s OAuth documentation
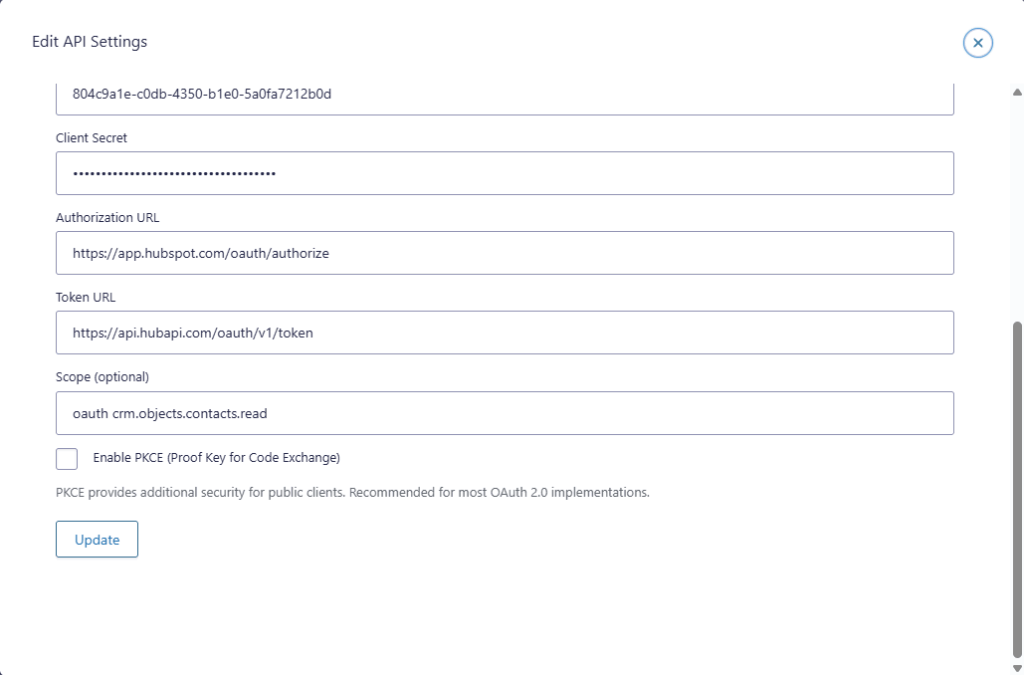
Token URL, scopes, and PKCE (Authorization Code flow)
Token URL
The Token URL is the endpoint the provider uses to exchange the authorization code for tokens. This value is supplied by the provider.
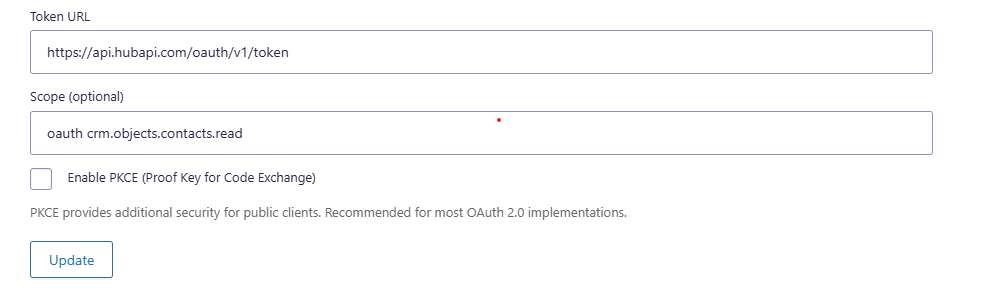
Scope (optional)
Scopes define permissions. For a read-only use case, use read scopes only.
Example scope (provider-specific): crm.objects.contacts.read
PKCE (optional)
Enable PKCE if your provider recommends it or requires it. If you are not sure, follow the provider’s OAuth setup guide.
Redirect URL for OAuth Authorization Code (callback URL)
API Connector does not show a single “callback URL” field in the connection editor.
The most reliable way to get the correct redirect URL is to start the authorization flow and copy the redirect URL used in the request.
Use this process:
- Save your API connection.
- Click Authorize (or Re-authorize).
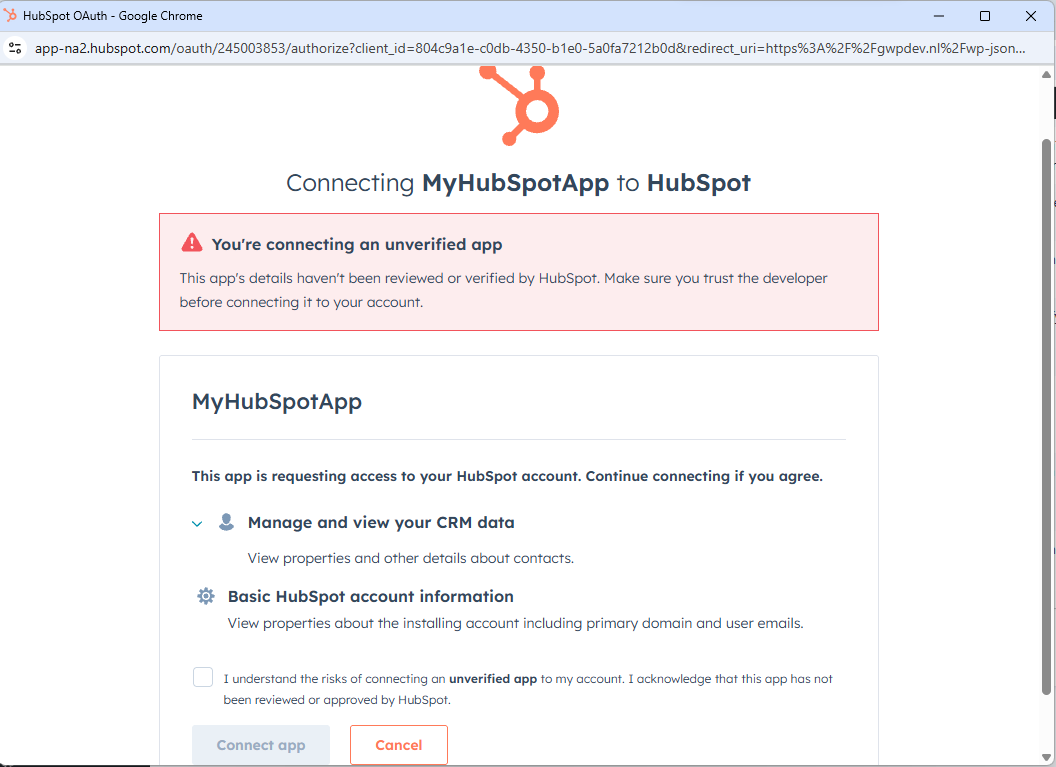
- Your browser opens the provider’s consent screen.
- Copy the redirect_uri value from the browser’s address bar (the URL you were sent to).
- Paste that redirect URL into your provider app settings under Redirect URLs, Redirect URIs, or Callback URLs.
Most WordPress sites use this redirect URL format:
https://yourdomain.com/wp-json/gwpapiconnector/v1/oauth/callbackThe domain changes per site. The callback path stays the same.
Example: “unverified app” warning during authorization
Some providers show an unverified app warning for development apps. This is common during testing.
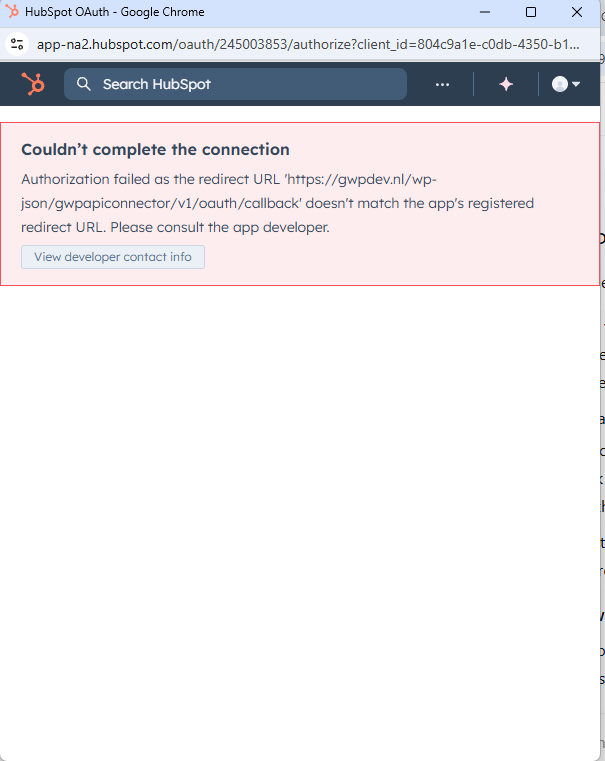
Example: redirect URI mismatch error
If the provider says the redirect URL does not match, it means the redirect URL registered in the provider app settings is not an exact match for the redirect URL used in the authorization request.
Common causes:
- http vs https mismatch
- wrong domain (www vs non-www)
- missing callback path segment
- trailing slash differences
Confirm the connection is authorized
After the redirect URL is registered correctly in the provider app settings:
- Click Authorize again.
- Complete the provider’s consent screen.
- Return to WordPress and confirm the connection shows as Authorized.
If access needs to be granted again later, use Re-authorize.
Common use cases
OAuth 2.0 Authorization Code is often used when connecting Gravity Forms to:
- CRMs (contact records, deal lookups)
- marketing platforms (subscriber or profile data)
- account-based APIs that require user-level approval
Once authorized, the connection can be used by API feeds to run requests such as GET, POST, PATCH, or DELETE, depending on what the API supports.
Security and maintenance notes
- Treat the client secret like a password. Keep access limited to site administrators.
- Use least privilege scopes. If a connection only needs read access, do not request write scopes.
- If a provider app is changed (redirect URLs, scopes, publishing status), re-authorize the connection.
Troubleshooting OAuth Authorization Code
Most OAuth Authorization Code errors come from redirect URL mismatches or missing scopes.
Redirect URI mismatch
Copy the redirect_uri from the authorization request and register that exact value inside the provider app settings.
Scope or permission error
Confirm scopes match the provider documentation, then save and re-authorize.
Unverified app warning
Normal for development apps. Confirm the app details before continuing.Connection is not authorized
Use Re-authorize and confirm the provider app is still active.
Related documentation
OAuth Authorization Code – FAQ
Start authorization and copy the redirect_uri used in the request, then register it in the provider.
Most providers require HTTPS for production OAuth apps. Use HTTPS when available.
Use the smallest scope set that matches your use case. Providers list valid scope values in their docs.
Enable PKCE if your provider recommends or requires it.
After updating scopes, re-authorize so the provider can apply the new permissions.