API Connector Feed settings
The Feed Settings allow you to configure how data is sent and received from external APIs using the GravityWP API Connector. This section covers the fields and options available for setting up your API connections effectively.
Access the feed settings by opening the Form Settings, then select the ‘API Connector’ tab. Here you can add API feeds, that connect your form fields to an API.
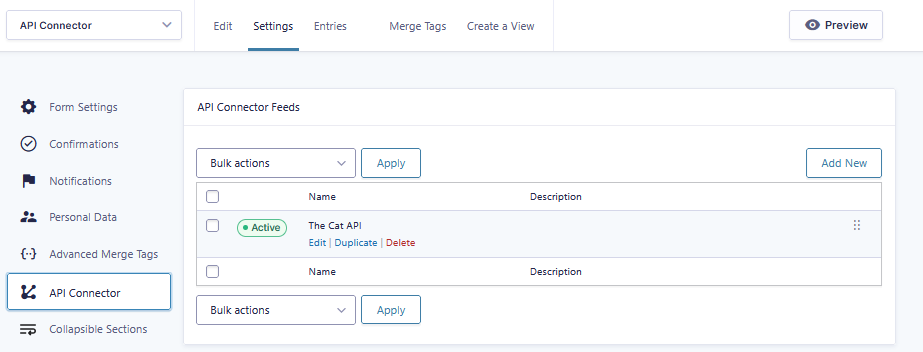
Click ‘Add New’ to add a new feed.
API Connector Feed settings
After adding a Name and description to your feed you can setup the API connection.
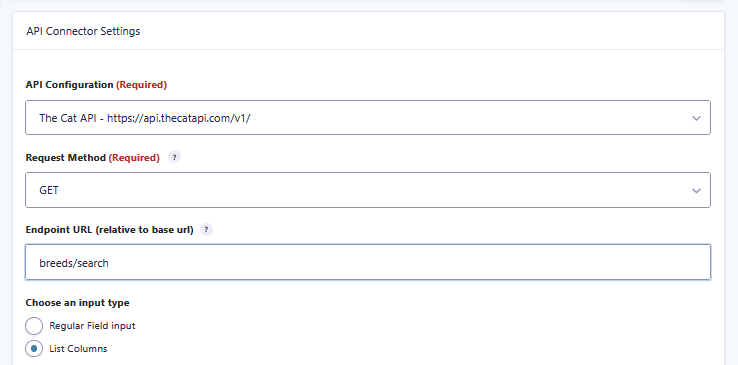
API Configuration: Choose the API configuration you want to use from the available options.
Authentication is configured in the API connection. See API Key, Basic Authentication, Bearer Token, OAuth 2.0 Client Credentials, and OAuth 2.0 Authorization Code
If you don’t know yet what the API response looks like or you have trouble figuring out which path to use:
We made an easy way to capture the API response and parse the available paths
Request Method: Most common is GET, but some API’s require POST.
Endpoint URL (Relative to Base URL): The specific URL endpoint you will access, relative to the base URL configured for the API in the plugin settings.
Choose an input type: Select whether to use regular field inputs or list column inputs. It is not possible to combine list fields and regular fields in the same API feed. If you select ‘List Columns’ you can select a List field too. The columns of this list field will become available for mapping.
Mapping regular Form Fields to the API
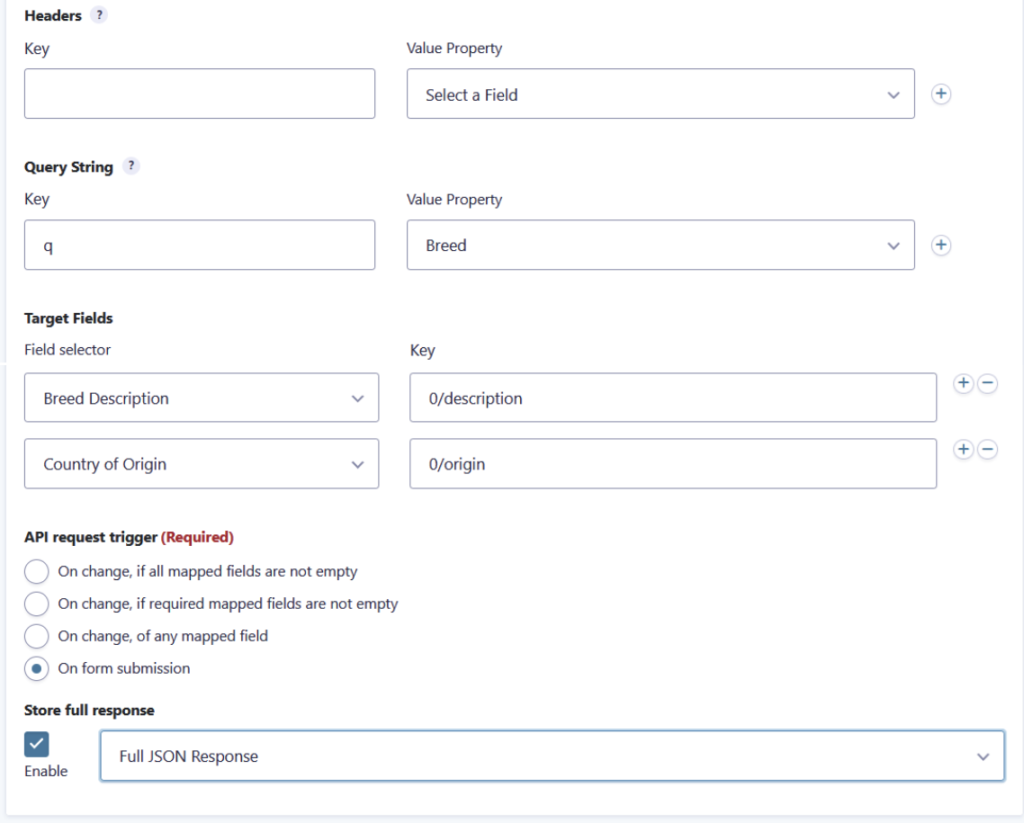
Headers: Here you can define additional Request Header parameters, where the values can be mapped to Form Fields.
Query String: Here you can define the Request Query parameters, where the values can be mapped to Form Fields. There parameters will be added to the url, like https://api.thecatapi.com/v1/breeds/search?q=cyprus
Both Header and Query String can also be mapped to a Custom Value where you can use merge tags, including merge tag modifiers. If you need to modify field values beyond the default Gravity Forms modifiers check out our Advanced Merge Tags plugin.
Target Fields: Map the values received from the API response to specific fields in your form. API Responses are usually in JSON format. You can map the result to a form field by defining a key path to the property you need. Nested properties can be accessed by using the ‘/’ character as a separator.
Example Response:
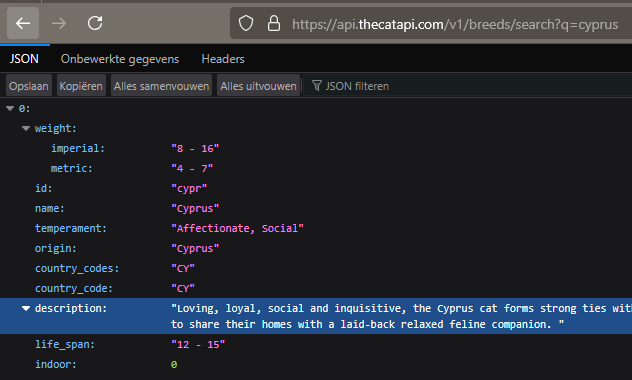
To access the imperial weight of the first breed that is returned, use:
0/weight/imperialIf you don’t know yet what the API response looks like or you have trouble figuring out which path to use:
We made an easy way to capture the API response and parse the available paths.
API Request Trigger: Specify when the API request should be triggered:
- On change, if all mapped fields are not empty: The request will trigger only on a change event if all fields that are involved in the request parameters have a value.
- On change if required mapped fields are not empty: The request will trigger only on a change event if all required fields that are involved in the request parameters have a value. Optional fields can stay empty.
- On change of any field: All field that are involved in the request will trigger an API call when changed.
- On form submission: The API request will trigger only after the form was submitted.
Store Full Response: Enables you to store the full response from the API in a text field for further use. This setting is only available if the request triggers on form submission.
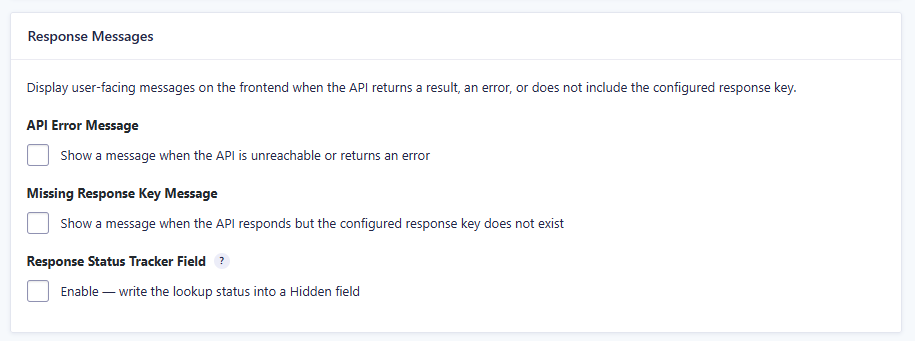
Response Messages: Display user-facing messages on the frontend when the API returns an error or when the configured response key is not found.
- API Error Message: Show a message when the API is unreachable or returns an error.
- Missing Response Key Message: Show a message when the API responds but the configured response key does not exist.
- Response Status Tracker Field: Enable this to write the lookup status into a Hidden field. The status can be
success,not_found, orapi_error, which can be used with conditional logic.
Note: For prefilled trigger fields in multipage forms, realtime lookups avoid unnecessary repeat requests on later page loads when the relevant target fields are already filled.
Mapping List Columns to the API
This works basically the same as setting up the mapping for regular fields, but with a few differences:
- The Request Trigger options are limited, because there are no required fields in a list and triggering on form submission will possibly trigger too many requests in a short time.
- Only List colums are available as mapping choice, both for the request parameters and the target mapping. It is possible to use the List Field merge tag with column index, to use the column value in the request parameters. Example:
First column of List field (id 10): {List:10.1}
Second column of List field (id 10): {List:10.2}