Do you want to add a more complex list field to your Gravity Form? This is the way to do it. Add dates, dropdowns and numbers (and calculations of these numbers) to your list field. it’s amazing what extra power you give to your form.
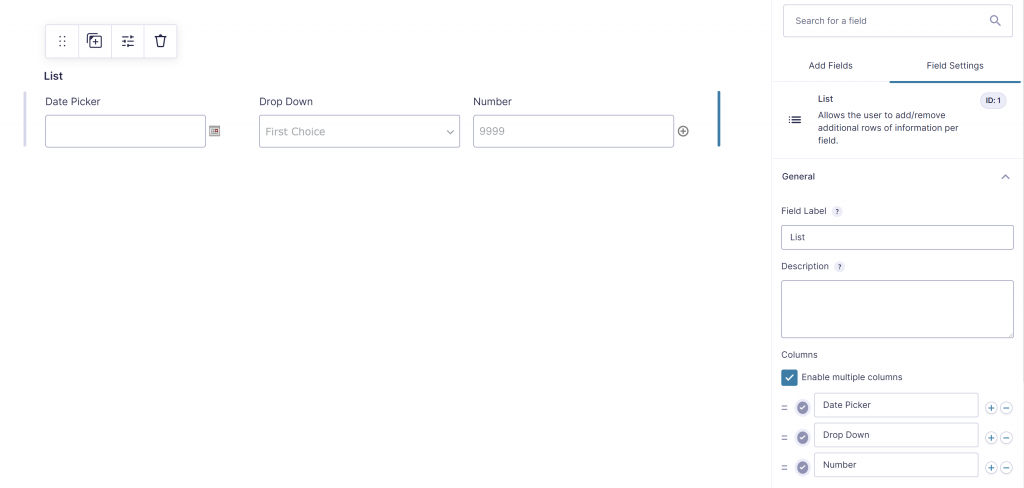
Example List Field with date, dropdown and number
Add-ons needed
To enable these functionalities, you need to install the List Field Date Picker, List Field Drop Down, List Field Text and List Field Number Format Add-ons for Gravity Forms.
Adding a List Field
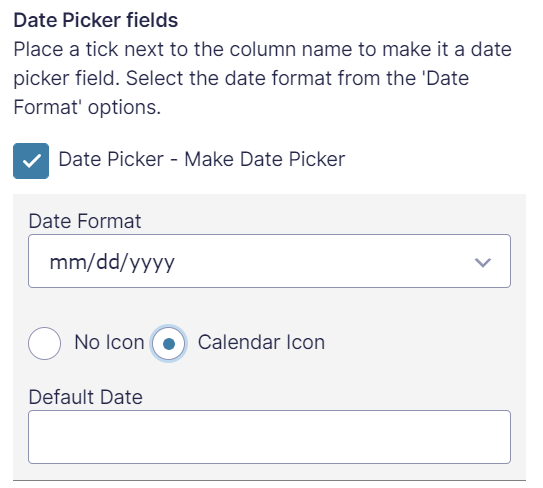
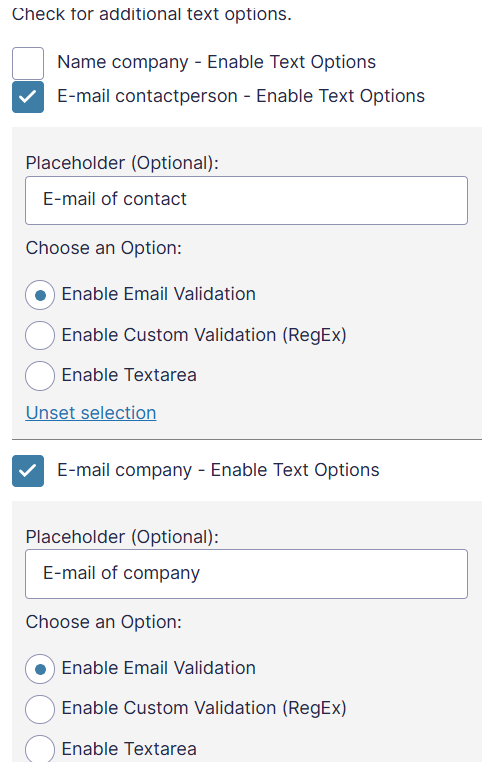
List Field Date Picker
Check out all the documentation for List Date Picker here.

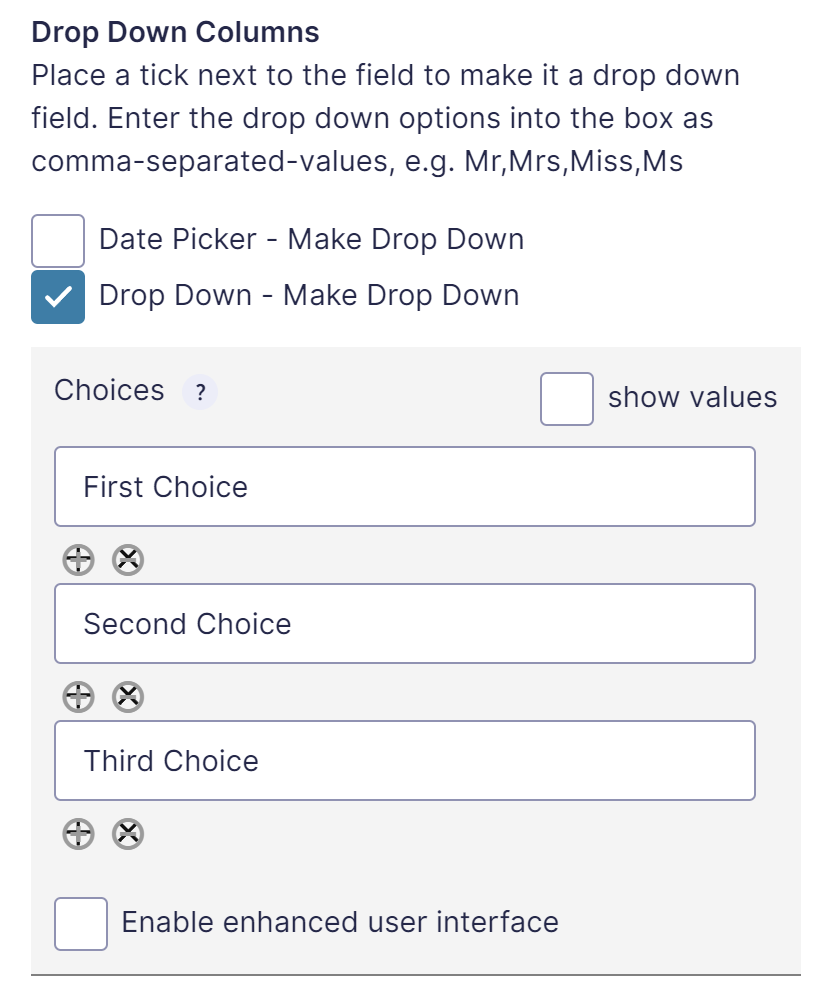
List Field Drop Down
Check out all the documentation for List Field Dropdown here.
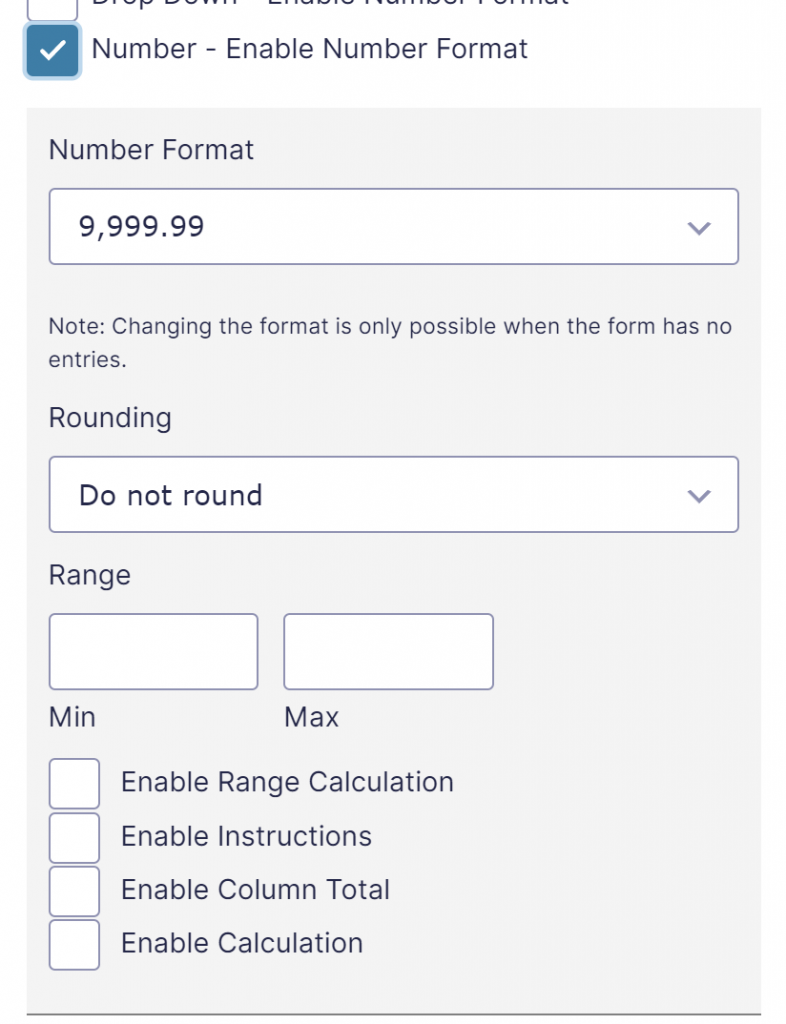
List Field Number Format
Check out all the documentation for List Field Number Format here.
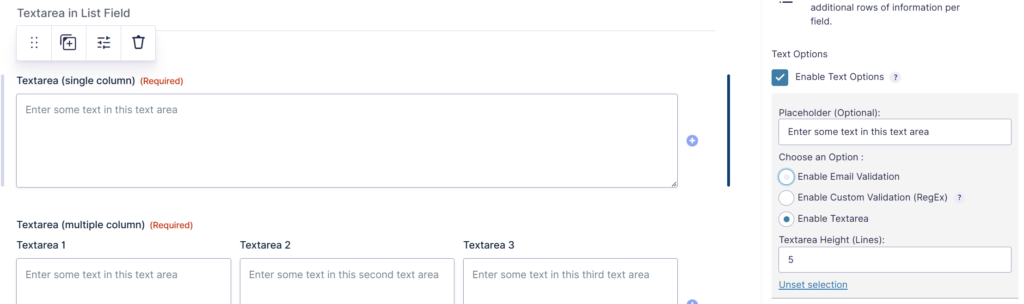
List Field Text
Check out all the documentation for List Text here.
Our Premium add-ons for Gravity Forms

All Entries
All your new Gravity Forms entries in one central place. Stop navigating between multiple forms to find new entries. Get immediate oversight and full control with a powerful, unified dashboard.

API Connector
Connect Gravity Forms to External API's: Query the API using form field values and automatically fill other form fields with the API response.
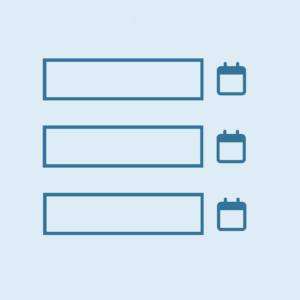
List Datepicker
Add a Datepicker with calendar select to a column or multiple columns in a Gravity Forms List Field.

n8n Connector
Connect Gravity Forms to n8n and automate your workflows with secure, flexible, and powerful webhooks. Go beyond simple notifications and build advanced, two-way automations.
Read tutorials about

Gravity Forms Pipedrive Integration: Send Form Contacts to Pipedrive Without Zapier
Learn how to connect Gravity Forms to Pipedrive without Zapier using GravityWP API Connector. This step-by-step tutorial shows how to send form contacts, custom fields, and the returned Pipedrive Person ID directly from WordPress to Pipedrive CRM.

Show Previous Gravity Forms Submissions Using Advanced Merge Tags
This step-by-step tutorial shows how to use GravityWP Advanced Merge Tags to count previous Gravity Forms submissions and calculate total submitted value based on a matching email address.

Gravity Forms LeadConnector Integration with OAuth 2.0
This documentation-based tutorial explains how to connect Gravity Forms to LeadConnector/HighLevel with OAuth 2.0, search contacts by email, and map returned CRM values back into form fields using GravityWP API Connector.

Gravity Forms Zoho CRM Integration: How to Auto-Populate Form Fields by Email
Learn how to auto-populate Gravity Forms from Zoho CRM using GravityWP API Connector. This tutorial shows how to search Zoho Contacts by email and fill form fields with the returned data.
