Looking for a way to build a seamless Gravity Forms Airtable integration and automatically fill form fields with data from Airtable? You’re in the right place. This step-by-step guide walks you through using the GravityWP API Connector to connect Airtable with Gravity Forms, no third-party platforms involved.
This setup is perfect for prefilling information from your CRM, or populating job details based on a project name. Let’s walk through the entire process using a real-world scenario.
Why Integrate Gravity Forms with Airtable?
Airtable is a powerful yet easy-to-use cloud database. Many teams use it to manage projects, customers, inventory, and more. Integrating it with Gravity Forms allows you to:
- Auto-fill Gravity Form fields based on existing Airtable records
- Prevent duplicate entries
- Improve data accuracy and save time
- Build smarter workflows right inside WordPress
And best of all, it works without relying on any external platforms.
What You’ll Need




- A WordPress site with Gravity Forms installed
- The GravityWP API Connector add-on
- An Airtable account with a base and table set up
- A Personal Access Token (PAT) from Airtable
Key Terms Explained
If you’re new to APIs or integrations, don’t worry, here are some key terms in plain language:
| Term | Simple Explanation |
|---|---|
| API | A way for two apps to talk to each other. In this case, Gravity Forms talks to Airtable. |
| GET request | A type of request that asks for data. Like asking Airtable: “Can you tell me the project description for ‘Website Redesign’?” |
| Bearer Token | A secure passkey that says, “Hey Airtable, it’s me, I’m allowed to ask for data.” |
| Base URL | The starting web address of the app you’re connecting to (e.g., Airtable’s API homepage). |
| Endpoint URL | The specific section (table) of Airtable you want to fetch data from. |
| filterByFormula | Airtable’s way to search. We use it to find rows that match something from the form. |
| JSON | A structured format that apps use to send and receive data. Think of it like a digital spreadsheet row. |
| Merge Tag | A shortcut that pulls the value someone typed in a form field, like their name or project. |
Meet the GravityWP API Connector Add-On
This add-on lets you connect Gravity Forms with any REST API. In this case, we’re connecting to Airtable’s API to retrieve information and display it in the form dynamically.
Benefits
- 100% WordPress-native
- No third-party platforms involved
- Flexible request types (GET/POST)
- Dynamic field mapping and conditional triggers
Step-by-Step: Connect Airtable to Gravity Forms (GET Request)
We’ll use a real-life example: When a user types a project name in Gravity Forms, the description auto-fills from Airtable.
1. Set Up Airtable
- Create a table called Projects
- Add at least two fields: Project Name and Project Description
- Fill in a few rows with dummy data (e.g., Branding Strategy, Website Redesign)
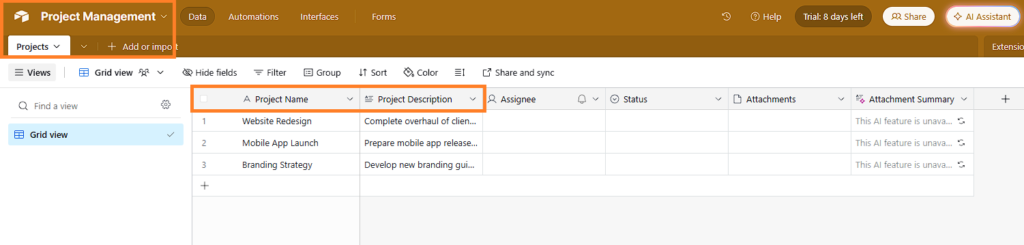
2. Generate Your Airtable Token
Go to https://airtable.com/developers/web/api/personal-access-tokens
- Click Create Token
- Scopes: data.records:read
- Select the base you just created
- Copy the token—it will be used as your API key
Tip: Airtable now uses PATs instead of old API keys. These are more secure and customizable.
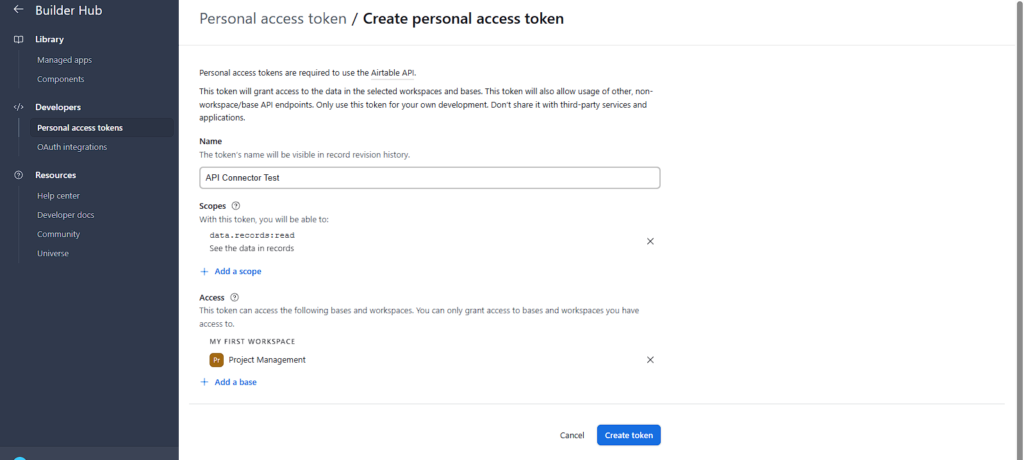
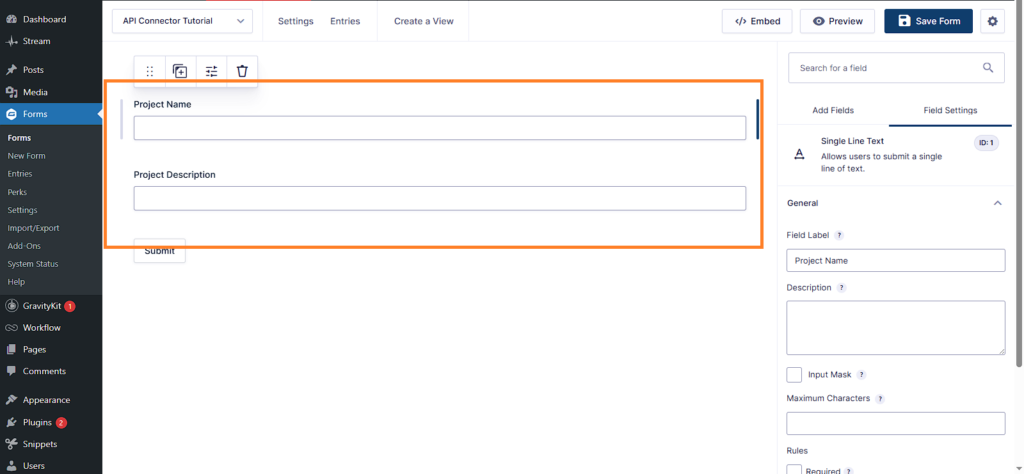
3. Build Your Gravity Form
- Field 1: Project Name (Single Line Text)
- Field 2: Project Description (Paragraph Text)
You’ll use the first field as the lookup value. The second field will display the data pulled from Airtable.
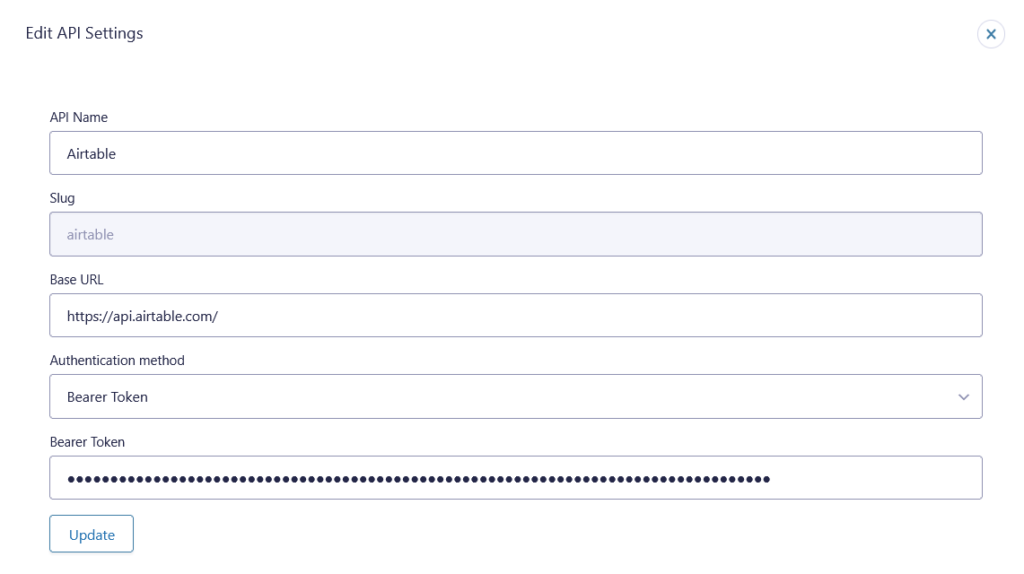
4. Configure the API in GravityWP Connector
Go to Forms > Settings > API Connector > Add API
API Name: Airtable Connection
Base URL: https://api.airtable.com/
Authentication Method: Bearer Token
Bearer Token: YOUR_PAT
Why “Bearer”? Airtable requires it to identify and authenticate your request.
Save the configuration.
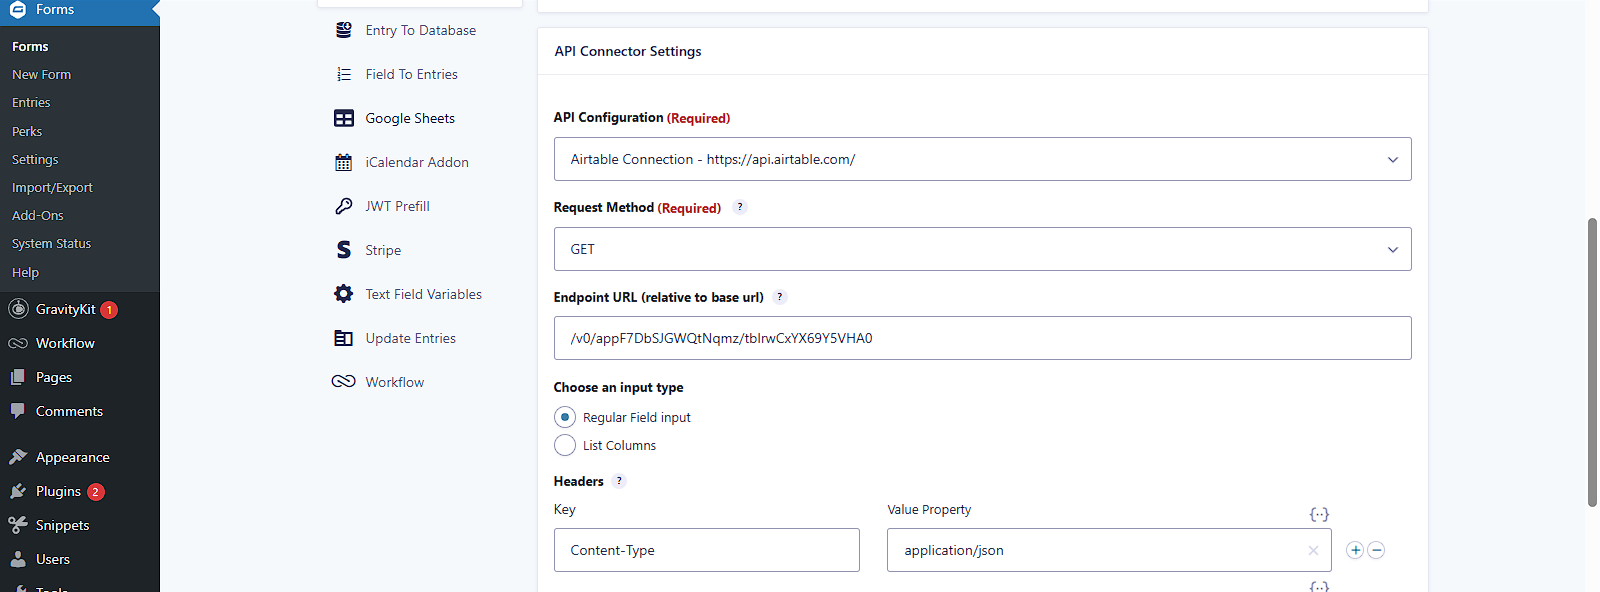
5. Set Up the API Feed (Your Form > Settings > API Connector)
- Request Method: GET
- Endpoint URL: /v0/YOUR_BASE_ID/Projects
- Input Type: Regular Fields
Headers:
- Content-Type: application/json
Even for GET, Airtable expects application/json in the headers.
Query String:
- Key: filterByFormula
- Value: {Project Name} = “{Project Name:1}”
This formula filters Airtable records by the value entered in the form.

6. Set Target Field Mapping
- Field: Project Description
- Key: records/0/fields/Project Description
Airtable’s API response wraps everything in an array. We use records/0/fields/… to extract the first match.

7. Set the Trigger
Choose: “On change, of any mapped field”
This ensures the API call fires as soon as someone types into the Project Name field.
8. Preview and Test
- Go to your form preview
- Type a project name that exists in Airtable (e.g., “Website Redesign”)
- The Project Description field should auto-fill
If it doesn’t work, double-check:
- Your field IDs in the merge tag (e.g., {Project Name:1})
- Your Bearer token
9. Troubleshooting Tips
- Enable logging in GravityForms Settings > Logging
- Check the API Connector logs
- AUTHENTICATION_REQUIRED → Check your token and Bearer spacing
- No response → Check the formula or table name in the Endpoint URL

Final Thoughts
Using the GravityWP API Connector, you can connect Gravity Forms with Airtable smoothly. This setup gives you full control, no middleware, no third-party subscriptions. And it’s just the beginning.
The potential of this add-on is huge, and even as it evolves, you can already build powerful, form-based workflows with it.
If you’ve made it this far, you’ve just unlocked a more dynamic, smarter way to use Gravity Forms.
Our Premium add-ons for Gravity Forms
Personal Edit Link
Let people correct their own Gravity Forms entries. Send a secure personal link that reopens the form with their saved answers and updates the original entry, with locked fields, audit history and optional Gravity Flow steps.

JWT Prefill
Fill forms with data you can trust. Prefill Gravity Forms fields with a secure token instead of links with editable url parameters, so your data is accurate, tamper-proof, and ready to use.

API Connector
Connect Gravity Forms to External API's: Query the API using form field values and automatically fill other form fields with the API response.

All Entries
All your new Gravity Forms entries in one central place. Stop navigating between multiple forms to find new entries. Get immediate oversight and full control with a powerful, unified dashboard.
Read tutorials about

How to Validate Repeatable Contact Rows in Gravity Forms
Learn how to validate repeatable Gravity Forms List field rows with GravityWP List Text. This tutorial shows how to add email and regex validation, test invalid values, and confirm that valid team roster data is stored correctly.

Gravity Forms Airtable Integration: Create Records From Form Submissions
Learn how to build a Gravity Forms Airtable integration with GravityWP API Connector. Send form submissions to Airtable, create new records automatically, and save the returned Airtable Record ID and response back to Gravity Forms.

Gravity Forms Asana Integration: Create Tasks From Form Submissions
Learn how to connect Gravity Forms to Asana with GravityWP API Connector. This tested workflow creates Asana tasks from form submissions and saves the returned task ID and URL back to Gravity Forms.

Gravity Forms Google Calendar Integration: Create Events From Form Submissions
Connect Gravity Forms to Google Calendar with GravityWP API Connector. Learn how to create calendar events from form submissions, map event details, configure OAuth 2.0, handle time zones, and save the returned Event ID and URL.