Looking to organize your Gravity Forms entries more efficiently by saving them directly into your own custom database tables? You’re in the right place. This tutorial walks you through how to use the GravityWP Entry to Database add-on to store form data in your WordPress database — no third-party platforms, middleware, or code needed.
We’ll use a real-world example: Creating a staff directory by storing employee details in a structured table. Along the way, we’ll break down important terminology and show you how to get everything working inside your WordPress site.
Why Use Entry to Database?
Gravity Forms stores submissions in the default WordPress tables, but that structure isn’t always flexible enough for advanced reporting or integrations. That’s where Entry to Database comes in.
With this add-on, you can:
- Send Gravity Forms data directly into custom database tables
- Use native WordPress or external database connections
- Structure and format data exactly the way you need it
- Enable more flexible, SQL-friendly storage and reporting options
And the best part? It works right inside Gravity Forms with a no-code approach.
What You’ll Need




- A WordPress site with Gravity Forms installed
- The GravityWP Entry to Database add-on
- Access to your site’s database (e.g., phpMyAdmin or Adminer)
Key Terminologies (Explained Simply)
If you’re new to database terms or GravityWP tools, here are some concepts to know:
| Term | Meaning |
|---|---|
| Database Table | A storage structure in your WordPress database where data lives (like a spreadsheet). |
| Column | A single field in your database table (e.g., name, email). |
| Row | One entry in the database table (e.g., one staff member). |
| Database Connection | Tells the add-on where to send the data (internal WordPress DB or external). |
| Feed | A Gravity Forms setting that connects your form to a specific table and maps the fields. |
| Data Types | Defines what kind of value goes in each column (e.g., text, date, integer). |
Real-World Example: Staff Directory Form
Let’s say you want to collect staff details and save them into a custom table. Here’s how we did it step-by-step:
Step 1: Create a Custom Database Table
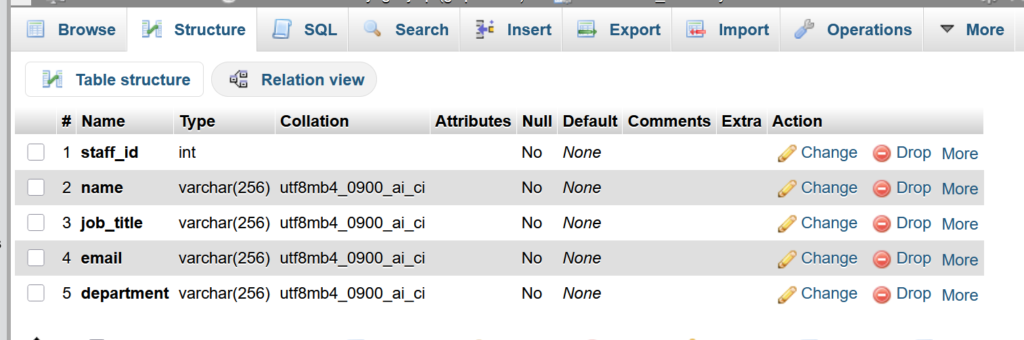
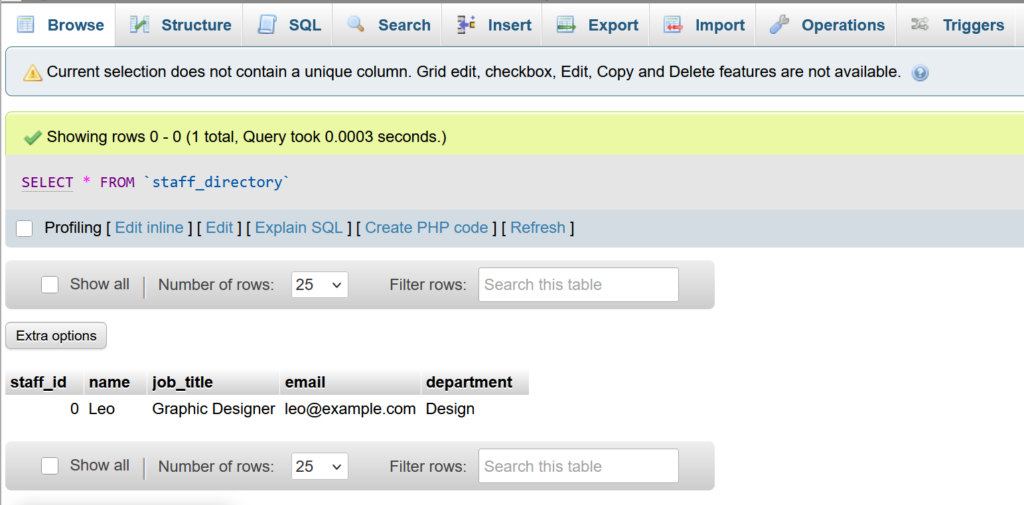
We created a table called staff_directory with the following columns:
- staff_id (int)
- name (varchar)
- email (varchar)
- job_title (varchar)
- department (varchar)
This table structure is designed to hold essential information about each staff member. Every column in this table will correspond to a field in the form later on. The staff_id can be manually assigned or auto-incremented depending on your workflow.
You can create this table using phpMyAdmin or Adminer.
staff_directory table in phpMyAdmin.Step 2: Create the Gravity Form
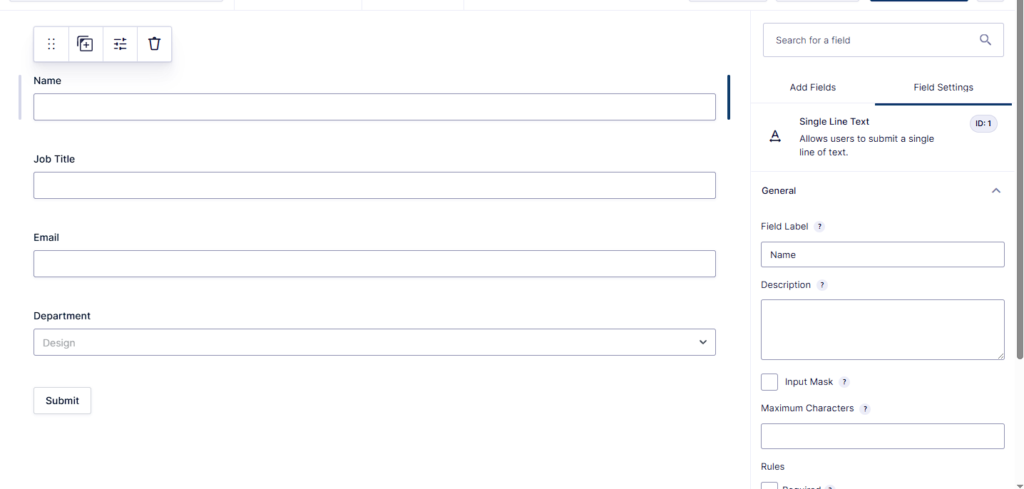
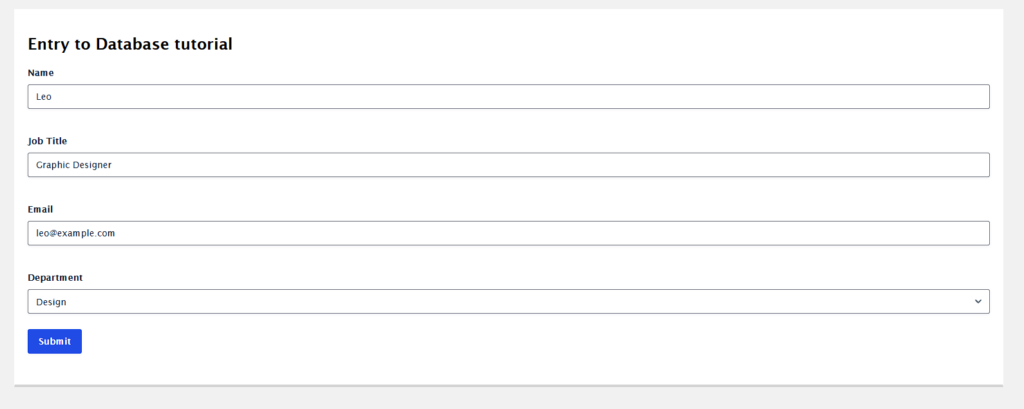
We built a simple form with the following fields:
- Name (Single Line Text)
- Email (Email Field)
- Job Title (Single Line Text)
- Department (Dropdown Field)
This form directly matches the database columns. Keep in mind that field names don’t need to be identical to database column names, but field mapping must be accurate in the next step.
Step 3: Configure the Database Connection
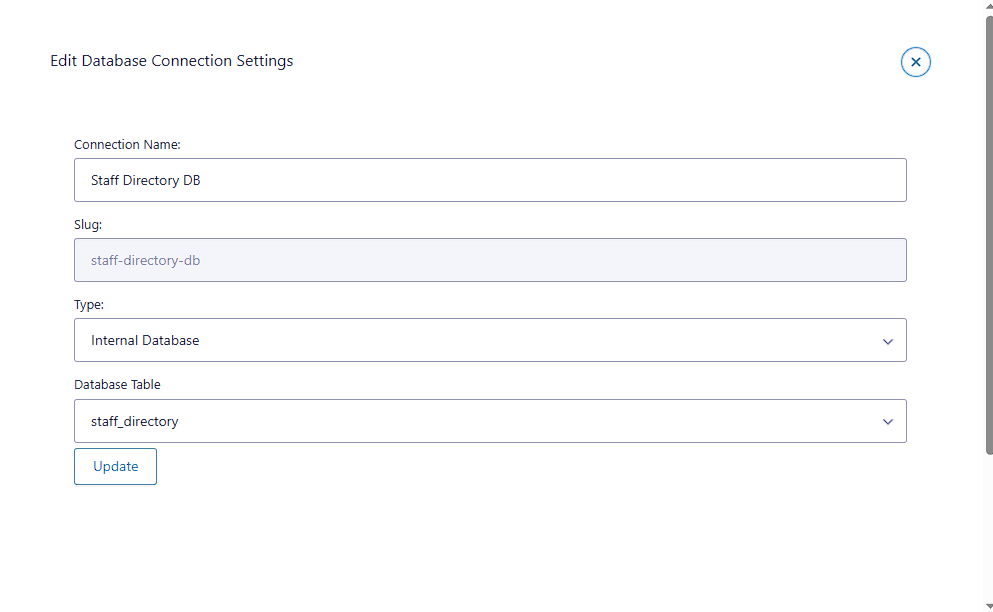
Navigate to: Forms > Settings > Entry to Database > Add Connection
We chose:
- Connection Type: Internal Database
- Connection Name: Staff Directory DB
- Database Table: staff_directory
This configuration tells the add-on to store form submissions directly into the staff_directory table that already exists in your WordPress database. You don’t need to provide host, username, or password — it’s all handled internally.
Step 4: Set Up the Feed
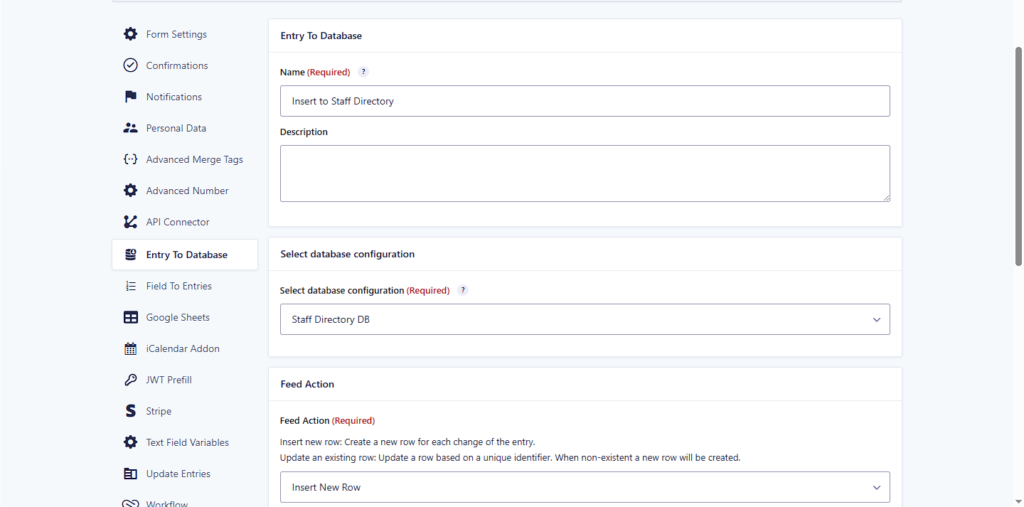
Next, go to: Forms > Settings > Entry to Database > Add Feed
We entered:
- Feed Name: Insert to Staff Directory
- Database Configuration: Staff Directory DB
- Feed Action: Insert New Row
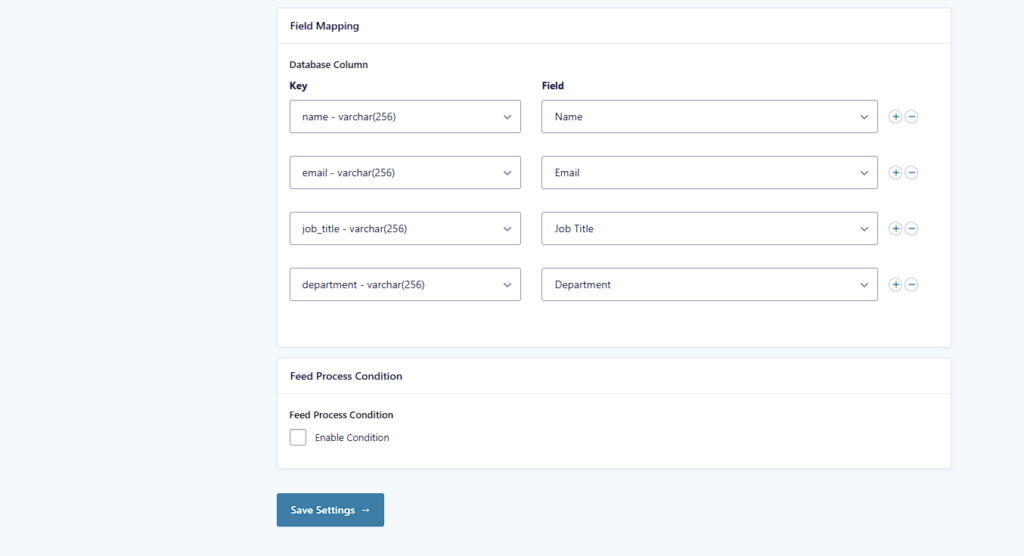
Then we mapped the fields:
- Name → name
- Email → email
- Job Title → job_title
- Department → department
This mapping ensures that when a user submits the form, the data goes into the correct columns in your table.
Step 5: Test the Form
Once everything is configured:
- Preview your form and submit a test entry
- Open phpMyAdmin (or Adminer) and check if the data appears in the staff_directory table
This step is crucial to make sure the form and database connection are working properly.
Bonus Tip: Use Required Fields
Make sure important fields like name, email, and job_title are marked as required in the form builder. This helps prevent incomplete entries from being submitted and saved.
Why This Method Works
Using the Entry to Database add-on, you skip the limitations of the default Gravity Forms storage structure. Instead, you:
- Organize your form data in your own tables
- Gain better control over structure and formatting
- Make reporting, filtering, and exporting easier
And because it’s 100% within WordPress, there are no third-party tools involved.
Final Thoughts
If you’re looking to level up your data organization inside WordPress, Entry to Database is one of the most powerful Gravity Forms add-ons available.
With a little setup and understanding, you can create robust solutions like staff directories, custom CRMs, and more—all powered by your forms and your data.
Need more tutorials like this? Check out our documentation or explore other GravityWP tools to supercharge your workflow.
Our Premium add-ons for Gravity Forms

Update Multiple Entries
Trigger the update of multiple entries in a target form by submitting an entry in a trigger form.

DateTime Field
The GravityWP - DateTime Field add-on adds a dedicated Date/Time field to Gravity Forms so users can enter both a date and a time in a single input.

API Connector
Connect Gravity Forms to External API's: Query the API using form field values and automatically fill other form fields with the API response.

List Dropdown
Add a Dropdown Select with choices to a column or multiple columns in a Gravity Forms List Field.
Read tutorials about

How to Validate Repeatable Contact Rows in Gravity Forms
Learn how to validate repeatable Gravity Forms List field rows with GravityWP List Text. This tutorial shows how to add email and regex validation, test invalid values, and confirm that valid team roster data is stored correctly.

Gravity Forms Airtable Integration: Create Records From Form Submissions
Learn how to build a Gravity Forms Airtable integration with GravityWP API Connector. Send form submissions to Airtable, create new records automatically, and save the returned Airtable Record ID and response back to Gravity Forms.

Gravity Forms Asana Integration: Create Tasks From Form Submissions
Learn how to connect Gravity Forms to Asana with GravityWP API Connector. This tested workflow creates Asana tasks from form submissions and saves the returned task ID and URL back to Gravity Forms.

Gravity Forms Google Calendar Integration: Create Events From Form Submissions
Connect Gravity Forms to Google Calendar with GravityWP API Connector. Learn how to create calendar events from form submissions, map event details, configure OAuth 2.0, handle time zones, and save the returned Event ID and URL.