You can use GravityView to dynamically populate a lot of fields in your Gravity Form. In this tutorial we explain you how you can use GravityView and Import Entries to make a beautiful list of links (which uses already available information) to fill in fields in a Gravity Form automatically (which also reduces the chance of wrong information!).
Import entries with Excel (or CSV file)
Import an Excel file to make new entries in a Gravity Form. It’s quite easy… You can use any Excel file you have to automatically populate Gravity Forms. Often times this makes it easier for your clients to fill in a form, because they don’t have to find all this information that is already available in existing data files (like Excel or Access).
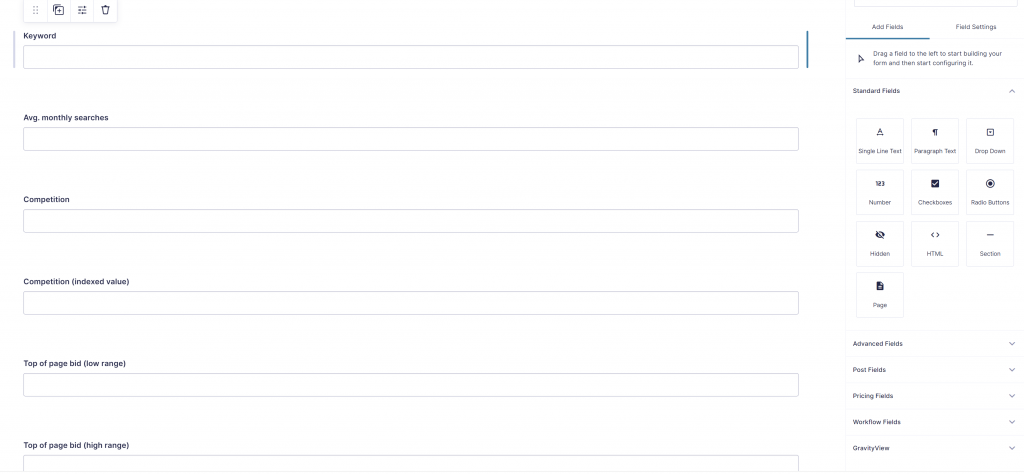
For this example we use the Keyword data that was used in the Export DataTables demo:
Create a View and a Populate Button
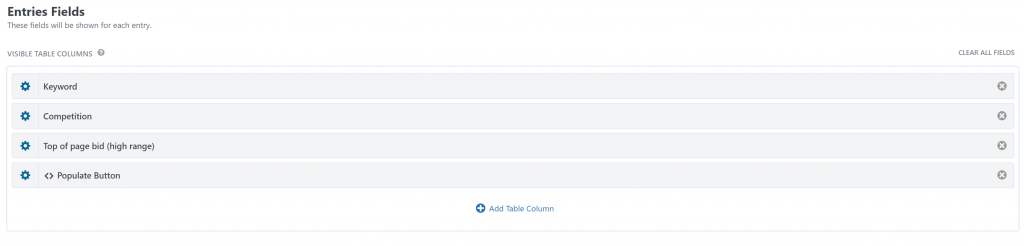
After importing data into your ‘data’ form (information you want to use to generate links), you can create a View with buttons to another form. We create a Table View with these fields.
In the Custom Content ‘Populate Button’ we create our button. We use a handy function in the GravityWP – Merge Tags Add-on. When going to the Admin Tab, you’ll find at the bottom of the table an automatically generated example populate URL:
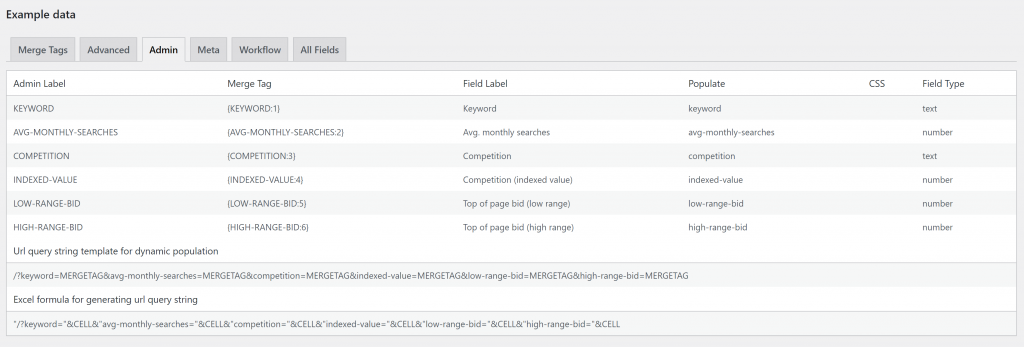
In our example the Query URL we want to use to create the button is:
/?keyword=MERGETAG&avg-monthly-searches=MERGETAG&competition=MERGETAG&indexed-value=MERGETAG&low-range-bid=MERGETAG&high-range-bid=MERGETAG
We use that as a basis for creating a bootstrap styled button in our Table View:
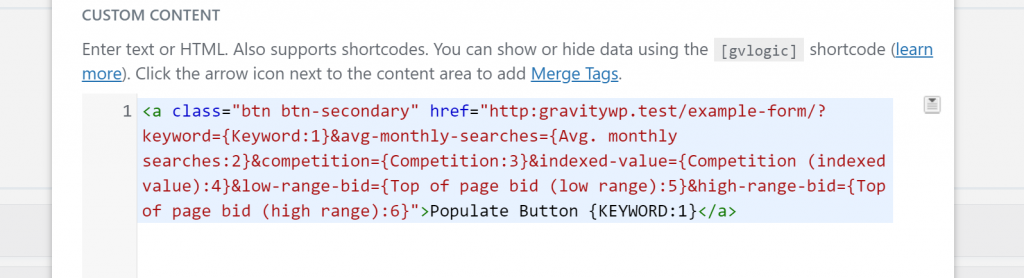
<a class="btn btn-secondary" href="http:gravitywp.test/example-form/?keyword={Keyword:1}&avg-monthly-searches={Avg. monthly searches:2}&competition={Competition:3}&indexed-value={Competition (indexed value):4}&low-range-bid={Top of page bid (low range):5}&high-range-bid={Top of page bid (high range):6}">Populate Button {KEYWORD:1}</a>Improving your Populate Query URL
Above example turns out okay, but there are a few tips that make the Populate link even better.
Use the :value Modifiers for Number Fields
When filling in Number values inside the Query URL, it’s recommended to add the :value Modifier to the Merge Tag. This way, in case of another Number Format like Valuta or comma decimals, it will either way output the point decimal notation. This will be interpreted in a right way when populating another Number Field. In above demo we could add the Modifier for example to the {Avg. monthly searches:2} Merge Tag:
{Avg. monthly searches:2:value}Use the :gwp_urlencode Modifier for Text Fields
You can run into problems when the populate Query URL contains strange characters (or accented characters). A smart way to prevent the URL from breaking down is to urlencode all the text values. You can easily do that when you have the GravityWP – Advanced Merge Tags Add-on for Gravity Forms installed. Just add :gwp_urlencode as a modifier to the Merge Tag and it will output the text in an URL friendly way:
{Keyword:1:gwp_urlencode}Improved Query URL
<a class="btn btn-secondary" href="http:gravitywp.test/example-form/?keyword={Keyword:1:gwp_urlencode}&avg-monthly-searches={Avg. monthly searches:2:value}&competition={Competition:3:gwp_urlencode}&indexed-value={Competition (indexed value):4:value}&low-range-bid={Top of page bid (low range):5:value}&high-range-bid={Top of page bid (high range):6:value}">Populate Button {KEYWORD:1}</a> Advanced Merge Tags
 List Number Format
 JWT Prefill
 Advanced Number Field
 Field to Entries
 Update Multiple Entries
 List Datepicker
 List Text
 API Connector
 Entry to Database
Read more tutorials about Katz Web Services, Inc.