Set up database connections
Overview
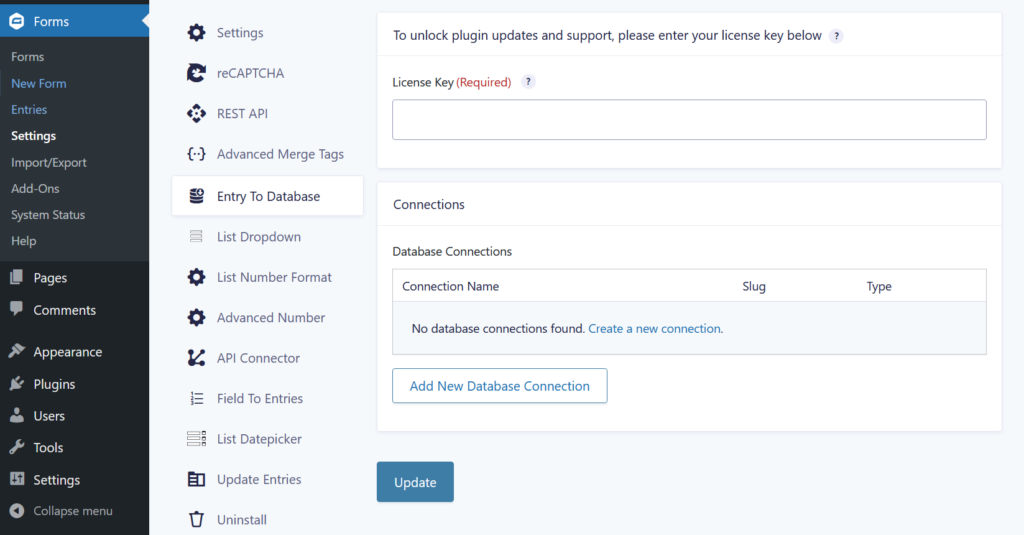
Go to Forms -> Settings -> Entry To Database to access the plugin settings. The ‘Database Connections’ section lets you add, edit, or remove database connections you can use to setup feeds to a database table for individual forms.
Only administrators can view and modify these settings.
Adding a New Connection
- Click the “Add New Database Connection” button. A modal will pop up.
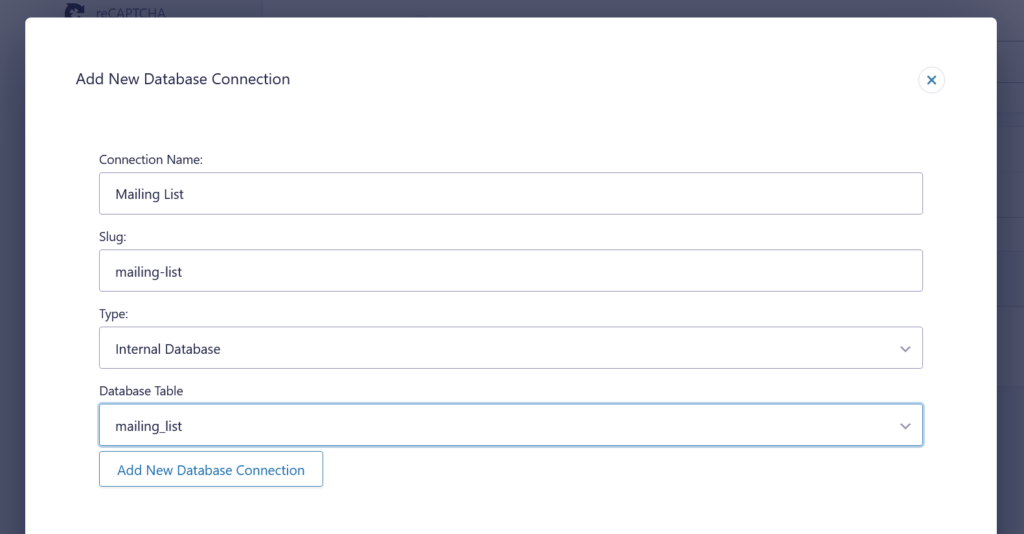
- Enter the Connection details:
- Connection Name – Enter a friendly, descriptive name for the connection. – Note: If you leave the “Slug” field blank, one is automatically generated from the name.
- Slug – A unique identifier for the connection. Only lowercase letters, numbers, hyphens, and underscores are allowed. When empty the slug will be created automatically from the Connection Name.
- Connection Type
- Internal Database – Store entries in an existing WordPress table.
- External Database – Connect to and store entries in an external database.
- Connection from wp-config – Use preconfigured settings from your wp-config file.
- Additional fields appear based on your selection:
- Internal: Choose a table from a dropdown. Default WordPress tables are not selectable. Read ‘Add an extra table to your WordPress database‘ on how to add tables to your WordPress database.
- External: To connect to an external database, fill in Host, Port, Username, Password, Database Name, and Table Name.
- wp-config: Select from configuration settings predefined in the wp-config.php. See ‘Add database connections via wp-config.php‘.
- Save: Click “Save Connection”