Add an extra table to your WordPress database
This manual will guide you through the process of creating a new table in your WordPress database using phpMyAdmin. Depending on your webhost you may have to use a different tool to access your database.
Prerequisites
- Access to your hosting provider’s control panel.
- A WordPress database created within phpMyAdmin.
Step-by-Step Guide
Step 1: Log into phpMyAdmin
- Navigate to your hosting provider’s control panel and log in.
- Locate the phpMyAdmin icon or link and click on it to launch.
Step 2: Select Your Database
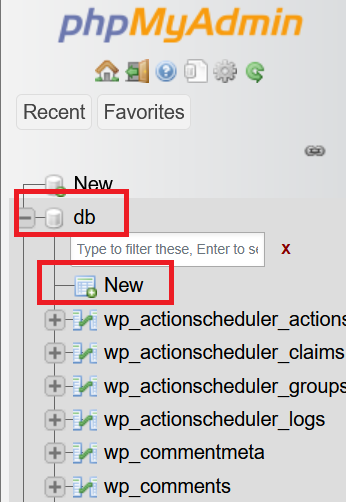
- In phpMyAdmin, you will see a list of databases on the left sidebar.
- Click on the database that corresponds to your WordPress installation. It typically has “wp_” as part of its name.
Step 3: Create a New Table
- After selecting your database, look for the “Create table” section in the main pane.
- Enter the name for your new table. For example:
wp_extra_entries. - Set the number of columns to
5(as needed for this table structure). - Click on Go to proceed.
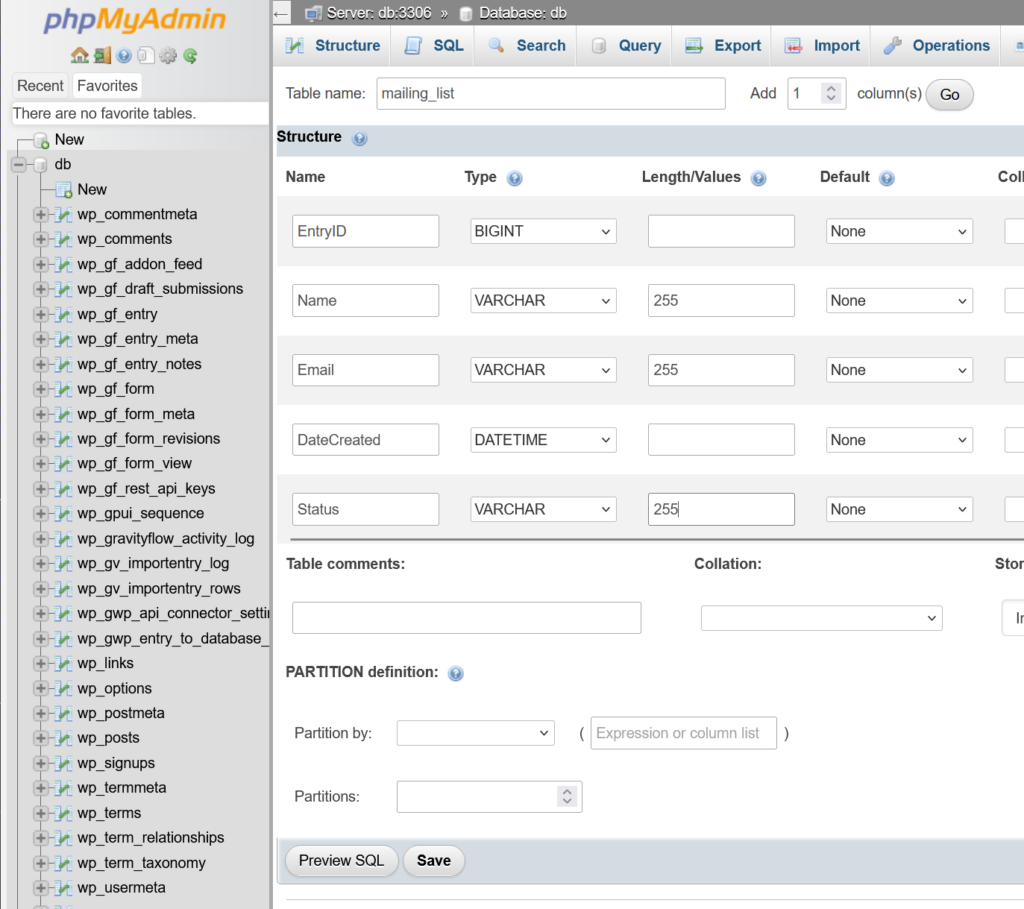
Step 4: Define Table Structure
You will now define each column according to the required structure. See MySQL common Data Types to decide what data types you need.
For example, if we want to create a table which stores a mailing list:
| Name | Type | Length/Values |
|---|---|---|
| EntryID | BIGINT | |
| Name | VARCHAR | 255 |
| VARCHAR | 255 | |
| DateCreated | DATETIME | |
| Status | VARCHAR | 255 |
This is how it should look like:
Step 5: Save the Table
- After entering all the column details, review the information for accuracy.
- Click on Save to create the table.
Step 6: Verify the Table Creation
- Once saved, the new table should appear in the list of tables under your selected database.
- Click on the table name to view its structure and ensure everything is set up correctly.
Congratulations! You’ve successfully created a new table in your WordPress database using phpMyAdmin.