Creating flexible, user-friendly forms is what makes Gravity Forms one of the most powerful WordPress plugins. But when you need users to input multiple pieces of structured data, like several rows in a list, the List Field Add-Ons from GravityWP become incredibly useful.
In this tutorial, we’ll walk you through how to use GravityWP’s List Field Add-Ons with Gravity Forms to streamline your forms using a real-world example. You’ll learn how to make your form dynamic and easy to use, without needing complex coding.
This example uses a Declaration Form to show you how the List Field Add-Ons work in practice. Feel free to adapt the method for any use case like expense tracking, inventory input, or course registration.
Add-Ons You’ll Need in your Gravity Form
These add-ons enhance the default Gravity Forms List Field, allowing you to create a more advanced repeater field with options like date pickers, dropdowns, number formatting, and text areas, all while keeping your form compact and organized.
Real-Life Gravity Forms Example: Declaration Form
A declaration form is a great use case where Gravity Forms can simplify bulk data entry with List Field Add-Ons. Let’s say your users need to submit a declaration for reimbursable expenses. You want to give users the ability to input multiple entries dynamically in a single table, making the process faster and easier for the person filling out the form.
Why This Works
This approach allows users to input multiple entries dynamically in a single form section. It improves the user experience by keeping all data organized and in context, especially when handling repeating data like expense logs.
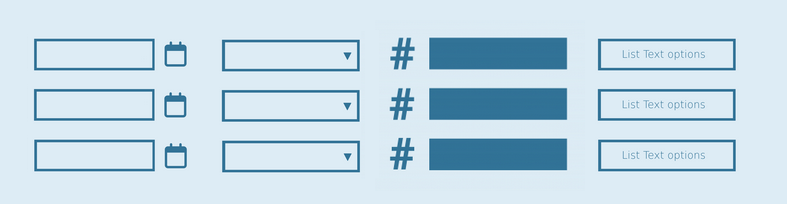
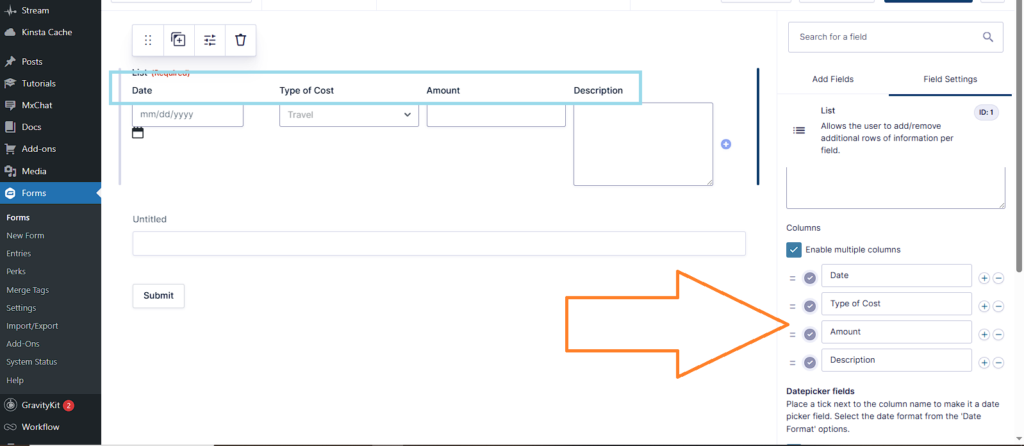
Here’s how we’ll structure the columns:
- Date
- Type of Cost
- Amount (€)
- Description
Sample Entry Table
| Date | Type of Cost | Amount (€) | Description |
|---|---|---|---|
| 2025-04-01 | Transportation | 15.00 | Bus fare to meeting |
| 2025-04-02 | Meals | 8.00 | Lunch during event |
How to Set It Up in Gravity Forms (Step-by-Step)
1. Create or Open a Form in Gravity Forms
Head to your WordPress dashboard → Forms → New Form (or open an existing one).
2. Add a List Field
Click on List under the “Advanced Fields” section. Rename it to something clear like “Declaration Table.”
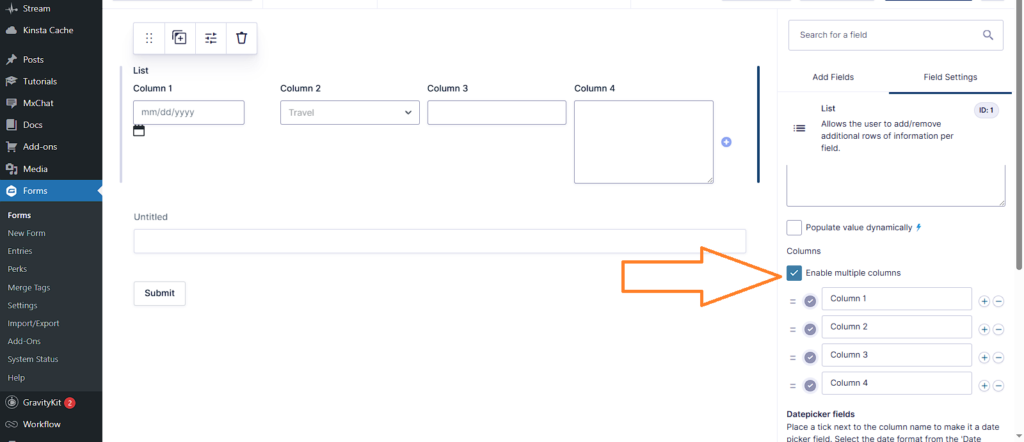
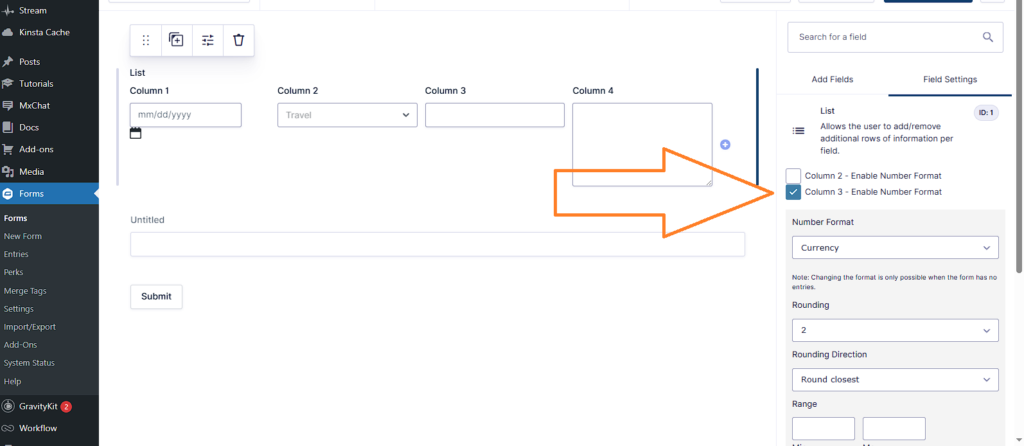
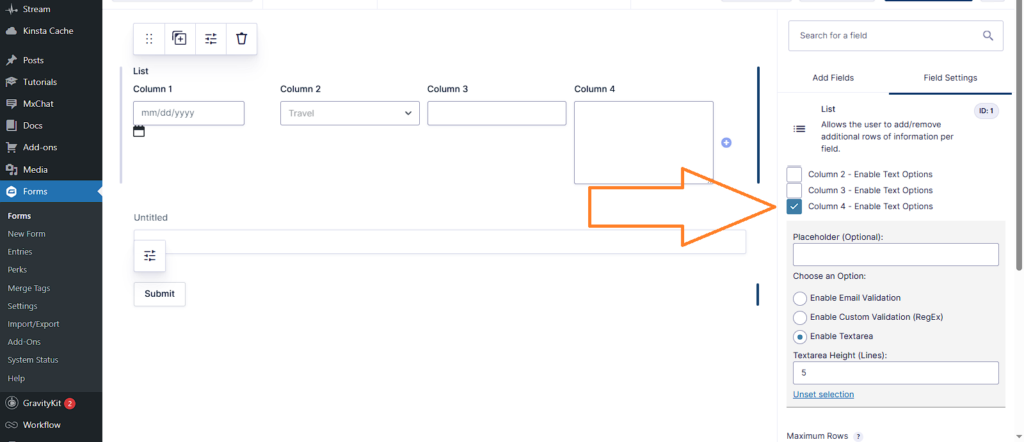
3. Enable the Add-Ons for Each Column
Click the List Field’s Settings (gear icon). Enable and configure each of the following add-ons:
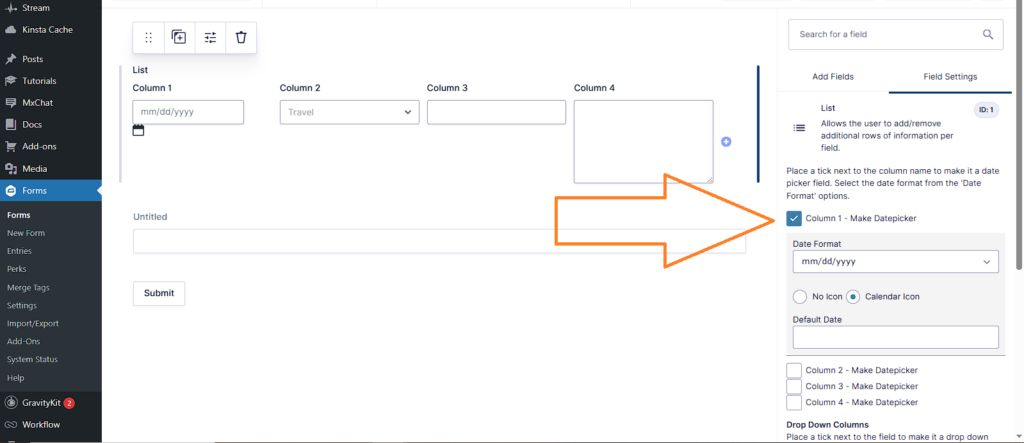
- Column 1 (Date Picker): Users select a date from a calendar.
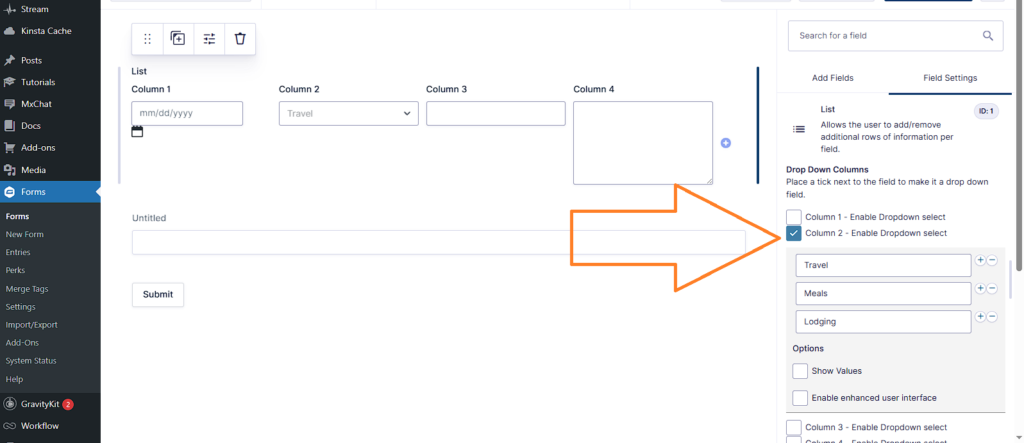
- Column 2 (Drop Down): Use predefined categories like Travel, Meals, Lodging.
- Column 3 (Number Format): Input amount (e.g., €10.00).
- Column 4 (Text): Short explanation of the cost.
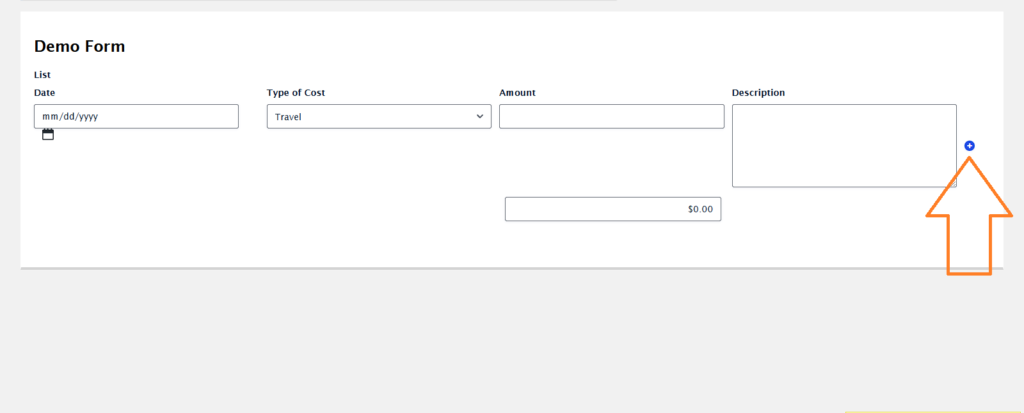
4.Test the Form on Front-End
Preview the form. You should now see a structured table where users can click “+” to add more rows.
5. Optional: Add Validation or Field Descriptions
To improve usability:
- Add a short instruction text above the form.
- Set field validations (e.g., required fields, format).
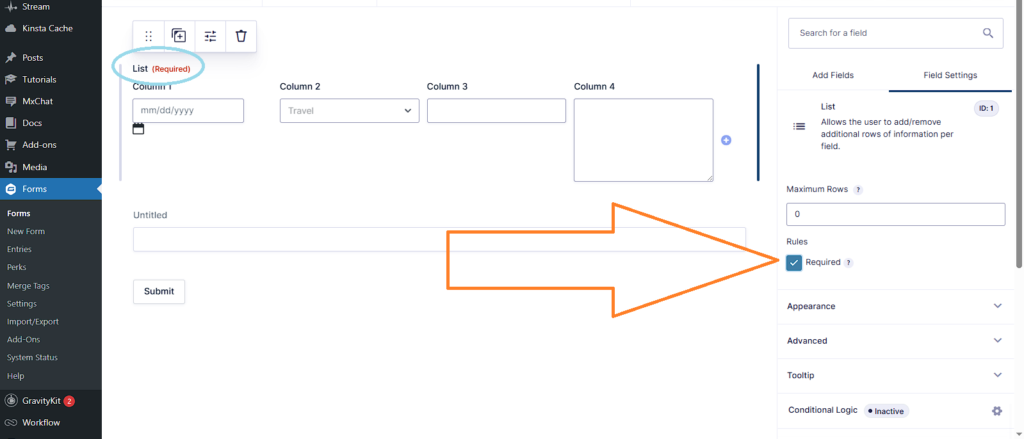
Finally, scroll to the bottom of the List Field settings and enable “Required” to make sure users fill out the field
Try It Yourself: Declaration Form Demo
Use the form below to test how the List Field Add-Ons work in a real-life scenario. Add multiple rows and experience the dynamic behavior in action!
Why Use GravityWP List Add-Ons in Gravity Forms?
- Cleaner Layout:
All related inputs are grouped in one place, making the form easier to use. Note: While this enhances user experience on the front end, exporting data can be more complex compared to using separate fields.
To solve this, check out our Field to Entries add-on, which automatically converts each row in a List Field into separate entries. This makes it easier to export, process, filter, or analyze the data individually in reports or third-party tools.
- Better User Experience:
Easier for users to add and review multiple entries.
- Highly Customizable:
Each column can have a different input type, making it suitable for various scenarios.
Perfect For:
- Declaration Forms
- Expense Reimbursement Forms
- Time Logs
- Inventory Inputs
- Attendance Tracking
- Task or Assignment Lists
- Booking Lists
- And more!
Final Tips
- Try submitting the form yourself to spot issues.
- Regularly update field labels and help text based on user feedback.
- You can style the List Field using custom CSS for a polished look.
Summary
With this setup, Gravity Forms becomes an even more powerful tool for structured and dynamic form input. Using GravityWP’s List Field Add-Ons with Gravity Forms transforms your WordPress forms into dynamic, user-friendly tools. Whether it’s for declarations, bookings, or time logs, this setup helps keep your data neat and actionable.
Our Premium add-ons for Gravity Forms

Update Multiple Entries
Trigger the update of multiple entries in a target form by submitting an entry in a trigger form.

Field to Entries
Create entries based on Checkboxes & Multi Select choices & List Field rows.
List Dropdown
Add a Dropdown Select with choices to a column or multiple columns in a Gravity Forms List Field.

Advanced Number Field
Functionality for Number Fields, like rounding or only absolute numbers, fixed point notation, range calculation, custom units like % or m2 & show as slider.
Read tutorials about

How to Create a Public Submission Business Directory in WordPress (Gravity Forms + GravityView)
Build a moderated business directory where users submit listings through a form, admins approve entries, and approved businesses appear in a searchable GravityView directory.

How to Create an Event Workshop Registration + Waitlist System in WordPress
This guide shows how to set up a workshop registration + waitlist system in WordPress: register attendees until capacity is reached, waitlist the rest, approve entries, and auto-promote people when a seat opens using Gravity Forms, Gravity Flow, and GravityView.

Gravity Flow Form Submission Step Tutorial
The Gravity Flow Form Submission step pauses a workflow until another form is submitted, then continues once the handoff is complete. This guide shows how to connect two forms, prefill fields with mapping, send the correct secure link, and troubleshoot the most common “workflow didn’t move” issues.

Gravity Flow Delete an Entry Step Tutorial
The Gravity Flow Delete Entry step lets you trash or permanently remove Gravity Forms entries as part of a workflow. This guide covers the key settings, scheduling options (delay or date-based), and safe testing tips so you can follow retention and privacy rules with confidence.