Do you want to add (and process) data from an incoming webhook to your Gravity Form? You can use the Incoming Webhook Add-on from Gravity Flow to do that. We explain where to get the Add-on and give you a real example how we use it.
How to configure the incoming webhook?
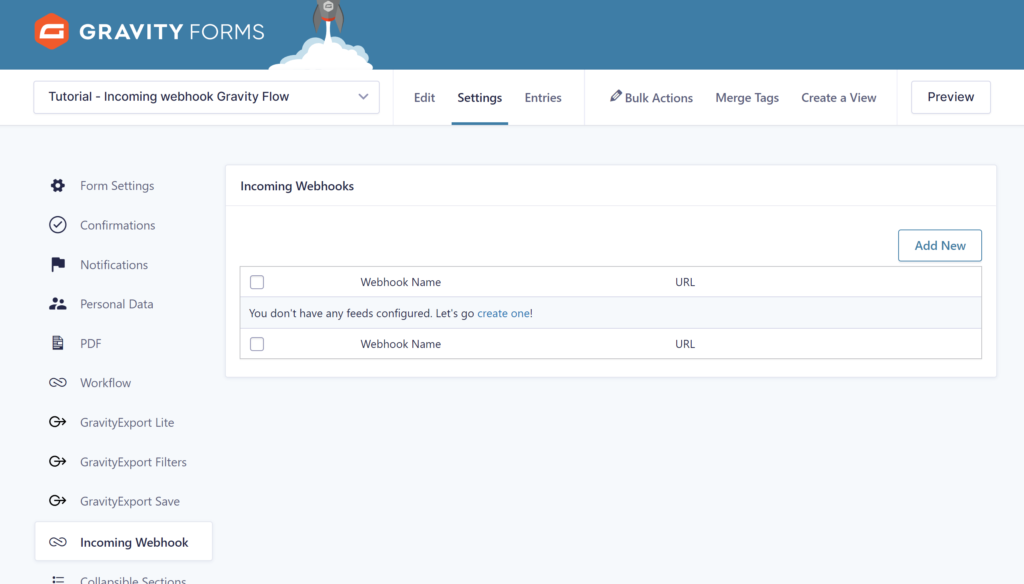
To get it working, you’ll need to add to your WordPress site Gravity Forms, Gravity Flow and the Incoming Webhook Add-on. Once you’ve done that, you can go to your Gravity Form settings (settings of one specific form) and click on Incoming Webhook:
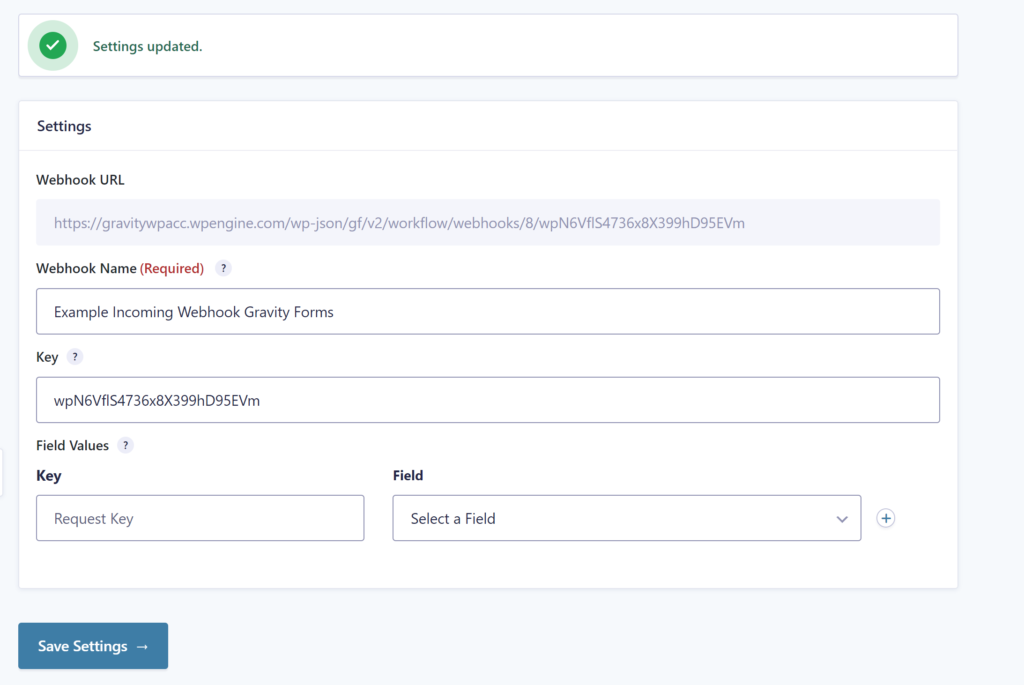
Click Add New and fill in your Webhook name (required):

Once you save the settings, Gravity Flow Incoming Webhooks will automatically generate a Webhook URL for you to use for connecting Webhooks from other sites to your site, like GitHub, Moodle or Paddle:
Example GitHub webhooks
In GitHub you have within the Settings page of one of your repositories a menu link to Webhooks:

When you click Add webhook or Edit an existing one, you can paste the Webhook URL generated by Gravity Flow inside the Payload URL. Important is to select ‘application/json’ as Content type:
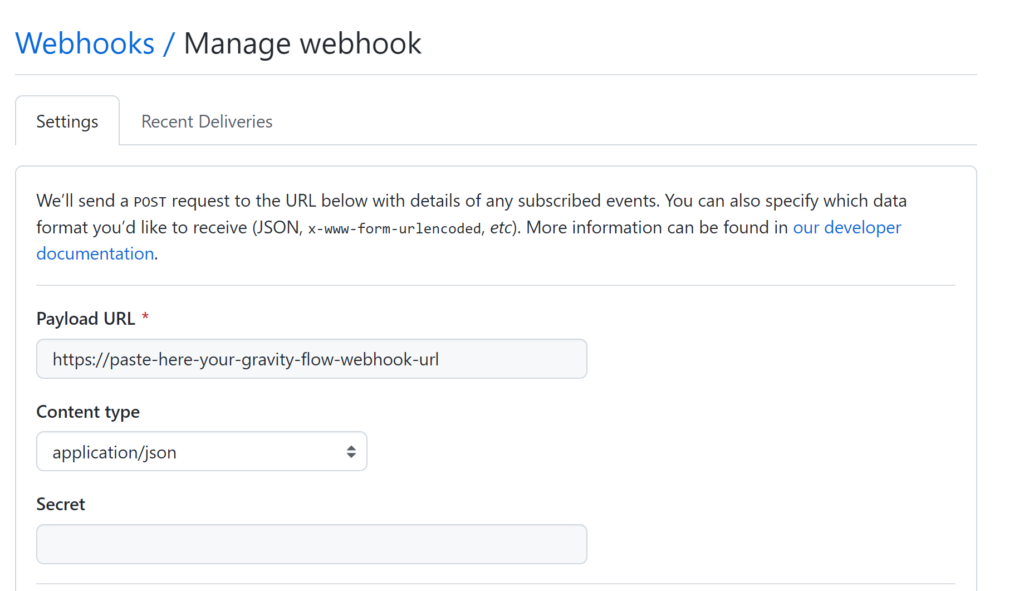
We leave SSL verification enabled (this checks if your site has a valid SSL certificate).
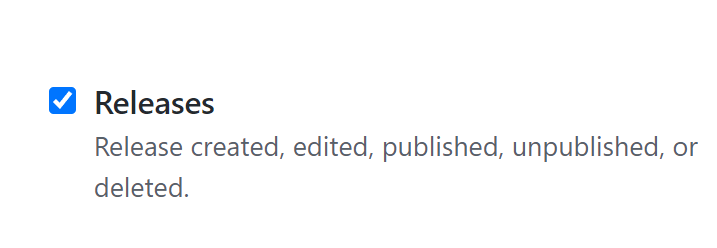
You can select on which triggers GitHub should post information to your Gravity Flow Incoming Webhook. You can select to send everything, but in this example we only want to get information on a specific individual event, namely the Releases event.

By selecting Releases, we’ll get an update from GitHub whenever a release is created, edited, published, unpublished or deleted. This way we can easily update information on our site about our own Add-ons, to keep it in sync with what’s happening on GitHub (where we manage all of our plugins):
Once some Release action is triggered, you can check in the tab ‘Recent Deliveries’ what was send to your Incoming Webook (all fake data for this example, but it should more or less look like this):
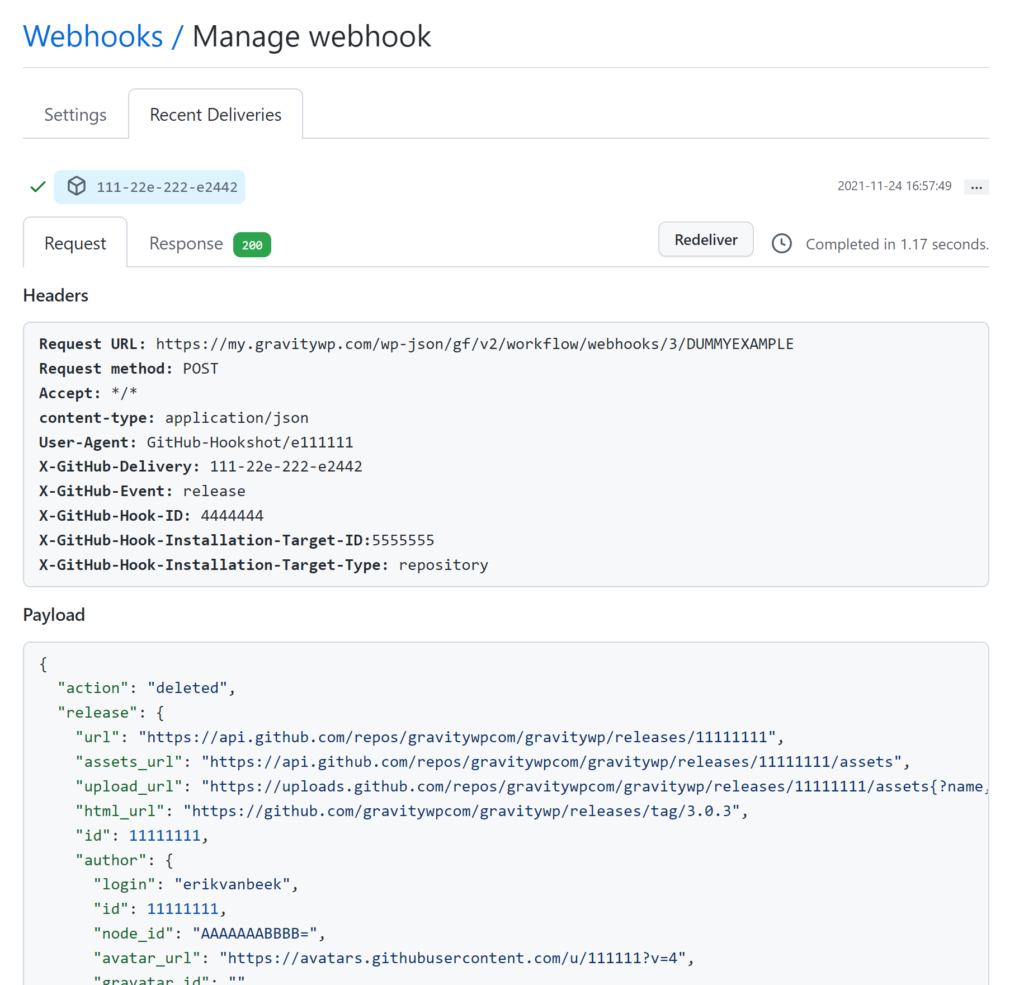
We see that the Response gave back ‘200’ (in green), which means our WordPress website accepted our GitHub data. The most important to do in your Gravity Form Incoming Webhook settings is mapping the Payload to specific fields.
Here is our example to process the above GitHub data:
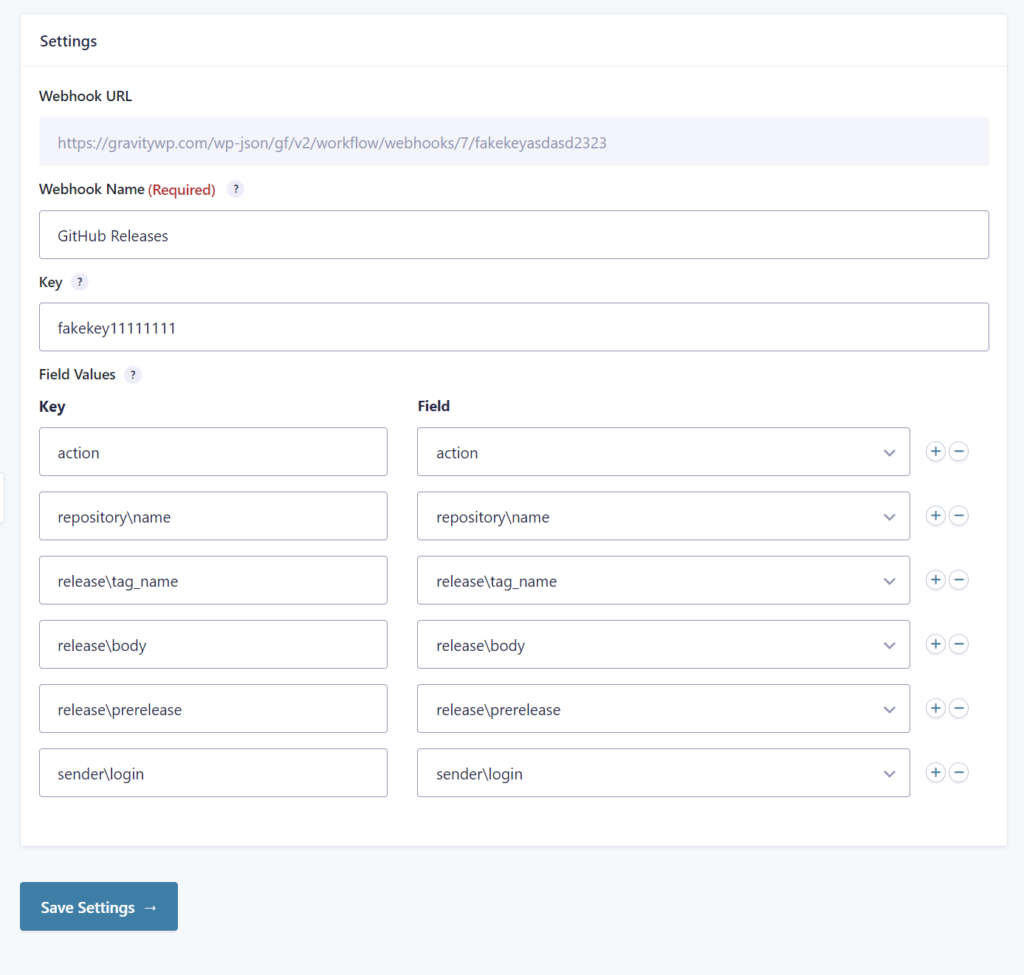
You see that when we want to map data from within an array inside the JSON, we have to us \ to target it specifically. For example we see that the release “url” is inside “release”. You can map that value by using release\url as your Key.

In our Gravity Form we have several Single Line fields, that we named exactly like the Key, but this is not necessary, you can use any label you want.
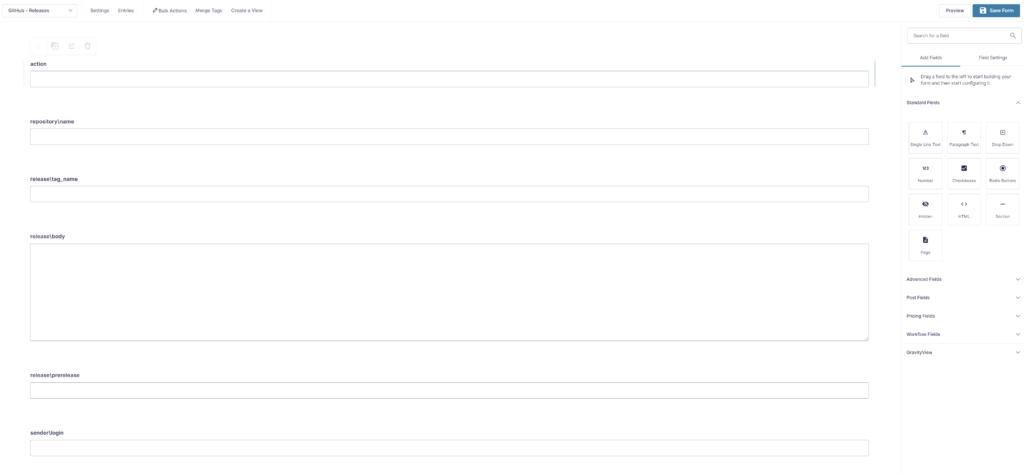
Once this is set-up, we receive specific information on our site after we create, publish or delete releases on GitHub. Based on the values you can create follow up Workflow steps like processing this information on other places on your site or sending an automatic Twitter message or e-mail update to interested users.

Our Premium add-ons for Gravity Forms

All Entries
All your new Gravity Forms entries in one central place. Stop navigating between multiple forms to find new entries. Get immediate oversight and full control with a powerful, unified dashboard.

Update Multiple Entries
Trigger the update of multiple entries in a target form by submitting an entry in a trigger form.

List Datepicker
Add a Datepicker with calendar select to a column or multiple columns in a Gravity Forms List Field.

Field to Entries
Create entries based on Checkboxes & Multi Select choices & List Field rows.
Read tutorials about

How to Create a Public Submission Business Directory in WordPress (Gravity Forms + GravityView)
Build a moderated business directory where users submit listings through a form, admins approve entries, and approved businesses appear in a searchable GravityView directory.

How to Create an Event Workshop Registration + Waitlist System in WordPress
This guide shows how to set up a workshop registration + waitlist system in WordPress: register attendees until capacity is reached, waitlist the rest, approve entries, and auto-promote people when a seat opens using Gravity Forms, Gravity Flow, and GravityView.

Gravity Flow Form Submission Step Tutorial
The Gravity Flow Form Submission step pauses a workflow until another form is submitted, then continues once the handoff is complete. This guide shows how to connect two forms, prefill fields with mapping, send the correct secure link, and troubleshoot the most common “workflow didn’t move” issues.

Gravity Flow Delete an Entry Step Tutorial
The Gravity Flow Delete Entry step lets you trash or permanently remove Gravity Forms entries as part of a workflow. This guide covers the key settings, scheduling options (delay or date-based), and safe testing tips so you can follow retention and privacy rules with confidence.

