Do you want to connect different Gravity Forms with each other, for exampe to change something in your form after an entry is submitted in another form on your site (or even another site)? With the Form Connector Add-on from Gravity Flow you can easily do that.
Extra Form Connector Workflow Step Types
By activating the Form Connector, five extra Step Types are available when creating a new Workflow Step:

| Step Type | Action |
|---|---|
| Form Submission | Waits for a Form Entry from another (in the Step selected) Form. |
| New Entry | Creates a new Entry in a target Form. |
| Update an Entry | Update (selected) Fields in a target Form with values from your current Form, Merge Tags (and Modifiers) or custom values. |
| Update Fields | Update (selected) Fields in the current Form with data from an Entry from another Form. |
| Delete an Entry | Delete an Entry in another Form. |
Form Submission Step

The Form Submission Step waits for a submit of an Entry from another Form before it’s triggered. When added to your Workflow, the Entry will wait at this step till the assigned user submits something in the specified Form.
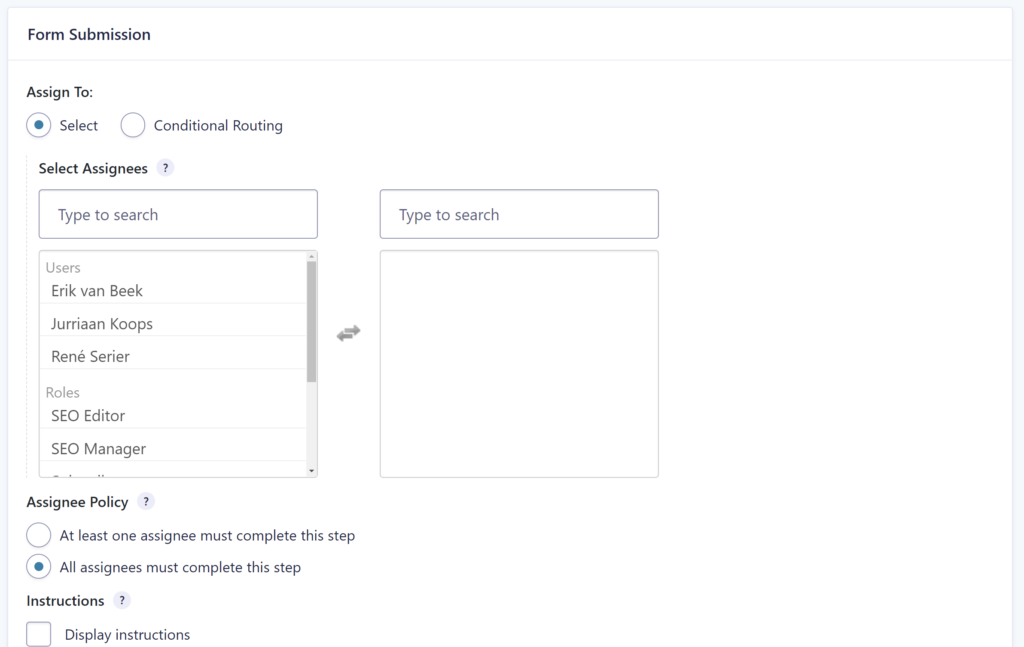
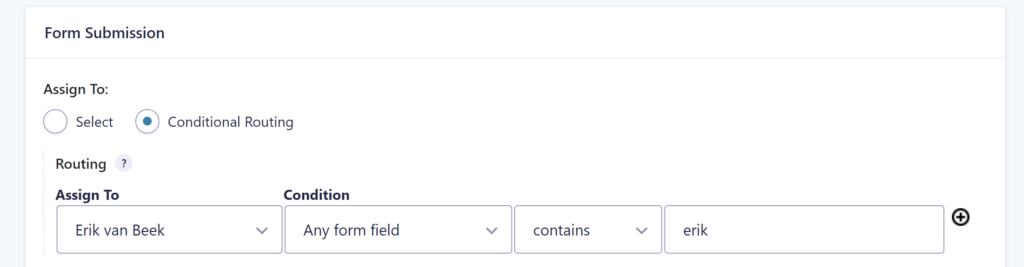
You can also configure Conditional Routing to assign a user based on values in the Entry.
You can automatically send an e-mail to all assignees with a direct link to the Form they have to submit:

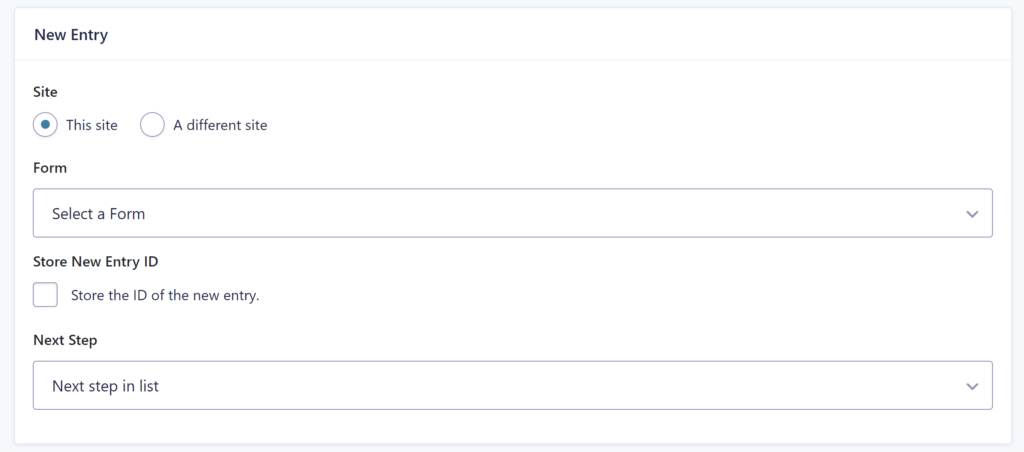
New Entry Step

With the New Entry Step you can create an entry in another Form with values from your current Form. You can create a new Entry on your own site, but also on a different site. To get that working, you’ll need to fill in the API credentials of the other site (and the other site needs to have WordPress, Gravity Forms, Gravity Flow & Form Connector).
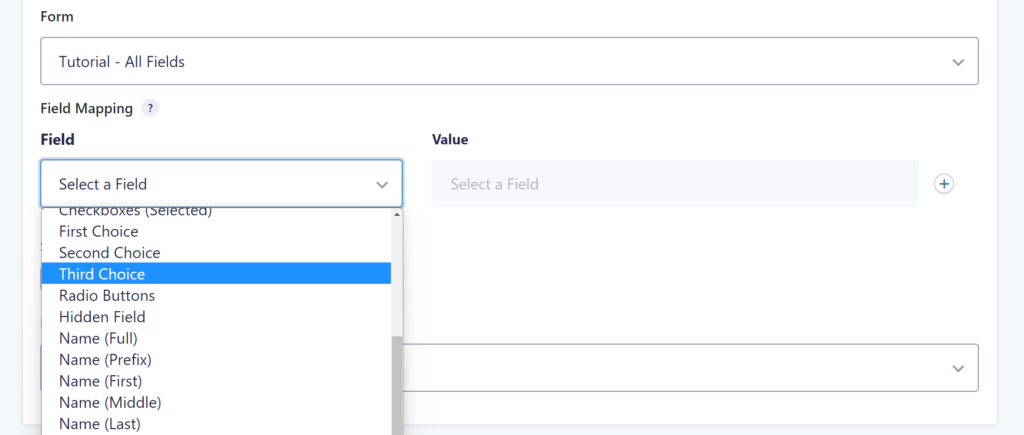
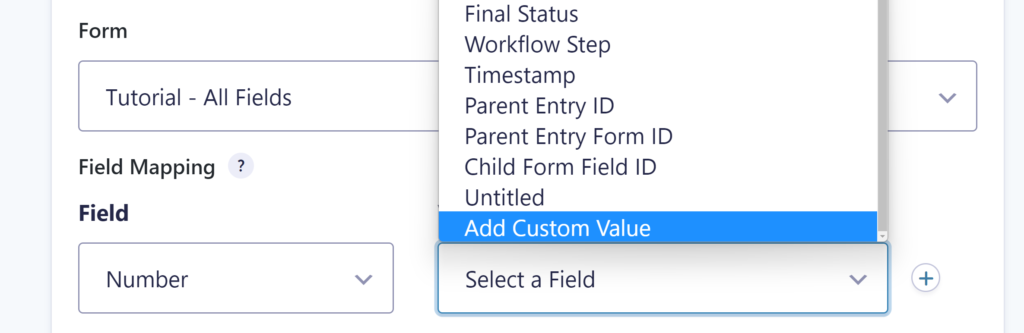
In this example we’ve selected our Tutorial – All Fields Form (a Form we’ve build with all the available Gravity Forms Fields. You can see it here). Under Field Mapping you can select a Field in your target Form (in our case the All Fields form). Under Value you can define how you want to fill the value of this Field. It will show you all the Fields of your current Form.
As value you can also click Add Custom Value (at the bottom of the dropdown). You can define yourself what value should be filled in (for example a hard value you always want to be filled in), but you can also use Merge Tags (and Modifiers) in the Add Custom Value.
We even use it to add complete HTML if we want to fill in a Rich Text Editor Field with multiple Merge Tags.
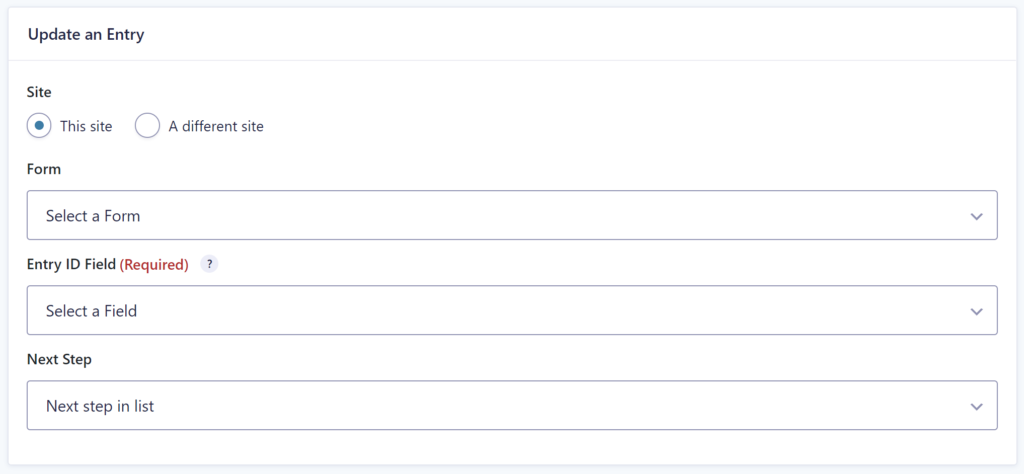
Update an Entry Step

The Update an Entry Step let’s you update certain Fields in another Form.
To get this working, you need to have the Entry ID of the Entry you want to target inside your current Entry. For example in our Form Connector Demo Form we have a Single Line Text Field that contains the Entry ID of the Entry we want to update:

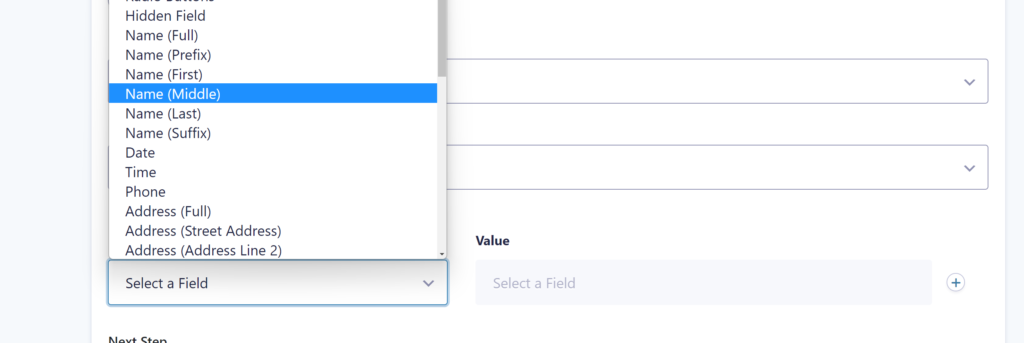
After you selected your Target Form (in this example the Tutorial – All Fields Form), you can select the Fields you want to overwrite (or in other words update). You can configure the Value with data from the current Entry, hard defined data (with Add Custom Value) and by using Merge Tags and Modifiers in the Custom Value.
Update Fields

Update (selected) Fields in the current Form with data from an Entry from another Form. You can basically select or find an Entry in another Form and use data from that Entry to fill in (or update) Fields in your current form.
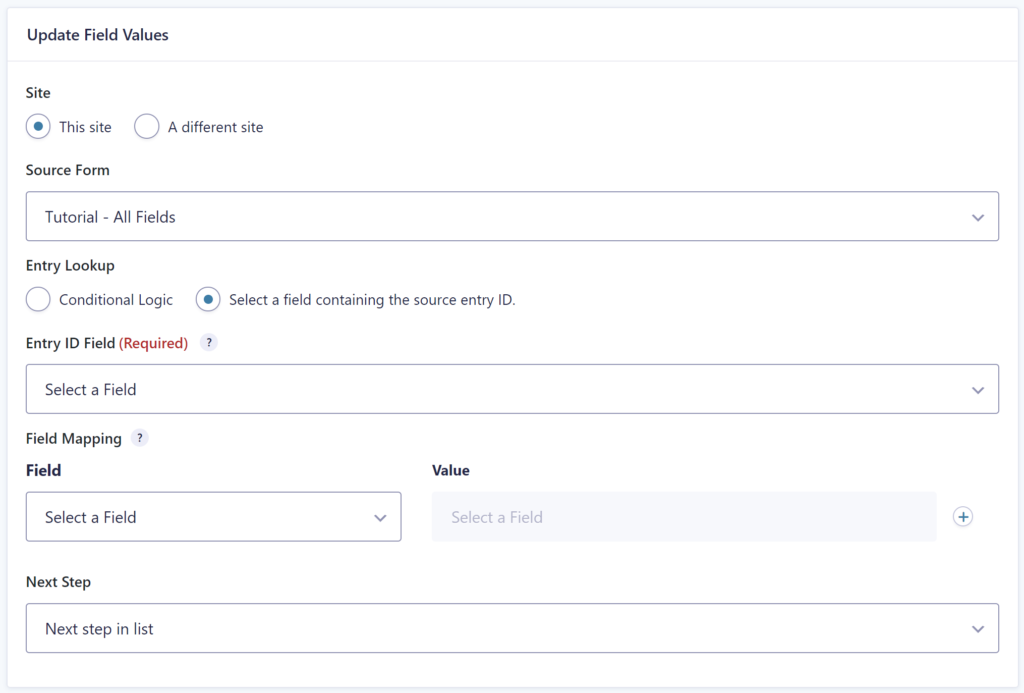
You select a Source Form and you have in this step a Entry Lookup functionality available. You can still use the standard way ‘Select a field containing the source entry ID’, but you can also choose for Conditional Logic:
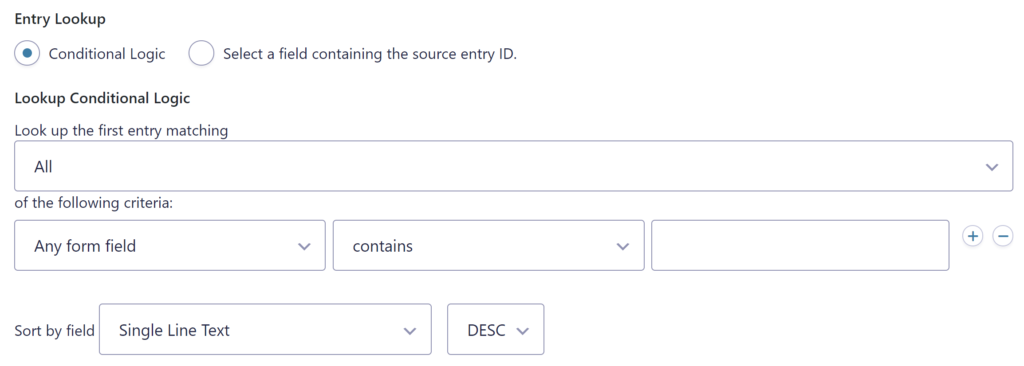
This way you can filter through the entries on your Source Form with (complex) Conditional Logic and decide how to sort the results. It will pick the first result as the Entry you want to use to get data from.
After we’ve configured a way to find an Entry ID, we begin mapping the Fields and Values:

Delete an Entry Step

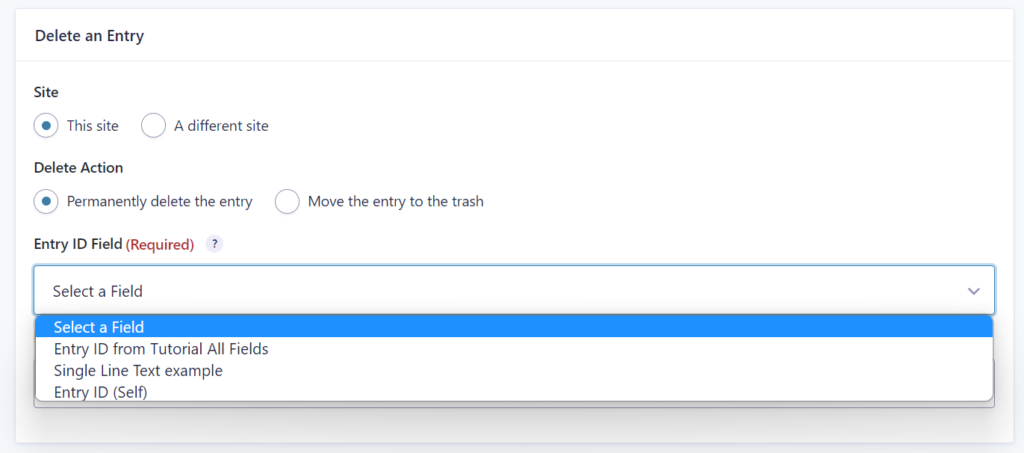
The Delete an Entry Step let’s you delete an Entry on your site or another site. You can choose to delete the Entry permanently, but there is also an option to move the Entry to the trash.
To define the Entry ID of the Entry you want to Delete, you can pick a Field from your current Entry which contains the Entry ID, but you can also delete the current Entry (by selecting Entry ID (Self)).
Estimated reading time: 9 minutes
Our Premium add-ons for Gravity Forms

List Text
Add features like textarea, placeholder and custom validation to a column or multiple columns in a Gravity Forms List Field.

List Datepicker
Add a Datepicker with calendar select to a column or multiple columns in a Gravity Forms List Field.

Update Multiple Entries
Trigger the update of multiple entries in a target form by submitting an entry in a trigger form.

List Number Format
With this Gravity Forms Add-on you can change List Field columns into a number field, do calculations within a row or column. Extra merge tags are available with total counts of columns.
Read tutorials about

Gravity Forms Discount Code Field: Apply Fixed or Percentage Discounts in a Form
Learn how to create a Gravity Forms discount code field that applies fixed or percentage discounts. This tutorial shows how to calculate subtotals, discount amounts, and final totals using tested form logic.

Gravity Forms Zoom Integration: Create Zoom Meetings From Booking Forms
Learn how to connect Gravity Forms to Zoom without Zapier using GravityWP API Connector. This step-by-step tutorial shows how to create Zoom meetings from booking form submissions and save the returned meeting details back to Gravity Forms.

Gravity Forms monday.com Integration: Create New Items From Form Submissions
Learn how to connect Gravity Forms to monday.com without Zapier using GravityWP API Connector. This step-by-step tutorial shows how to create new monday.com items from form submissions and save the returned monday.com item ID back to Gravity Forms.

Gravity Forms Pipedrive Integration: Send Form Contacts to Pipedrive Without Zapier
Learn how to connect Gravity Forms to Pipedrive without Zapier using GravityWP API Connector. This step-by-step tutorial shows how to send form contacts, custom fields, and the returned Pipedrive Person ID directly from WordPress to Pipedrive CRM.

