With the plugin Import Entries you can easily import entries using an Excel file. This makes it also possible to import big list of data to your WordPress site and use it to fill in information automatically using the Polulate Field possibility in Gravity Forms.
Prepare an Excel file to Import (to CSV)
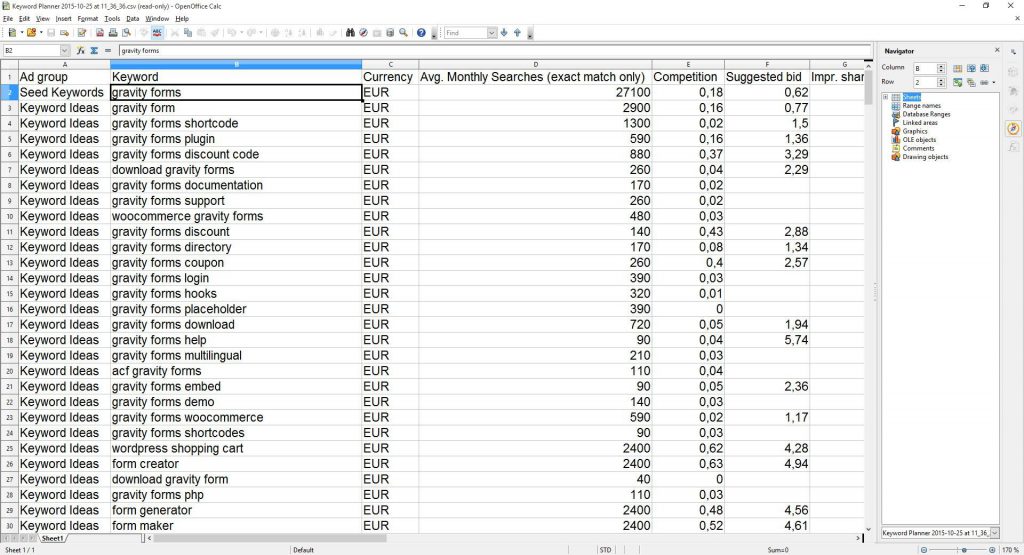
To use your Excel file in Import Entries, you have to save it as a Comma Seperated Values file. For this Tutorial we use an Excel file from Google’s Keyword Planner.
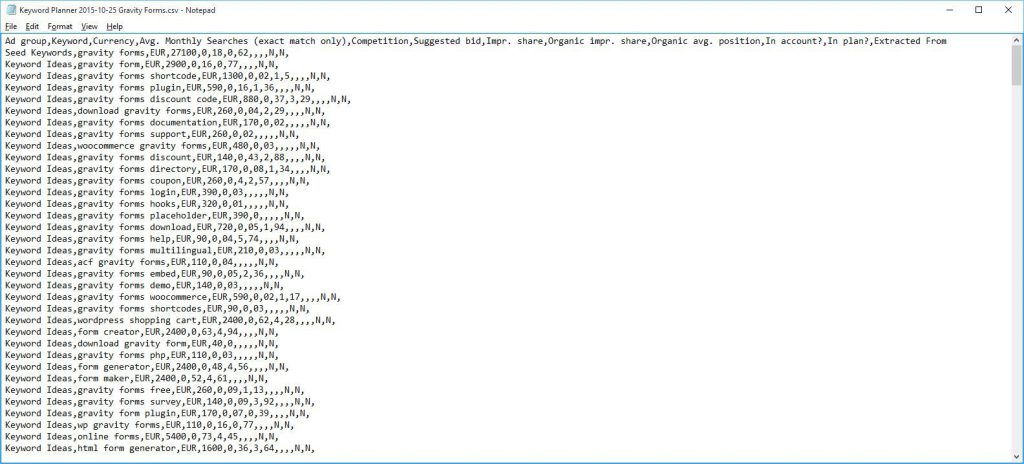
Make sure to save your excel file as a Comma Separated File for it to work with Import Entries plugin. You can check this by opening the CSV file in your Notepad and checking if there are only Comma’s used to separate the columns. This should look like this in notepad:
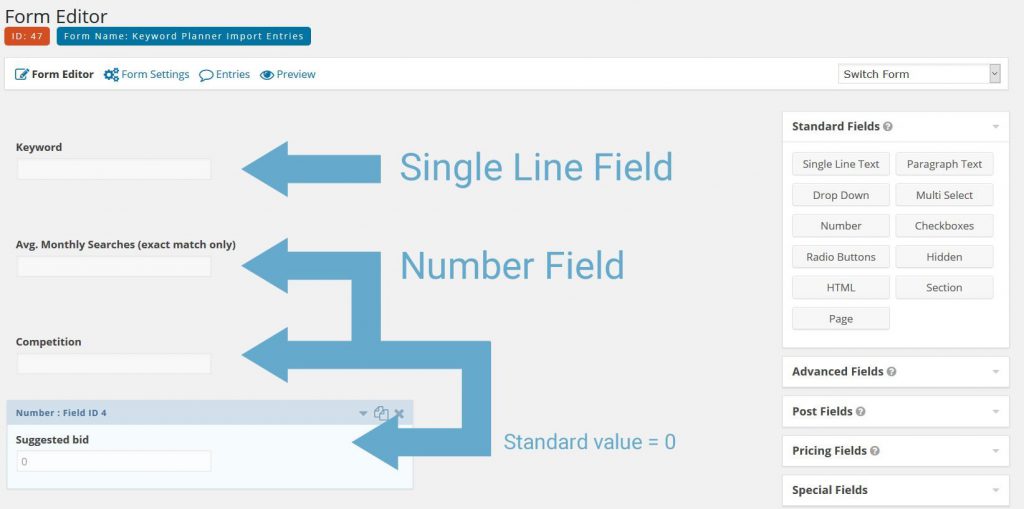
Make a form with the exact same Column Names
As you saw in the Excel file, there are 12 columns:
- Ad group
- Keyword
- Currency
- Avg. Monthly Searches (exact match only)
- Competition
- Suggested bid
- Impr. share
- Organic impr. share
- Organic avg. position
- In account?
- In plan?
- Extracted From
In this tutorial, we will only use the bold columns:
Mapping the Form Fields
With your Form ready, you can start importing Entries with the CSV file. Go to Forms > Import/Export > Import Entries and Upload your CSV file. See below what it looks like:
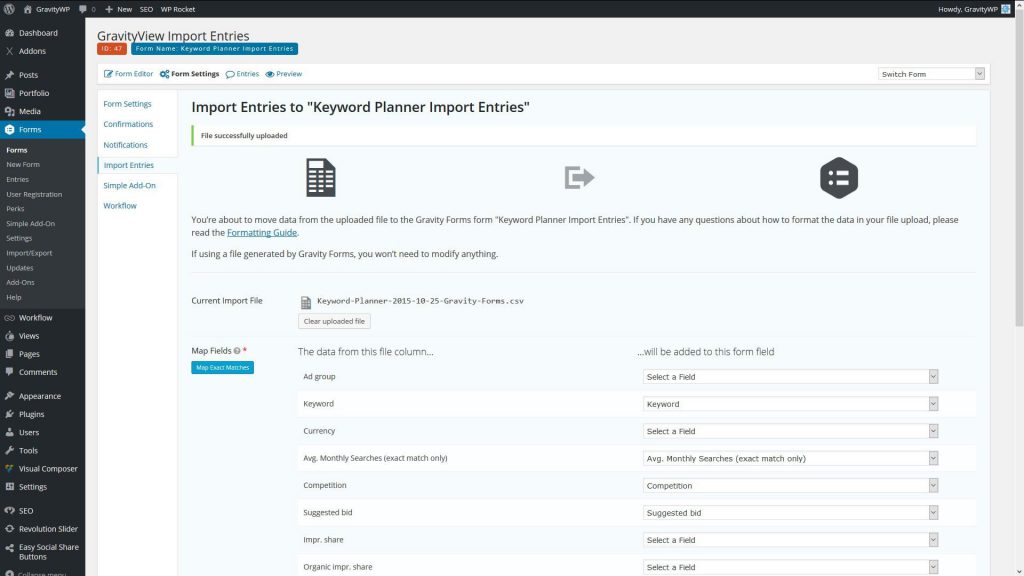
Because we use the exact same column names as field names in the Gravity Form, it is possible to click on Map Exact Matches. With doing that, it will look for matches between the field names and the CVS column names. This saves a lot of time, especially when you have to repeat Excel imports to your forms.

Configuration and importing entries to Gravity Forms
There are some configuration options for your import.
- Be sure to check the ‘Use Default Field Values’ in this example. Why? Because the Suggested bid field is sometimes empty. The default value (standard value) is 0, so if empty this will be asymptomatically zero.
- You can also choose to upload the files to the new website you are maybe working on, or choose to just link to the files that are in the csv file. Be aware: if you choose for uploading the files, it will take quite a long time for the import, because every file will be downloaded to a new folder.
- You can also set conditions for the import (like you are used to with Gravity Forms). It will set conditions based on the values in your csv file.
Click on ‘Save Configuration’ to update all your choices.
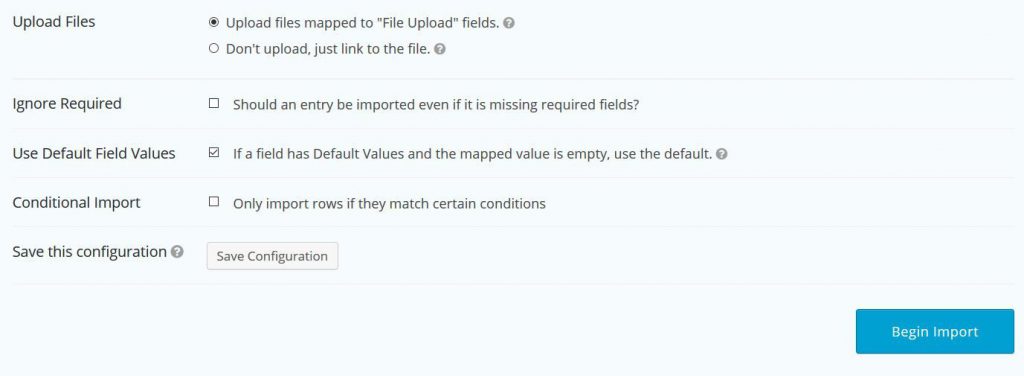
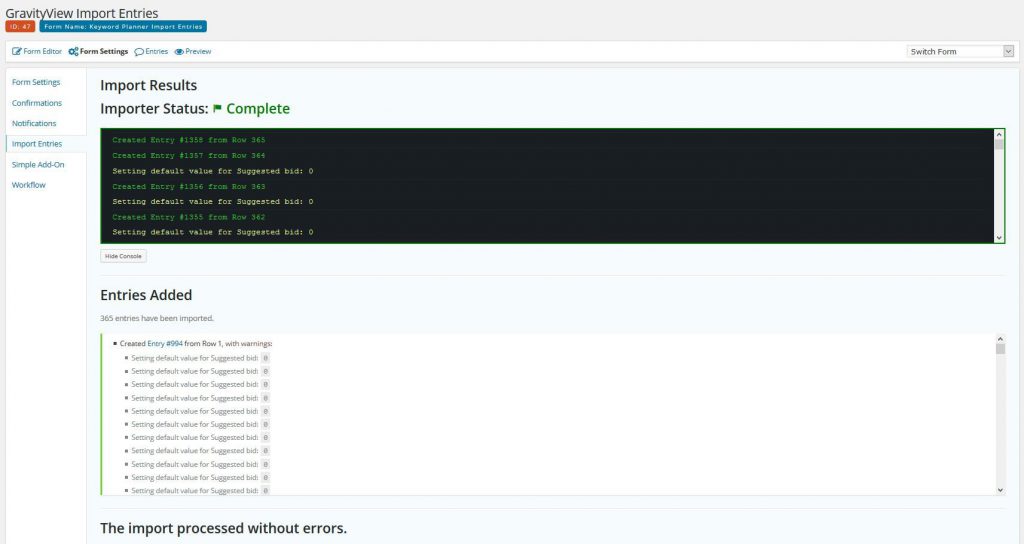
After this: hit ‘Begin Import’ to import your Entries from Excel. You will see this message if the import is completed:
Our Premium add-ons for Gravity Forms

Field to Entries
Create entries based on Checkboxes & Multi Select choices & List Field rows.

Advanced Number Field
Functionality for Number Fields, like rounding or only absolute numbers, fixed point notation, range calculation, custom units like % or m2 & show as slider.

List Text
Add features like textarea, placeholder and custom validation to a column or multiple columns in a Gravity Forms List Field.

JWT Prefill
Fill forms with data you can trust. Prefill Gravity Forms fields with a secure token instead of links with editable url parameters, so your data is accurate, tamper-proof, and ready to use.
Read tutorials about

Gravity Forms Zoho CRM Integration: How to Auto-Populate Form Fields by Email
Learn how to auto-populate Gravity Forms from Zoho CRM using GravityWP API Connector. This tutorial shows how to search Zoho Contacts by email and fill form fields with the returned data.

How to Create a Public Submission Business Directory in WordPress (Gravity Forms + GravityView)
Build a moderated business directory where users submit listings through a form, admins approve entries, and approved businesses appear in a searchable GravityView directory.

How to Create an Event Workshop Registration + Waitlist System in WordPress
This guide shows how to set up a workshop registration + waitlist system in WordPress: register attendees until capacity is reached, waitlist the rest, approve entries, and auto-promote people when a seat opens using Gravity Forms, Gravity Flow, and GravityView.

Gravity Flow Form Submission Step Tutorial
The Gravity Flow Form Submission step pauses a workflow until another form is submitted, then continues once the handoff is complete. This guide shows how to connect two forms, prefill fields with mapping, send the correct secure link, and troubleshoot the most common “workflow didn’t move” issues.
