Do you want to duplicate multiple Gravity Forms fields at once? Or edit many titles of different fields in one overview? Than you should really consider to use the Bulk Actions Pro plugin for Gravity Forms.
Edit multiple Gravity Forms field
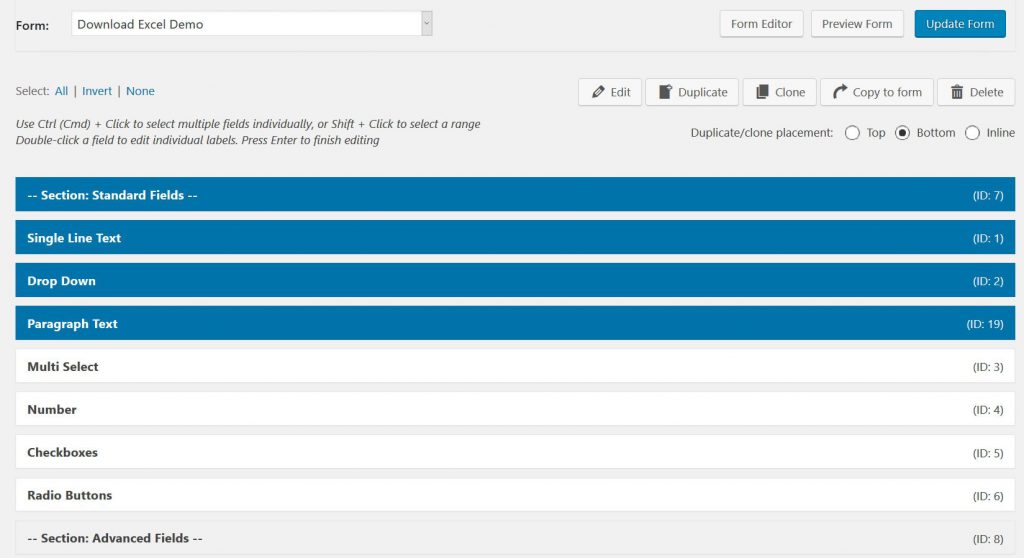
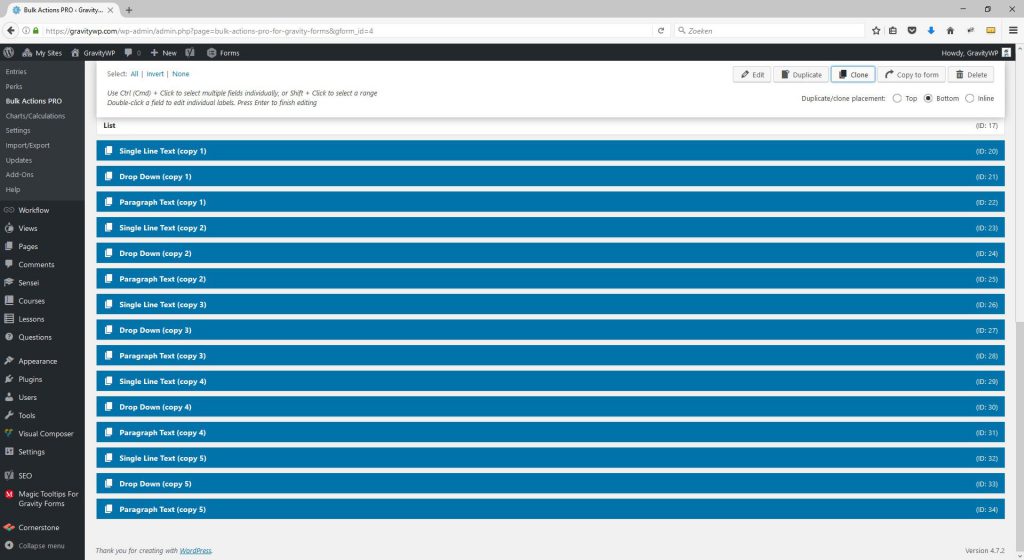
Bulk Actions creates a different visual (and very functional) way to show your Gravity Forms fields. Normally every field takes a lot of space and you are scrolling down a lot. With Bulk Actions you see only the field titles and can click multiple fields to perform cloning, duplicating or editing actions on them.
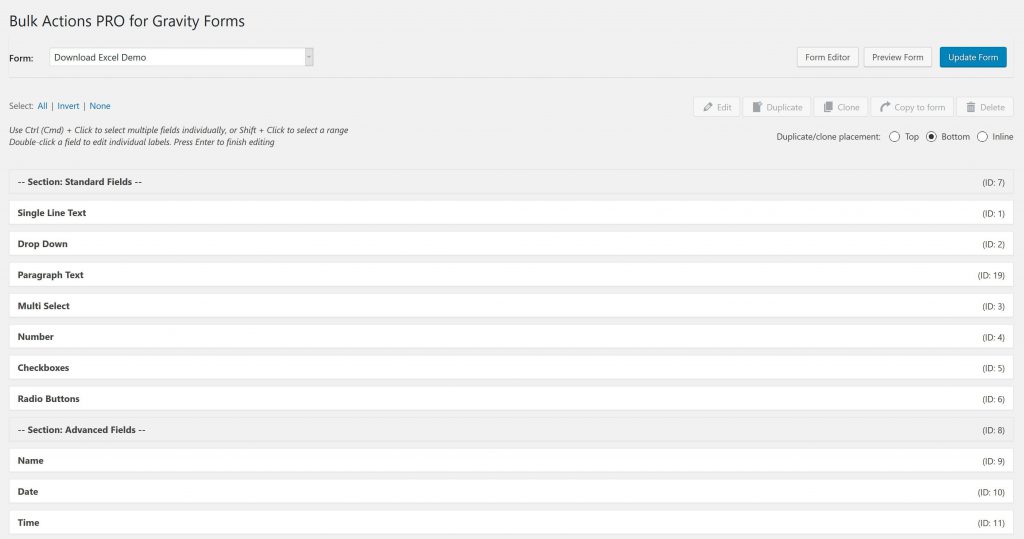
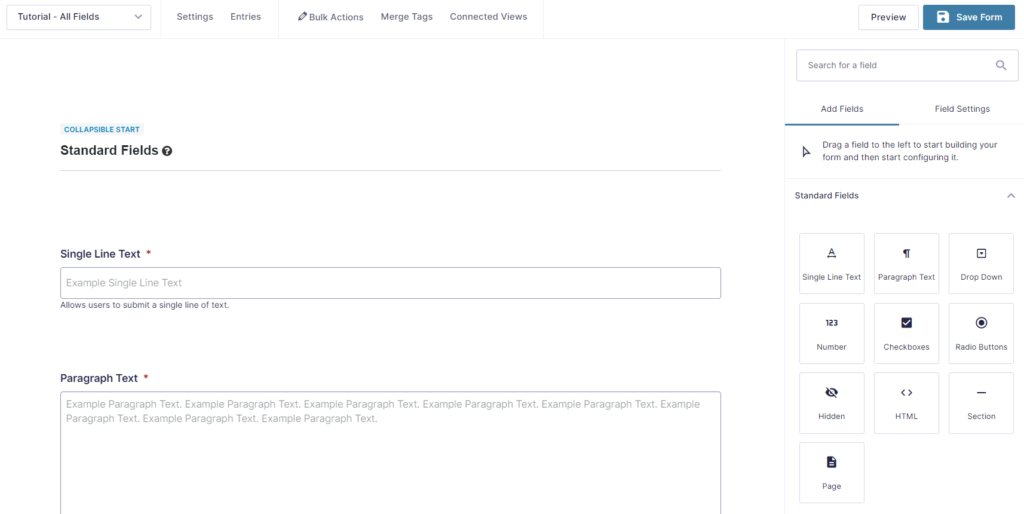
If you compare this with the normal UI for Gravity Forms, you will see that the the above Bulk Actions overview is much more compact.
Edit multiple titles at once
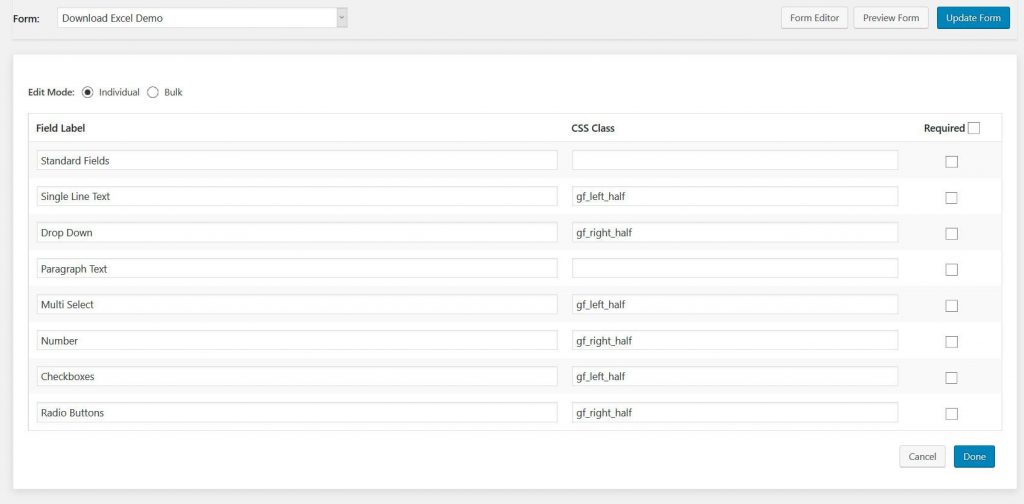
Bulk Actions makes it possible to edit multiple field titles at once. Very convenient. We use our Download Excel from the front-end Form to demonstrate. Select Gravity Forms fieldsUse Ctrl (Cmd) + Click to select multiple fields individually, or Shift + Click to select a range.
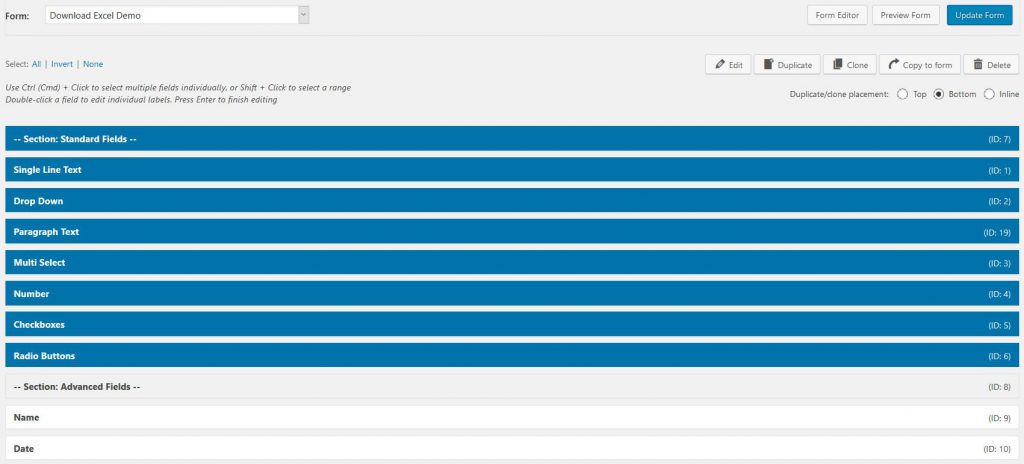
Click edit (and change title / CSS class / Required in bulk)You can easily change the Field Labels of Gravity Forms for multiple fields, the CSS class(es) and if the field is required. Providing a perfect visual overview to change the most important information per field.
Duplicate multiple fields Gravity Forms
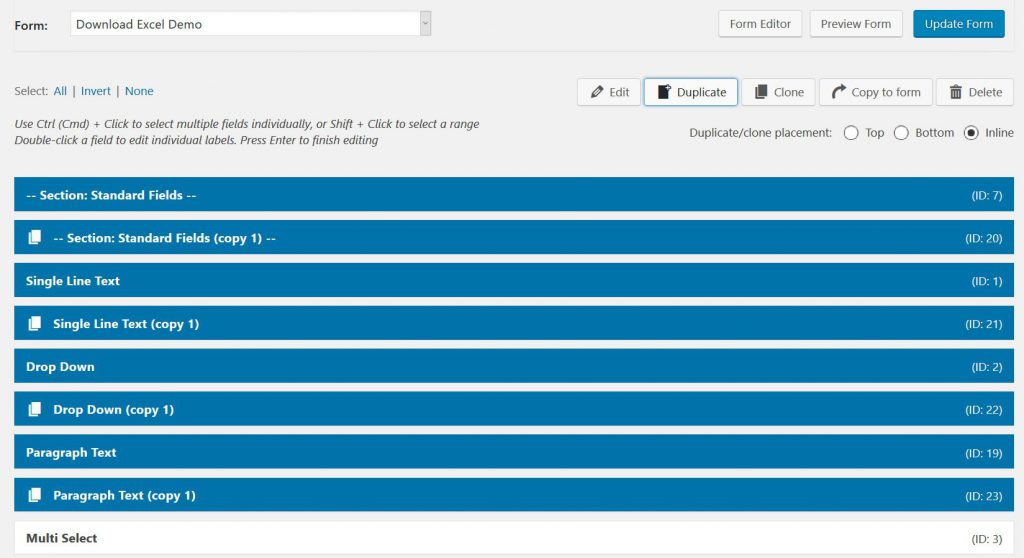
Bulk Actions makes it possible to duplicate multiple fields at once. Very convenient. We use our Download Excel from the front-end Form to demonstrate. Use Ctrl (Cmd) + Click to select multiple fields individually, or Shift + Click to select a range.
Then hit ‘Duplicate’Notice that we changed the standard option to ‘Inline’ duplicating. There are three different ways: Top: The selected Gravity Forms will be duplicated and pasted to the Top of the form. Bottom: This places the duplicated fields at the Bottom of the form (nice when you are building your form from scratch). Inline: the copied fields will be pasted under the fields that are being copied. It’s easy than to loose the selection and click only the fields you want to change the position of and put them in the right place. Saves really a lot of time. Note: when copying, Bulk Actions will add (copy 1) or (copy 2) to the fields. Before saving, it’s not possible to duplicate duplicated fields.
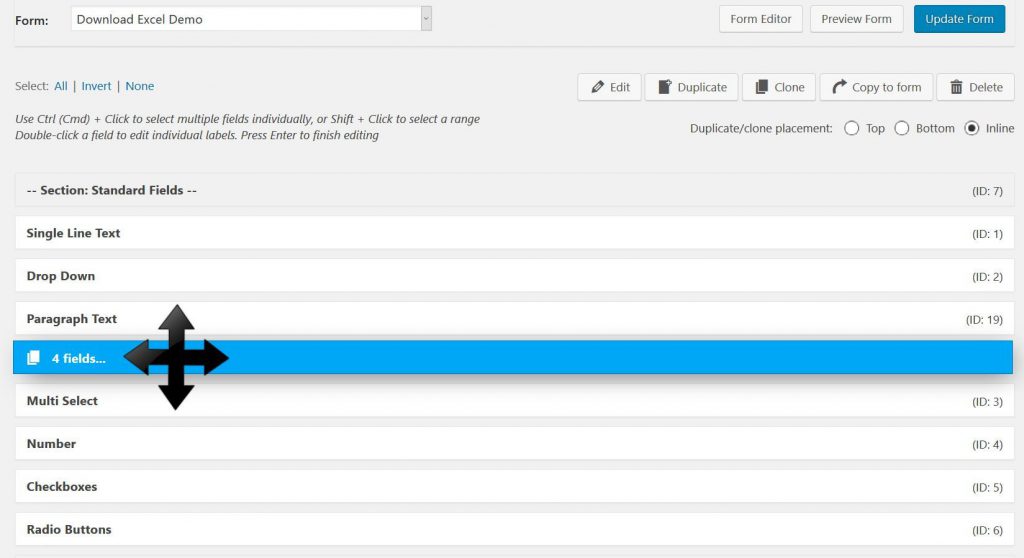
Move the selected fields to the desired location
Select all the fields you want to use and move them to the preferred position. You can easily select and move the fields as a group around your form and put them exactly where you want them.
Clone Gravity Forms Fields multiple times
Choose how many ‘clones’ you want from your Gravity Forms fields
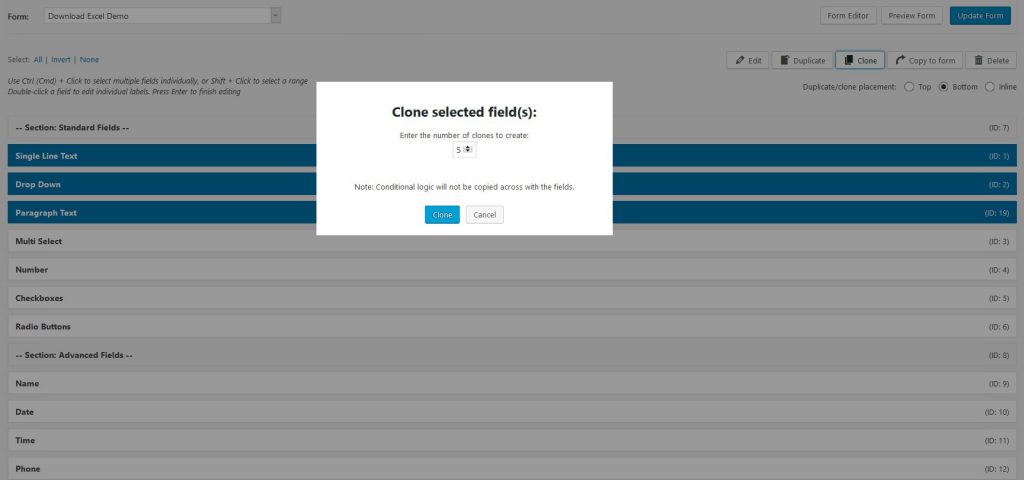
These clones are pasted at the bottom of the form
Our Premium add-ons for Gravity Forms
List Dropdown
Add a Dropdown Select with choices to a column or multiple columns in a Gravity Forms List Field.

Advanced Number Field
Functionality for Number Fields, like rounding or only absolute numbers, fixed point notation, range calculation, custom units like % or m2 & show as slider.

JWT Prefill
Fill forms with data you can trust. Prefill Gravity Forms fields with a secure token instead of links with editable url parameters, so your data is accurate, tamper-proof, and ready to use.

DateTime Field
The GravityWP - DateTime Field add-on adds a dedicated Date/Time field to Gravity Forms so users can enter both a date and a time in a single input.
Read tutorials about

Show Previous Gravity Forms Submissions Using Advanced Merge Tags
This step-by-step tutorial shows how to use GravityWP Advanced Merge Tags to count previous Gravity Forms submissions and calculate total submitted value based on a matching email address.

Gravity Forms LeadConnector Integration with OAuth 2.0
This documentation-based tutorial explains how to connect Gravity Forms to LeadConnector/HighLevel with OAuth 2.0, search contacts by email, and map returned CRM values back into form fields using GravityWP API Connector.

Gravity Forms Zoho CRM Integration: How to Auto-Populate Form Fields by Email
Learn how to auto-populate Gravity Forms from Zoho CRM using GravityWP API Connector. This tutorial shows how to search Zoho Contacts by email and fill form fields with the returned data.

How to Create a Public Submission Business Directory in WordPress (Gravity Forms + GravityView)
Build a moderated business directory where users submit listings through a form, admins approve entries, and approved businesses appear in a searchable GravityView directory.