Drip campaigns (known by many other names like drip marketing, automated email campaign, lifecycle emails, autoresponders and marketing automation) are basically a set of marketing emails that will be sent out automatically on a schedule. If you have Gravity Forms and Gravity Flow installed, it’s very easy to set up your own Drip Campaign.
Using Gravity Flow for WordPress Drip Campaigns
- Install Gravity Flow.
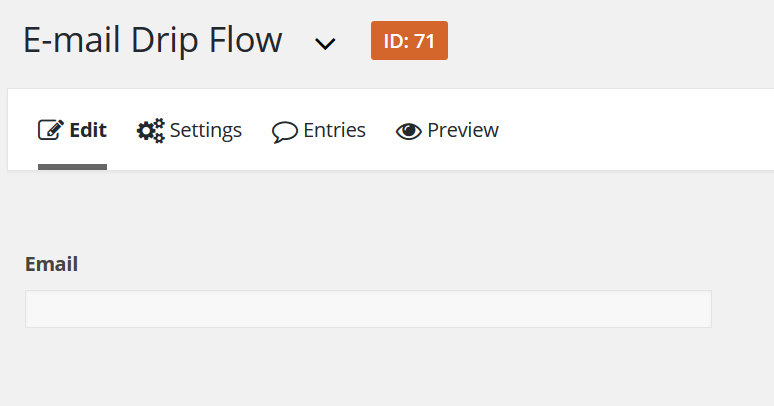
- Then write the different Drip e-mails you want to send.
- Then create (or select) a Gravity Form where at least an e-mail address is asked.
Add workflow step(s)
Then go to Gravity Flow by clicking on Workflow under Settings and Add a new step. Click on ‘Notification’ and on ‘Schedule this step’. You can delay the sending of the mail in minutes, hours, days and weeks.
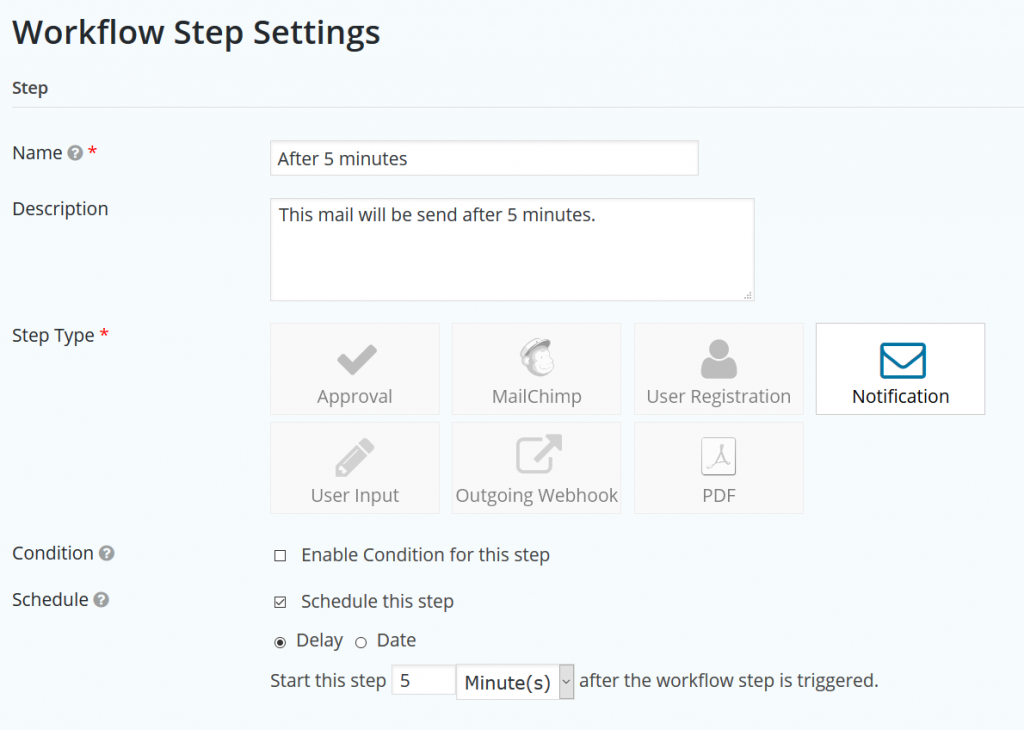
Set up timing and messages
Then enable Workflow notification and click on Fields > Email to send this e-mail to the address that is submitted in your form. After that, configure the message you want to send. Repeat this steps for every email you want to send out.
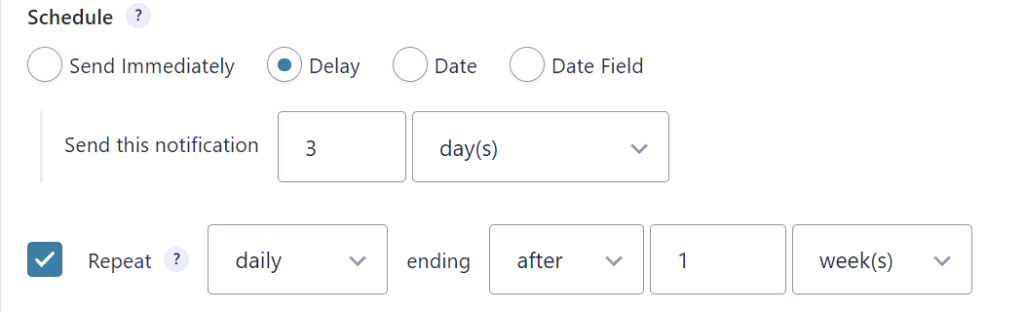
Alternative option: Notification Scheduler
Another option to create a drip campaign is to use the Notification Scheduler from GravityWiz.
Our Premium add-ons for Gravity Forms

Advanced Number Field
Functionality for Number Fields, like rounding or only absolute numbers, fixed point notation, range calculation, custom units like % or m2 & show as slider.

List Number Format
With this Gravity Forms Add-on you can change List Field columns into a number field, do calculations within a row or column. Extra merge tags are available with total counts of columns.

All Entries
All your new Gravity Forms entries in one central place. Stop navigating between multiple forms to find new entries. Get immediate oversight and full control with a powerful, unified dashboard.
List Datepicker
Add a Datepicker with calendar select to a column or multiple columns in a Gravity Forms List Field.
Read tutorials about

How to Create a Public Submission Business Directory in WordPress (Gravity Forms + GravityView)
Build a moderated business directory where users submit listings through a form, admins approve entries, and approved businesses appear in a searchable GravityView directory.

How to Create an Event Workshop Registration + Waitlist System in WordPress
This guide shows how to set up a workshop registration + waitlist system in WordPress: register attendees until capacity is reached, waitlist the rest, approve entries, and auto-promote people when a seat opens using Gravity Forms, Gravity Flow, and GravityView.

Gravity Flow Form Submission Step Tutorial
The Gravity Flow Form Submission step pauses a workflow until another form is submitted, then continues once the handoff is complete. This guide shows how to connect two forms, prefill fields with mapping, send the correct secure link, and troubleshoot the most common “workflow didn’t move” issues.

Gravity Flow Delete an Entry Step Tutorial
The Gravity Flow Delete Entry step lets you trash or permanently remove Gravity Forms entries as part of a workflow. This guide covers the key settings, scheduling options (delay or date-based), and safe testing tips so you can follow retention and privacy rules with confidence.

