GravityView is a GravityKit plugin. It turns Gravity Forms entries into searchable, sortable, and filterable Views on a WordPress site. It can power directories, listings, profiles, and dashboards. And it also support front-end entry management. Visitors do not need to work inside the WordPress admin.
This page is the GravityWP hub for practical GravityView tutorials. It also collects related workflow guides. New to GravityView? Start with the guide below. Already know the basics? Jump to the outcome that matches your project.
What Will You Learn From These GravityView Resources?
By the end of this hub, you will know what GravityView does, which resource matches your workflow, and where to go for directories, entry display, editing, filtering, layouts, dynamic population, and Gravity Flow examples.
- Understand how GravityView works with Gravity Forms entries.
- Choose the right GravityView tutorial for the outcome you need.
- Find resources for directories, listings, front-end display, and front-end editing.
- See where filtering, search, dynamic population, specialized layouts, and Gravity Flow fit.
- Use current GravityKit documentation when an older GravityWP tutorial shows an earlier interface.
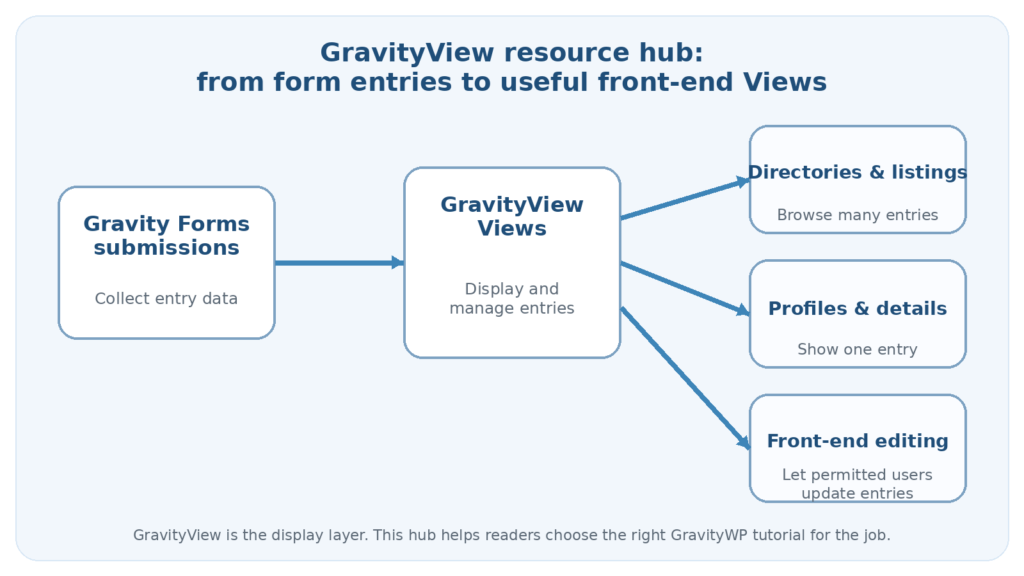
Where Should You Start With GravityView?
Start with the front-end display guide if you are new to GravityView. It explains Multiple Entries, Single Entry, and Edit Entry. It also shows how GravityView fits with Gravity Forms.
Gravity Forms + GravityView: How to Display Entries on the Front End
Use this as the beginner guide. It explains how Gravity Forms collects data. It then shows how GravityView displays that data. You will also see when each core layout fits.
What Can You Build With GravityView?
GravityView can turn Gravity Forms data into front-end directories and listings. It can also power profiles, searchable records, editable entries, and workflow dashboards. Start with what users need to see or change.
| Goal | Start with |
| Build a public directory or listing | Directories and listings |
| Show submitted entries on the front end | Front-end entry display |
| Let users or staff update entries | Front-end editing |
| Help visitors find the right records | Filtering and search |
| Pass entry data into another form | Dynamic population |
| Track approvals or business processes | Gravity Flow workflows |
GravityView Tutorials by Outcome
Directories and Listings
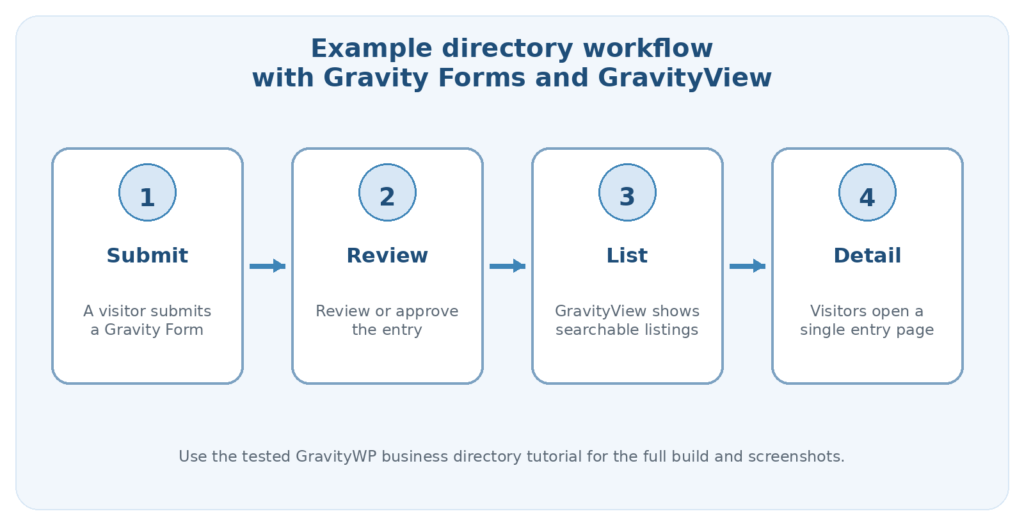
Use this path when form submissions need to become public or private listings. Multiple Entries can show many records at once. Single Entry can provide a detail page for one record.
How to Create a Public Submission Business Directory
This tested GravityWP tutorial builds a moderated business directory. It uses Gravity Forms and GravityView. It covers submissions, entry approval, searchable listings, filters, and single listing pages.
Front-End Entry Display
If the goal is to display Gravity Forms entries, use the dedicated guide. Do not repeat the full how-to here. This hub should help readers find the right tutorial. It should not compete with that tutorial.
How to Display Gravity Forms Entries on the Front End
Use this for Multiple Entries, Single Entry, Edit Entry, profiles, directories, and dashboard-style use cases.
Front-End Editing
GravityView includes an Edit Entry area. Permitted users can update existing entries from the front end. Set the editing rules and permissions for the specific workflow.
Send Notifications When GravityView Entries Are Edited
Use this when an edited entry should trigger a Gravity Forms email notification and a saved revision.
For the current product documentation, see GravityKit’s GravityView documentation and its Edit Entry resources.
Filtering and Search
GravityView can make entry lists searchable and filterable. A Search Bar helps visitors find records. The Advanced Filtering extension can limit which entries appear. Filters can use values such as user, role, date, approval status, or form fields.
For a tested GravityWP example, the public submission business directory uses a Search Bar and field filters. For current setup details, see GravityKit’s Advanced Filtering documentation and pre-filtering guide.
Dynamic Population and Personalized Views
GravityView can pass entry values into an embedded Gravity Form. GravityKit documents this setup. It uses merge tags and dynamic-population parameters. Data from a View can then prefill fields in another form.
Official guide: Embed a form for each entry in a View
Use the current GravityKit guide for the supported setup and parameter mapping.
Layouts and Specialized Views
Choose the layout based on how people need to use the data. Multiple Entries works for lists and directories. Single Entry shows one record in detail. Edit Entry handles front-end updates. GravityView Pro also supports additional layout options such as DataTables for table-based displays and front-end exports.
For the core setup sequence, use GravityKit’s Getting Started: Setting up Your First View.
Gravity Flow Workflows
GravityView can act as the front-end dashboard in a Gravity Flow process. This is useful when entries need approvals or status tracking. It also works for assignments and other workflow steps.
How to Create an Event Workshop Registration + Waitlist System
This GravityWP build uses Gravity Forms for registration. Gravity Flow handles capacity and approvals. GravityView provides a front-end dashboard for attendee and workflow information.
How Do You Create a View in GravityView?
Choose the Gravity Form that supplies the data. Then select a layout and add the fields you want to show. Configure the View settings. Finally, embed the View on a page or post.
GravityKit’s current getting-started guide starts with the form and layout. Next, configure Multiple Entries, Single Entry, and Edit Entry. Then review the View settings and publish the View. Use the official guide for the current interface.
GravityKit: Setting up Your First View
Current official setup reference for creating and publishing a GravityView View.
What Is the Difference Between GravityView and GravityKit?
GravityView is the plugin for front-end Gravity Forms entry display and management. GravityKit is the company behind it. GravityKit also offers other Gravity Forms tools.
The company once used the GravityView name for both the business and the plugin. That caused confusion. In 2022, the business rebranded as GravityKit. GravityView stayed as the product name.
Official references: GravityView product page and GravityKit rebrand background.
Useful GravityView Resources
Use these references when you need the current product documentation or want to explore related Gravity Forms workflow options.
- GravityView product page — current product overview and capabilities
- GravityView documentation — current setup, editing, filtering, search, shortcodes, and troubleshooting
- GravityView shortcode guide — embedding Views and filtering entries with shortcode parameters
- Gravity Forms Add-On Suites Compared — where GravityKit, Gravity Flow, GravityWP, and other add-on ecosystems fit by workflow
Older GravityView Tutorials and Interviews
GravityWP has covered GravityView for many years. The links below are useful for background. Some older tutorials show earlier product names or interfaces. Check the current GravityKit docs before following old menu paths.
- Inline Real-Time Editing Gravity Forms Field Values – older GravityWP walkthrough for inline editing
- GravityView Dynamic Population – older GravityWP dynamic-population example
- Excel Export Gravity Forms DataTables – older DataTables export walkthrough
- Show Gravity Forms Entries on a Calendar – older GravityWP calendar tutorial; the current product name is GravityCalendar
- WPCoffeeTalk: Zack Katz – 2021 interview
- LMScast: Go Beyond the Simple Contact Form with GravityView – 2020 interview
GravityView FAQ
GravityView displays and manages Gravity Forms entries on the front end. Common uses include directories, profiles, listings, and searchable records. It can also support entry-editing workflows.
Yes. GravityView includes an Edit Entry area. You can configure it so permitted users can update existing entries from the front end.
Yes. GravityView can display Gravity Flow-related entry and workflow data on the front end. Gravity Flow handles the workflow steps. Those steps can include approvals, assignments, and status changes.
See the tested workshop registration and waitlist workflow for one practical example.
Our Premium add-ons for Gravity Forms
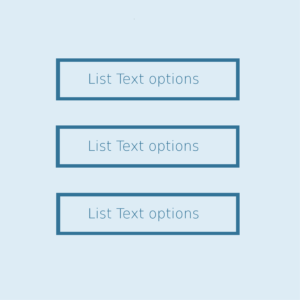
List Text
Add features like textarea, placeholder and custom validation to a column or multiple columns in a Gravity Forms List Field.

Advanced Number Field
Functionality for Number Fields, like rounding or only absolute numbers, fixed point notation, range calculation, custom units like % or m2 & show as slider.

List Number Format
With this Gravity Forms Add-on you can change List Field columns into a number field, do calculations within a row or column. Extra merge tags are available with total counts of columns.
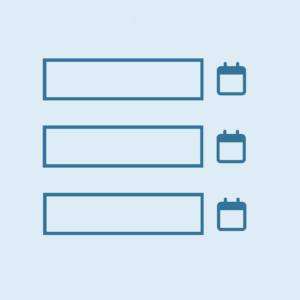
List Datepicker
Add a Datepicker with calendar select to a column or multiple columns in a Gravity Forms List Field.
Read tutorials about

How to Validate Repeatable Contact Rows in Gravity Forms
Learn how to validate repeatable Gravity Forms List field rows with GravityWP List Text. This tutorial shows how to add email and regex validation, test invalid values, and confirm that valid team roster data is stored correctly.

Gravity Forms Airtable Integration: Create Records From Form Submissions
Learn how to build a Gravity Forms Airtable integration with GravityWP API Connector. Send form submissions to Airtable, create new records automatically, and save the returned Airtable Record ID and response back to Gravity Forms.

Gravity Forms Asana Integration: Create Tasks From Form Submissions
Learn how to connect Gravity Forms to Asana with GravityWP API Connector. This tested workflow creates Asana tasks from form submissions and saves the returned task ID and URL back to Gravity Forms.

Gravity Forms Google Calendar Integration: Create Events From Form Submissions
Connect Gravity Forms to Google Calendar with GravityWP API Connector. Learn how to create calendar events from form submissions, map event details, configure OAuth 2.0, handle time zones, and save the returned Event ID and URL.


Author: Erik van Beek
Published: 03-11-2017
Last update: 29-09-2026