Do you want to schedule Gravity Forms E-mail notifications, for example for drip campaigns, recurring offers or reminders? With the Notification Scheduler from GravityWiz you can easily do that.
Scheduling options Gravity Forms Notifications
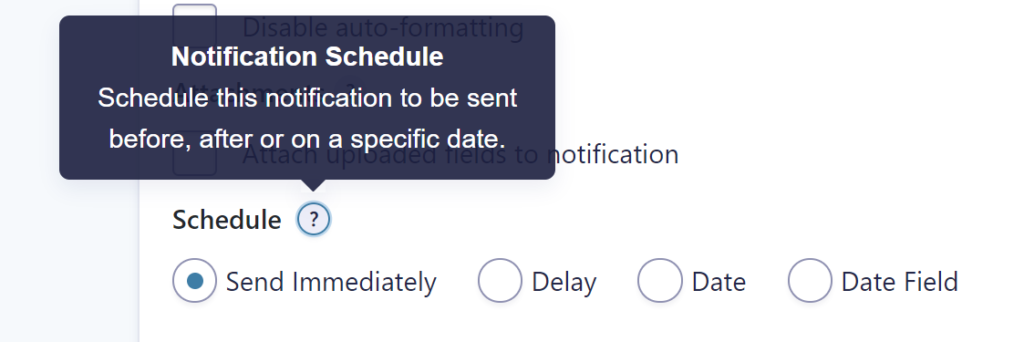
After activating the Notification Scheduler Add-on for Gravity Forms, you’ll see an extra Schedule option in the Notification settings in your Gravity Form. The option to Send Immediately is selected as default and works like you’re used to. You can now also choose for:
- Delay: set a certain delay since the moment the entry was created.
- Date: pick a specific date the notification should be send.
- Date Field: use the date value in a Date Field to schedule the moment the notification should be send.
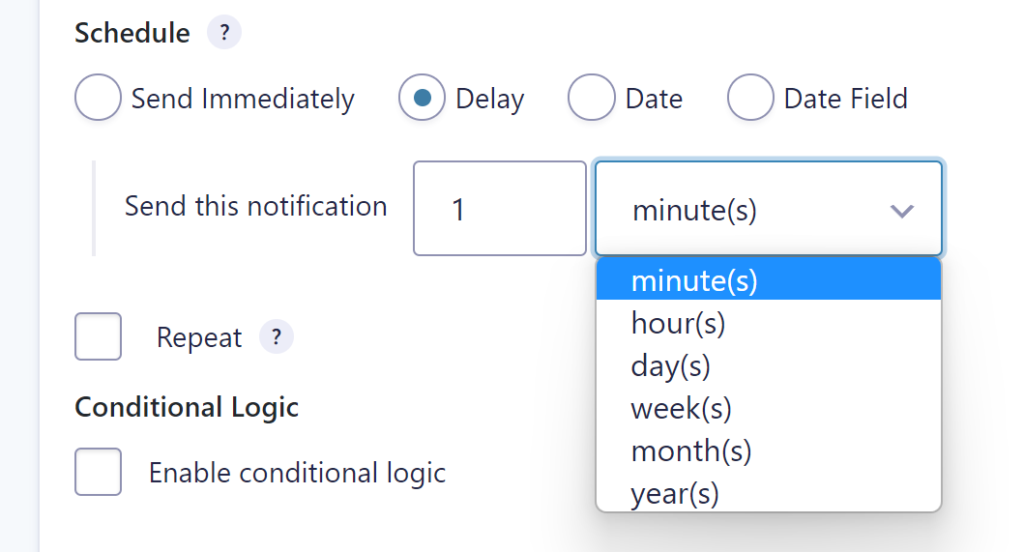
Delaying Gravity Forms Notifications
If you want to delay / postpone sending the notification, select ‘Delay’. You can delay in minutes, hours, days, weeks, months or years.
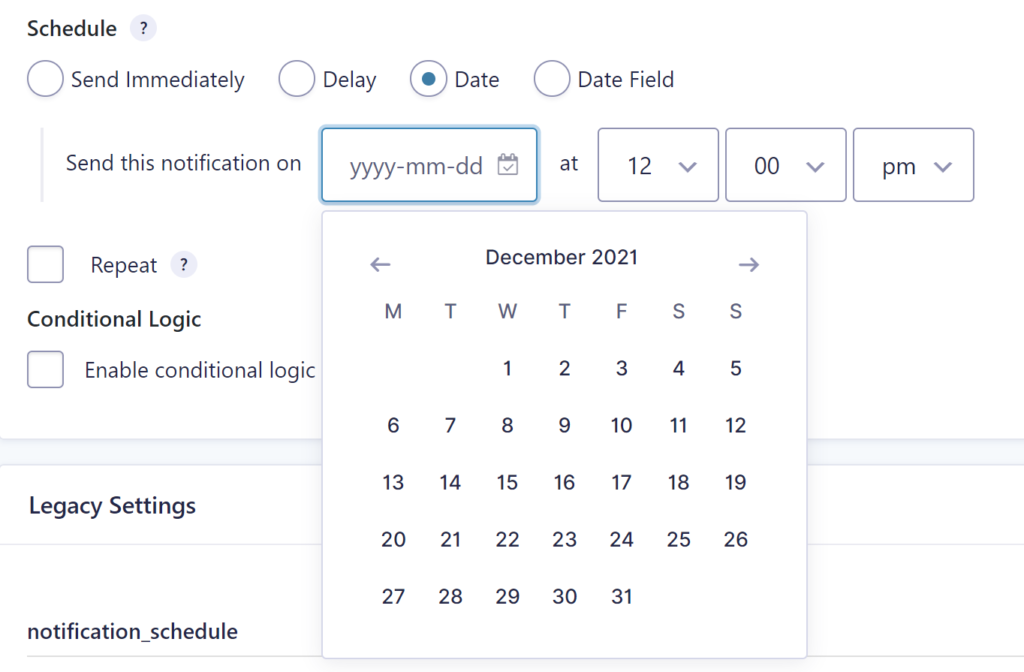
Setting a Date to send Gravity Form Notification
If you select Date, you can pick a hard date to send out the notification. This can be handy if you want all the subscribers / e-mail addresses in your entries (or maybe a filtered group of entries) to receive an e-mail at the same time, for example a few days before an event. You can configure a date and a time the e-mail should be send.
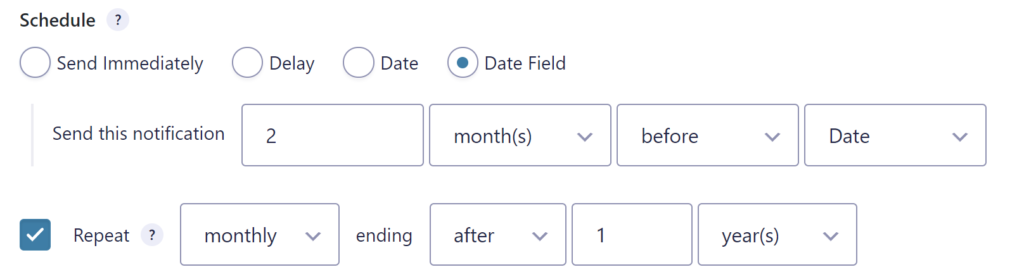
Using a Date Field to plan your Notification
When selecting Date Field, you can plan the moment a notification is send out based on the date selected in a Date Field in your form. You can set how many minutes, hours, days, weeks, months or weeks after or before the Date Field date the e-mail should go out.

Repeating a Gravity Forms notification
Notification Scheduler also adds an option to repeat sending out the notification. You can select which interval the e-mail should be repeated (daily, weekly, monthly, yearly) and when the repetition should end (never or after a certain period: minutes, hours, days, weeks, months years).
This examples waits till two months before the value in the Date Field and after that repeats sending the e-mail monthly and stops after 1 year.
Our Premium add-ons for Gravity Forms

Update Multiple Entries
Trigger the update of multiple entries in a target form by submitting an entry in a trigger form.

Entry to Database
Integrates Gravity Forms with internal or external databases, offering flexible mapping of form fields to database columns and real-time synchronization between entries and database rows.
Field to Entries
Create entries based on Checkboxes & Multi Select choices & List Field rows.

Advanced Number Field
Functionality for Number Fields, like rounding or only absolute numbers, fixed point notation, range calculation, custom units like % or m2 & show as slider.
Read tutorials about

How to Create a Public Submission Business Directory in WordPress (Gravity Forms + GravityView)
Build a moderated business directory where users submit listings through a form, admins approve entries, and approved businesses appear in a searchable GravityView directory.

How to Create an Event Workshop Registration + Waitlist System in WordPress
This guide shows how to set up a workshop registration + waitlist system in WordPress: register attendees until capacity is reached, waitlist the rest, approve entries, and auto-promote people when a seat opens using Gravity Forms, Gravity Flow, and GravityView.

Gravity Flow Form Submission Step Tutorial
The Gravity Flow Form Submission step pauses a workflow until another form is submitted, then continues once the handoff is complete. This guide shows how to connect two forms, prefill fields with mapping, send the correct secure link, and troubleshoot the most common “workflow didn’t move” issues.

Gravity Flow Delete an Entry Step Tutorial
The Gravity Flow Delete Entry step lets you trash or permanently remove Gravity Forms entries as part of a workflow. This guide covers the key settings, scheduling options (delay or date-based), and safe testing tips so you can follow retention and privacy rules with confidence.

