Do you want to create a new Gravity Forms entry the moment an order is processed in WooCommerce? Or when a payment is pending, on hold, completed, cancelled, refunded or failed? With the WooCommerce Add-on for Gravity Flow you can do that easily and create follow-up Workflow Steps after the entry is created.
Trigger new entry on WooCommerce payment statuses
With the WooCommerce Add-on for Gravity Forms (from Gravity Flow) enabled, you’ll have an extra setting available in your Gravity Form: Woocommerce:
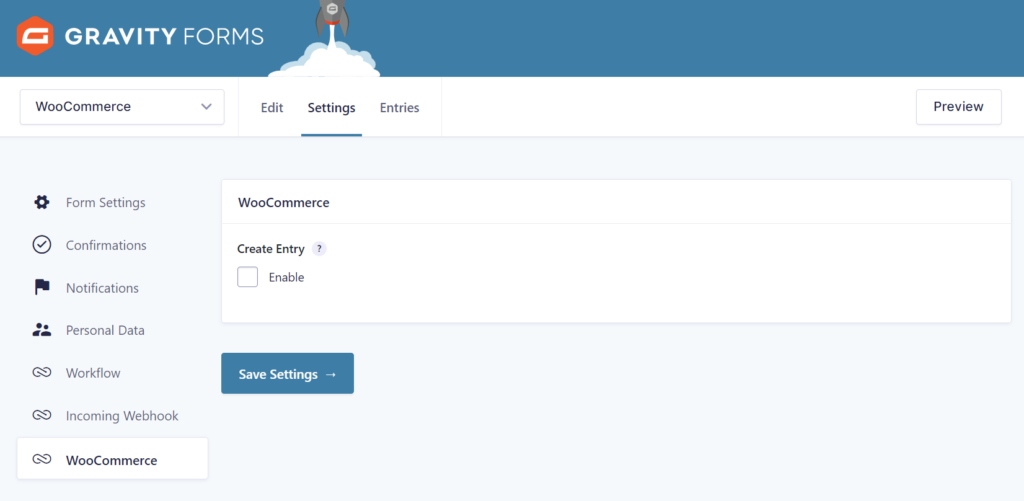
Enabling the ‘Create Entry’ will generate automatically an entry in the specific Gravity Form whenever a defined WooCommerce payment status is triggered:
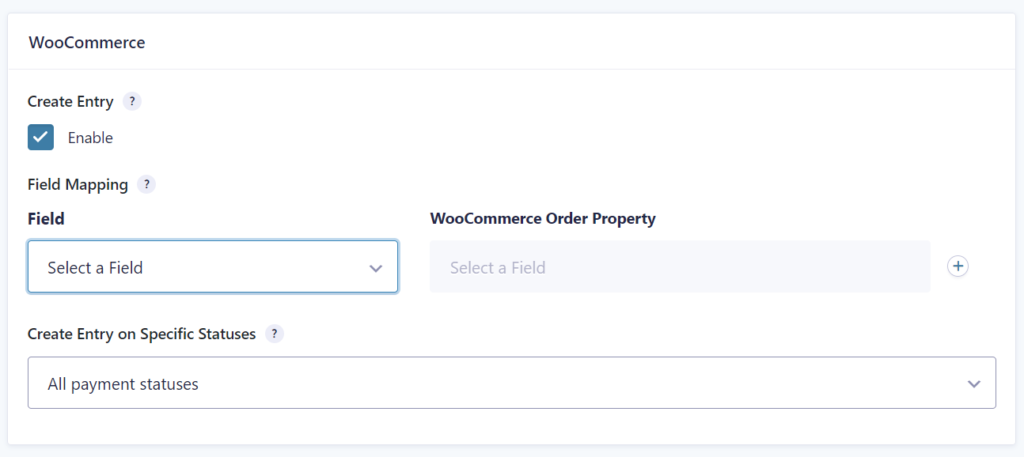
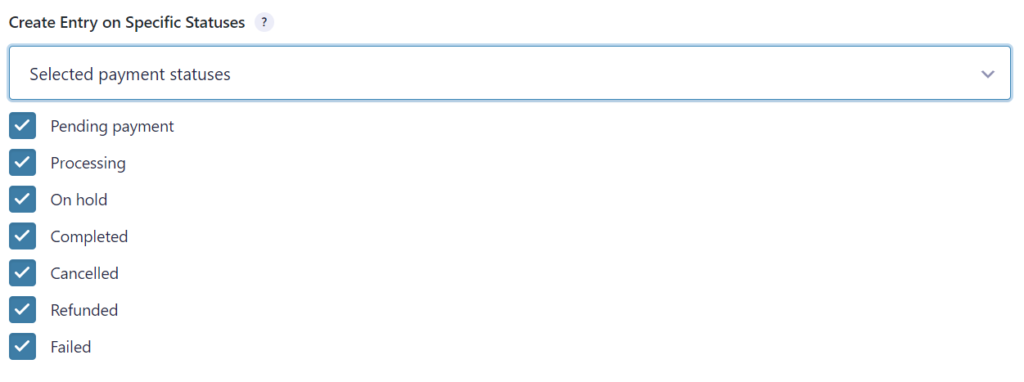
You can also choose to only create an entry in this form on certain payment events: Pending payment, Processing, On hold, Completed, Cancelled, Refunded, Failed.
Mapping WooCommerce Order Properties to your Gravity Form
You can select Fields from your Gravity Form to fill with WooCommerce order information:
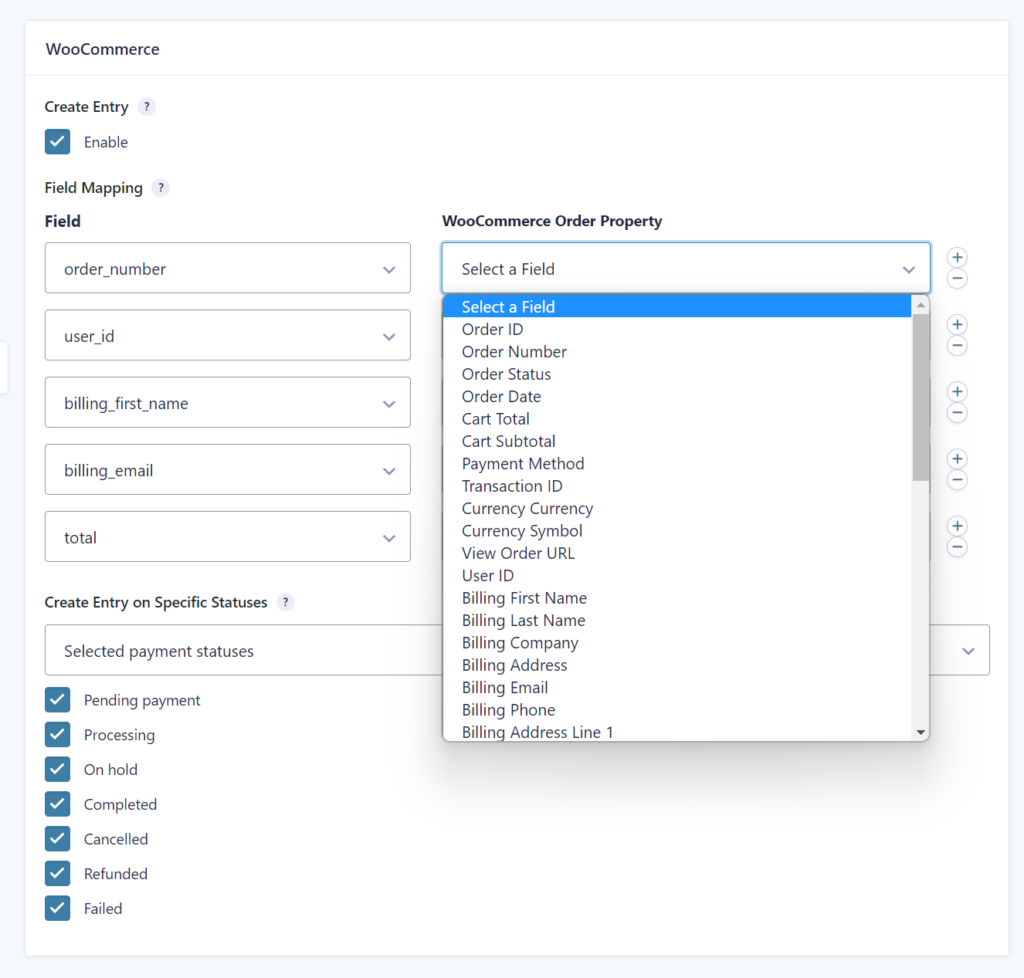
Available WooCommerce Order Properties
The following WooCommerce order properties are available to map to your Gravity Form:
| Order information | Order ID | User ID | Order Number | Order Status | Order Date | Billing First Name | Total Number of Items | Customer Note |
| Cart information | Cart Total | Cart Subtotal | Cart Discount | Coupon Codes Used |
| Payment information | Payment Method | Transaction ID | Currency | Currency Symbol | View Order URL | Tax | Tax included or excluded |
| Billing information | Billing Last Name | Billing Company | Billing Address | Billing Email | Billing Phone | Billing Address Line 1 | Billing Address Line 2 | Billing City | Billing Postcode | Billing Country Code | Billing Country | Billing State Code | Billing State |
| Shipping information | Shipping First Name | Shipping Last Name | Shipping Company | Shipping Address | Shipping Address Line 1 | Shipping Address Line 2 | Shipping City | Shipping Postcode | Shipping Country Code | Shipping Country | Shipping State Code | Shipping State | Shipping Method | Shipping Total | Shipping Tax |
Examples or connecting WooCommerce with Gravity Forms
With this Add-on you have all your favorite Gravity Forms tools and Add-ons like Views, Perks, Charts, Merge Tags and Workflow steps available to process WooCommerce data in the way you want. Think for example about:
- Triggering an outgoing webhook or an e-mail notification on specific orders, informing a supplier about this order, with the possibility to add approval steps, asking for an additional Form entry, updating your stock inside another system.
- Creating a custom order overview for your employees, with additional checklists and statuses, separate from WooCommerce, with to-do action points that are specific for your organization.
- Sending the client a follow-up request a few days later to give a review, on your own site or on Google, Yelp or other review sites (with customized links to make it as easy as possible for them).
- Changing / cleaning up / sanitizing data to make it ready for other systems your organization uses.
- Publishing something automatically on your website after a successful order payment, showing how many items are sold.
The possibilities are endless, only limited by your imagination. A must have Add-on for people that want to improve their sales process and open up all the Gravity Tools that you’re experienced with.
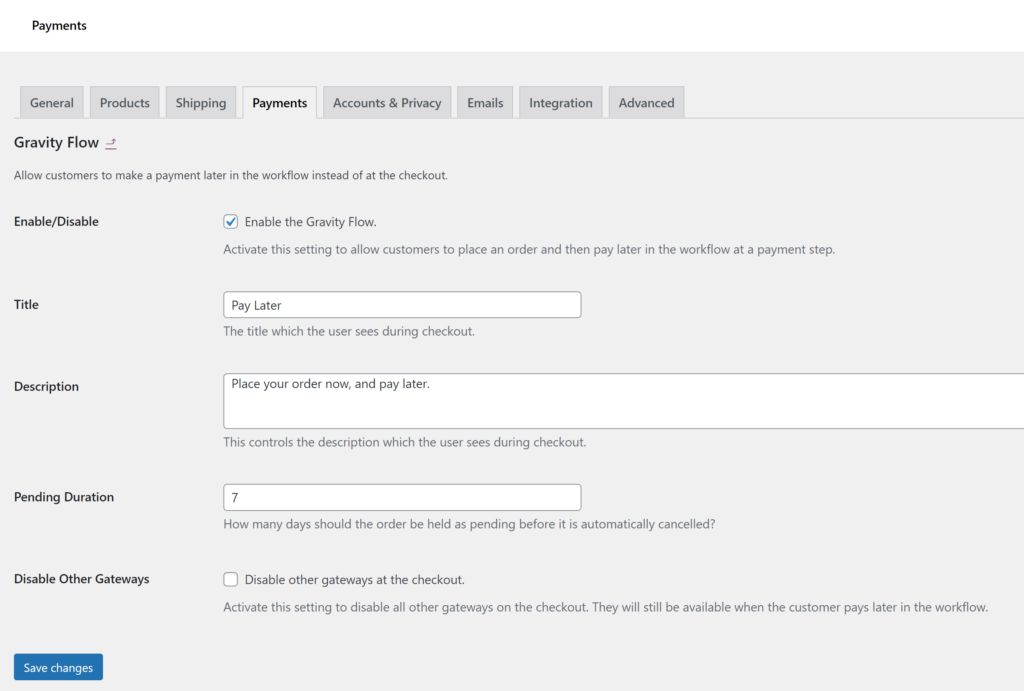
Using Gravity Flow as a WooCommerce Payment method
The WooCommerce Add-on also adds an extra Payment Method to your Payments tab in the WooCommerce settings:
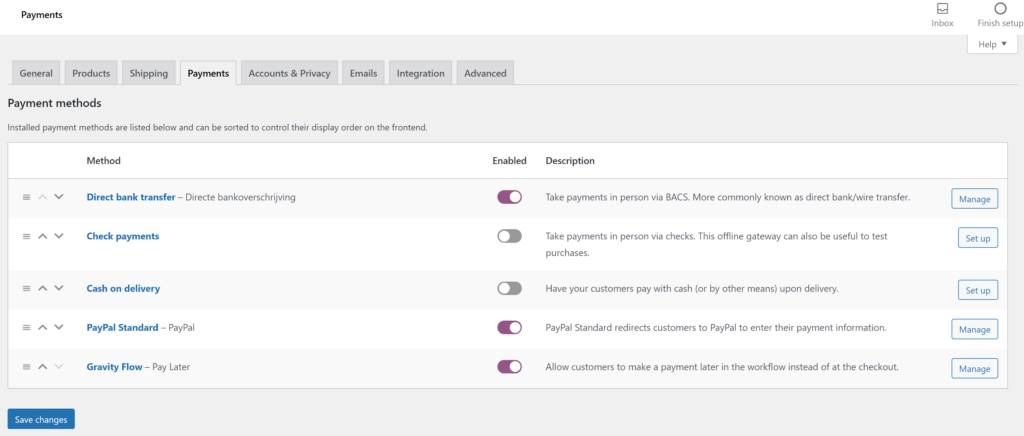
By enabling the Gravity Flow Payment Method for WooCommerce, you can let customers pay later in the workflow at a payment step. You can also disable all other Gateways if you want to have full control with Gravity Forms and Flow to manage the payment process.
Our Premium add-ons for Gravity Forms

All Entries
All your new Gravity Forms entries in one central place. Stop navigating between multiple forms to find new entries. Get immediate oversight and full control with a powerful, unified dashboard.

n8n Connector
Connect Gravity Forms to n8n and automate your workflows with secure, flexible, and powerful webhooks. Go beyond simple notifications and build advanced, two-way automations.

Update Multiple Entries
Trigger the update of multiple entries in a target form by submitting an entry in a trigger form.

Field to Entries
Create entries based on Checkboxes & Multi Select choices & List Field rows.
Read tutorials about

How to Create a Public Submission Business Directory in WordPress (Gravity Forms + GravityView)
Build a moderated business directory where users submit listings through a form, admins approve entries, and approved businesses appear in a searchable GravityView directory.

How to Create an Event Workshop Registration + Waitlist System in WordPress
This guide shows how to set up a workshop registration + waitlist system in WordPress: register attendees until capacity is reached, waitlist the rest, approve entries, and auto-promote people when a seat opens using Gravity Forms, Gravity Flow, and GravityView.

Gravity Flow Form Submission Step Tutorial
The Gravity Flow Form Submission step pauses a workflow until another form is submitted, then continues once the handoff is complete. This guide shows how to connect two forms, prefill fields with mapping, send the correct secure link, and troubleshoot the most common “workflow didn’t move” issues.

Gravity Flow Delete an Entry Step Tutorial
The Gravity Flow Delete Entry step lets you trash or permanently remove Gravity Forms entries as part of a workflow. This guide covers the key settings, scheduling options (delay or date-based), and safe testing tips so you can follow retention and privacy rules with confidence.

