You’re about to build a simple, reliable Gravity Forms ActiveCampaign integration in WordPress that fills in First Name, Last Name, and Phone as soon as a user enters an Email and the form is submitted. We’ll use the GravityWP API Connector add-on to call the ActiveCampaign API with your API key for authentication. No custom code, no webhooks.
What this Gravity Forms ActiveCampaign integration does
When someone enters an Email on a Gravity Form and clicks submit, the site calls ActiveCampaign’s contacts endpoint, finds the matching contact in the ActiveCampaign account, and writes the person’s First Name, Last Name, and Phone into the form entry. We also store the full JSON response in a text field so you can see exactly what came back and copy the correct JSON paths in seconds. This improves CRM data quality and sets you up for clean automation and better customer experience later.
This Gravity Forms ActiveCampaign integration reduces typing, prevents errors, and keeps your CRM data consistent.
Step 1 – Prepare ActiveCampaign for the Gravity Forms ActiveCampaign integration
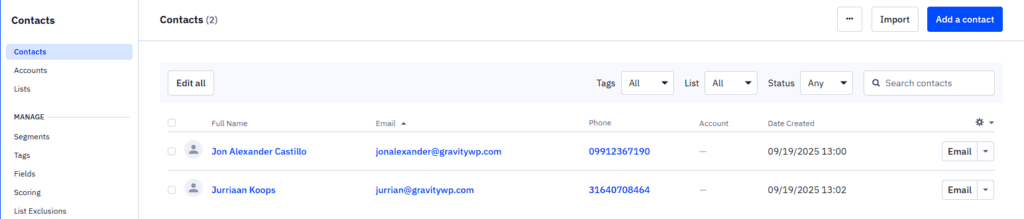
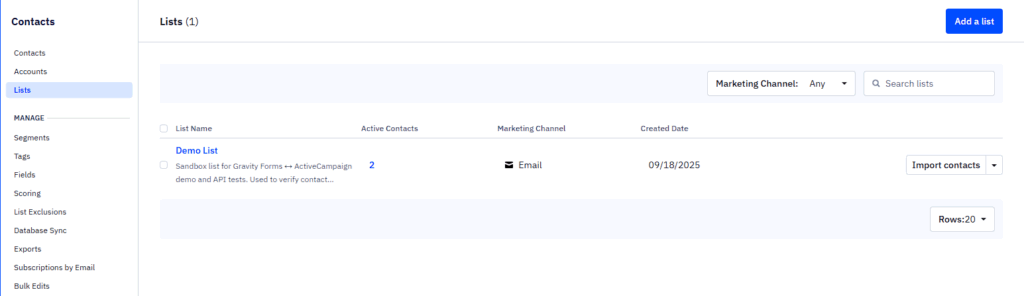
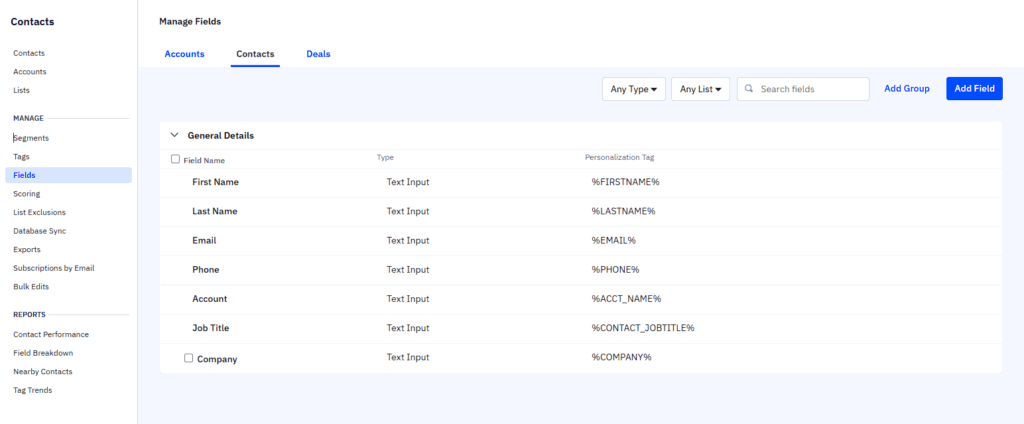
In ActiveCampaign, we created/confirmed a list (Demo List) and added two test contacts (Jon and Jurriaan) with email, firstName, lastName, and phone. We also created a custom field for Company, but we’re leaving it out here because it didn’t return data in our entries during testing.
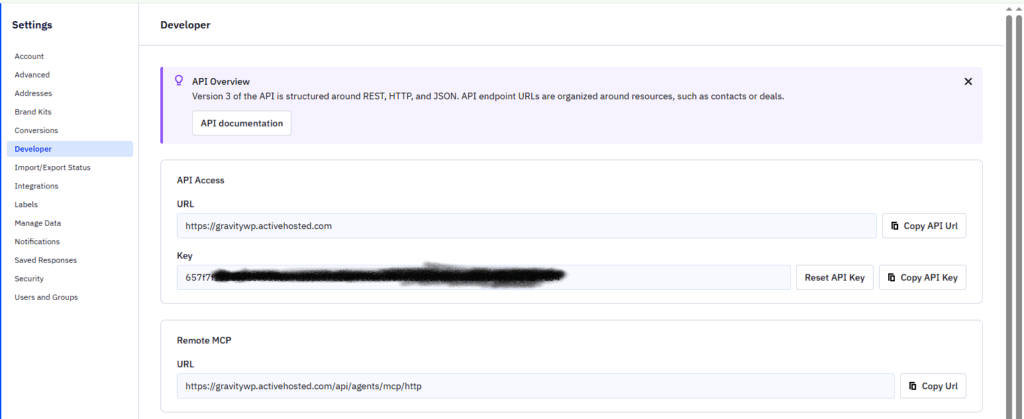
Next, we went to Settings → Developer and copied the API URL and API Key. The docs often show a pattern like https://{youraccountname}.api-us1.com/api/3, but you should always use the exact URL shown on your own Developer screen. In our account, that URL is https://gravitywp.activehosted.com/api/3.
Why these values matter: the Base URL is the root for every call the add-on makes, and the API Key is how the integration authenticates. ActiveCampaign expects the key in a header named Api-Token.
Step 2 – Build the Gravity Form for the ActiveCampaign integration
In Gravity Forms, we created a new form with these fields, in this order: Email, First Name, Last Name, Phone, and Message (Paragraph). Email is the lookup key we send to ActiveCampaign. First Name, Last Name, and Phone are populated from the response. Message holds the full JSON for verification and troubleshooting.Keeping it simple makes the integration easy to test and maintain. If you need conditional logic, segmentation, or notifications later, this clean base pays off.

Step 3: Create the API Connection in GravityWP API Connector
Go to Forms → Settings → API Connector → Add New API Connection and enter:
- API Name: ActiveCampaign (clear label you’ll recognize in feeds)
- Base URL: paste exactly from AC Developer (e.g., https://gravitywp.activehosted.com/api/3)
- Authentication Method: API Key (matches how we read contacts)
- API Key Parameter Name: Api-Token (must be exact)
- API Key Placement: Header (where ActiveCampaign reads the token)
Save the connection. That’s what the form feed will use.Why these inputs: this is the simplest, most stable path. API Key auth keeps the read call straightforward, and using the Api-Token header matches how ActiveCampaign validates requests.
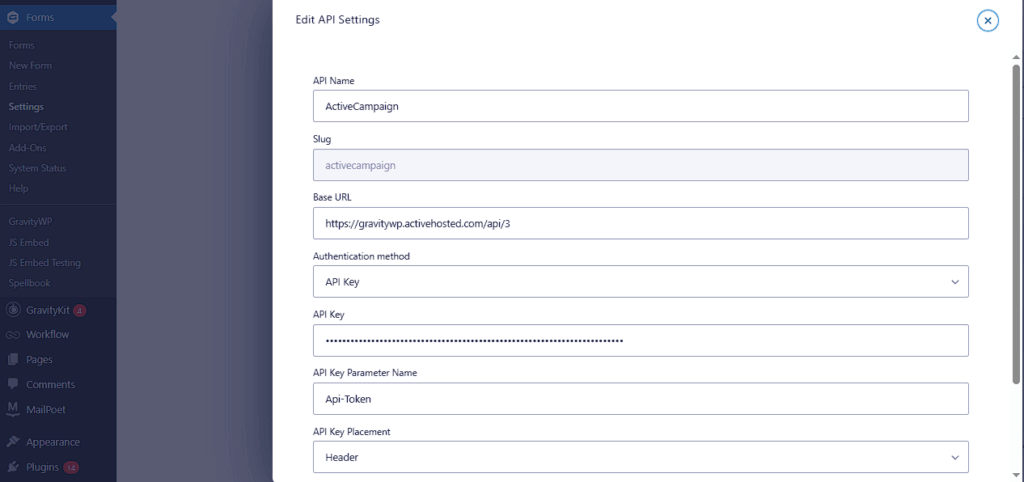
Api-Token request header.With the connection saved, the Gravity Forms ActiveCampaign integration can authenticate every request via the Api-Token header.
Step 4: Create the API Feed on your form
Open the form → Settings → API Connector → Add New Feed.
We named ours AC – Get Field Values (new) and selected the ActiveCampaign API configuration we just saved. We set Request Method to GET and Endpoint URL to /contacts. That endpoint lists/searches contacts and returns the data we want.
We chose Regular Field input so we can pass the form Email as a query string parameter. Under Query String (GET), we set the Key to email. For the Value Property, we clicked the merge-tag icon and picked the Email field. In our screenshots, that shows up as email-text. This exact pairing is what we tried and confirmed working.
Then we mapped the response to the target fields using the paths that matched our stored JSON:
- First Name → contacts/0/firstName
- Last Name → contacts/0/lastName
- Phone → contacts/0/phone
We set API request trigger to On form submission to keep the call fast and predictable (the email value won’t change mid-flow). Finally, we turned on Store full response and selected the Message field. That gives an instant JSON log, perfect for debugging or expanding the integration later.
Why we use each input:
- GET — we’re reading data, not creating/updating a contact.
- /contacts — this is the endpoint we tested and confirmed.
- Key: email — this is what worked in our environment.
- contacts/0/… mapping — our response had a top-level contacts array with the match at index 0.
- On form submission — simpler UX and avoids extra API calls while typing.
Store full response — makes path discovery and troubleshooting easy (we also use GravityWP’s “Parse the possible paths…” tool to copy exact paths).
Paste the JSON into Parse the possible paths from a JSON API response to copy the exact paths without guessing.
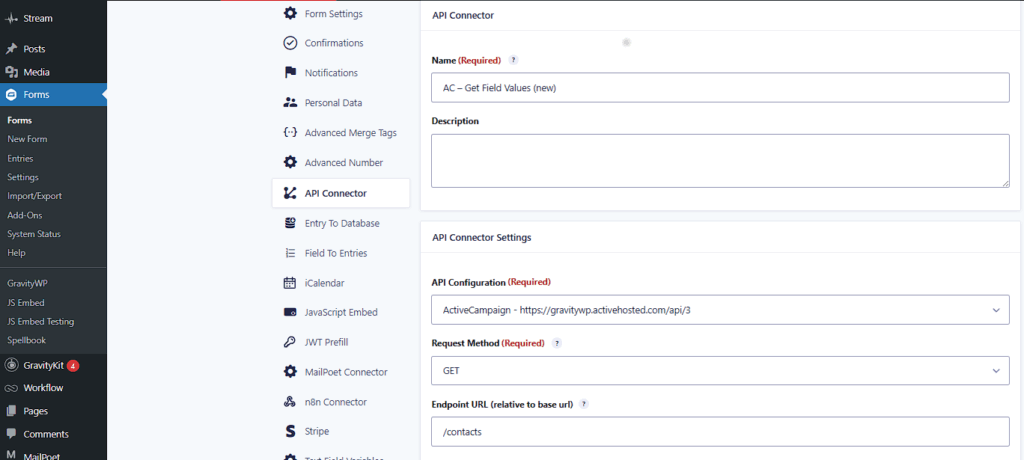
/contacts on the ActiveCampaign API to retrieve contact details by email when the form is submitted.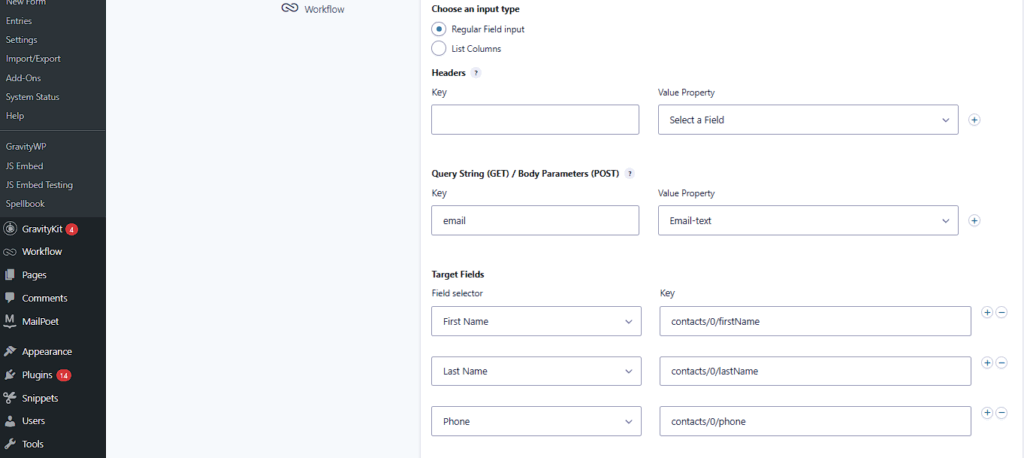
email uses the form’s Email merge tag; JSON paths map to First Name, Last Name, and Phone (contacts/0/...).Step 5: Test the integration
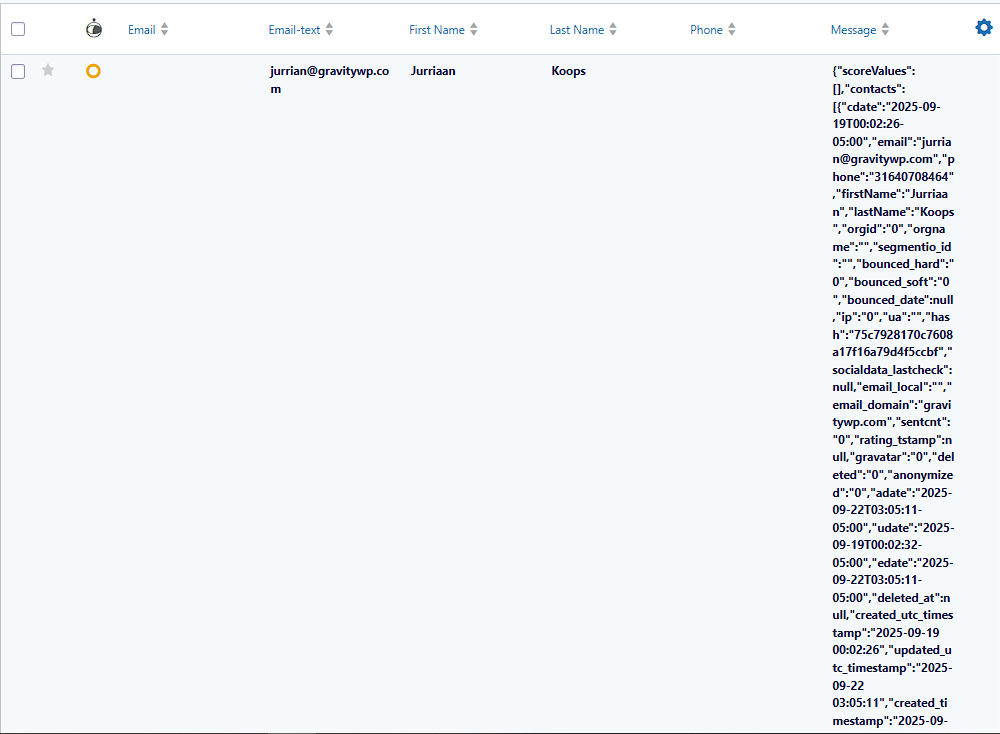
On the front end, we submitted the form using known emails from our ActiveCampaign account (e.g., jonalexander@gravitywp.com, jurrian@gravitywp.com). In Entries, we saw First Name, Last Name, and Phone populated automatically. The Message field contained the full JSON that came back from ActiveCampaign our proof that the integration, authentication, and mapping are correct.If you plan to automate workflows for example, a notification that uses the mapped name, or a follow-up step that depends on Phone this is the perfect moment to verify data quality

Troubleshooting based on our test
If fields are blank, start with the basics. Confirm the email you submitted actually exists in ActiveCampaign and that the profile includes firstName, lastName, and phone. Make sure the Base URL in the API connection matches the Developer page exactly, and that the Api-Token header uses a current key. If it’s still empty, open the Message field in the entry and review the JSON. If those properties aren’t present, there’s nothing to map yet. When you do see them, the paths we used contacts/0/firstName, contacts/0/lastName, contacts/0/phone will work.
About the Company custom field: we tried to pull it and it didn’t populate in our entries, so this guide leaves it out. Once you see Company appear in your stored JSON, add a mapping using the exact path you see there.
Where this Gravity Forms ActiveCampaign integration fits in your workflow
This ActiveCampaign and Gravity Forms setup is a clean starting point for marketing automation. With accurate names and phone numbers in your form entries, it’s easier to send the right notification, apply conditional logic in confirmations, or add a separate feed later that tags contacts. You can also turn this into a reusable template if your team builds many contact forms or lead capture forms. The integration keeps form data aligned with your CRM and reduces routine tasks.
Use this Gravity Forms ActiveCampaign integration as a template for future contact forms and lead capture flows.
Quick recap (exact values we used)
- Base URL: https://gravitywp.activehosted.com/api/3 (from AC Settings → Developer)
- Auth: API Key in header Api-Token
- Endpoint: /contacts
- Query String (GET): email = {Email merge tag}
- Mappings:
- First Name → contacts/0/firstName
- Last Name → contacts/0/lastName
- Phone → contacts/0/phone
- First Name → contacts/0/firstName
- Trigger: On form submission
- Store full response: Message field
If you want to use this Gravity Forms ActiveCampaign integration, check the GravityWP API Connector page.
Our Premium add-ons for Gravity Forms

JWT Prefill
Fill forms with data you can trust. Prefill Gravity Forms fields with a secure token instead of links with editable url parameters, so your data is accurate, tamper-proof, and ready to use.

Advanced Merge Tags
This Gravity Forms Add-On adds extra Merge Tag modifiers (and a lot of power). From the most common used functions like capitalize and length to changing date formats.

Entry to Database
Integrates Gravity Forms with internal or external databases, offering flexible mapping of form fields to database columns and real-time synchronization between entries and database rows.

API Connector
Connect Gravity Forms to External API's: Query the API using form field values and automatically fill other form fields with the API response.
Read tutorials about

How to Create a Public Submission Business Directory in WordPress (Gravity Forms + GravityView)
Build a moderated business directory where users submit listings through a form, admins approve entries, and approved businesses appear in a searchable GravityView directory.

How to Create an Event Workshop Registration + Waitlist System in WordPress
This guide shows how to set up a workshop registration + waitlist system in WordPress: register attendees until capacity is reached, waitlist the rest, approve entries, and auto-promote people when a seat opens using Gravity Forms, Gravity Flow, and GravityView.

Gravity Flow Form Submission Step Tutorial
The Gravity Flow Form Submission step pauses a workflow until another form is submitted, then continues once the handoff is complete. This guide shows how to connect two forms, prefill fields with mapping, send the correct secure link, and troubleshoot the most common “workflow didn’t move” issues.

Gravity Flow Delete an Entry Step Tutorial
The Gravity Flow Delete Entry step lets you trash or permanently remove Gravity Forms entries as part of a workflow. This guide covers the key settings, scheduling options (delay or date-based), and safe testing tips so you can follow retention and privacy rules with confidence.