Sometimes you’re in a very specific situation: n8n is running happily on your laptop, but you need a real external service to hit a webhook. Maybe you want to test a GravityWP n8n Connector feed from a live WordPress site. Maybe you just don’t have VPS budget yet, but you still want “real internet” behaviour, not localhost simulations. That’s exactly where a Cloudflare Tunnel n8n setup helps.
At GravityWP we’ve hit this exact wall while testing our own n8n Connector add-on and helping users debug Gravity Forms webhooks, so we started using Cloudflare Tunnel as a short-lived bridge between “local dev” and “real web” without spinning up a VPS every time.
Instead of renting a server, we used Cloudflare Tunnel’s Quick Tunnel feature to give our local n8n instance a temporary public HTTPS URL. From the browser’s point of view, it looked like a hosted n8n instance on the open internet. Under the hood, everything still lived on http://localhost:5678 on our Windows machine.
This guide walks through what that setup is, how we actually did it, and where the hard limits are so you don’t accidentally treat this as a production solution.
What Cloudflare Tunnel Quick Tunnels actually do
Cloudflare Tunnel is Cloudflare’s way to connect private services to the internet without opening ports or exposing your IP directly. You run a small program called cloudflared on your machine. Instead of accepting inbound connections, it opens outbound connections from your machine to Cloudflare’s edge. Cloudflare then routes traffic from a public URL through that tunnel back to your local service.
Quick Tunnels (the “trycloudflare.com” ones) are the lightweight, no-account version of that idea. You don’t need a Cloudflare login or a domain. You just run a single command that points at a local URL like http://localhost:5678, and Cloudflare returns a random HTTPS URL such as:
https://something-random.trycloudflare.com
As long as cloudflared keeps running, anyone hitting that URL is effectively talking to your local n8n instance.
Cloudflare is very clear about what this is and isn’t: Quick Tunnels are great for experiments, previews and testing. They have no uptime guarantees and aren’t meant to run production workloads long term. That matches our use case perfectly: “I just need to debug my webhooks this afternoon.”
For more detail, see Cloudflare’s official Quick Tunnels documentation.
How this fits into your n8n hosting options
In the main “How to set up an n8n instance” overview, you have structured, long-term choices: n8n Cloud, self-hosted on a VPS, one-click providers, and Docker on your own VPS.
The Cloudflare Tunnel n8n trick is not a new hosting option. It’s a temporary bridge between:
- local n8n on
http://localhost:5678, and - real external services that must call an HTTPS URL.
n8n’s own documentation describes running locally via Docker or Node on http://localhost:5678 as a normal development and testing workflow. Cloudflare Tunnel simply makes that local instance reachable from outside your network for a short time.
If you’re also working with Gravity Forms, start with our Getting Started: How to Set Up Your First Connection between n8n and Gravity Forms guide for the GravityWP n8n Connector, then use this tunnel as a temporary bridge during testing.
Our exact setup when we tested this
Here’s the real situation we used, so you can mirror it if needed.
We were on Windows 10 (64-bit). n8n was already running locally at http://localhost:5678 via Docker, following the standard n8n Docker instructions. We could open http://localhost:5678 in the browser and see the editor, create workflows, add webhook nodes, etc.
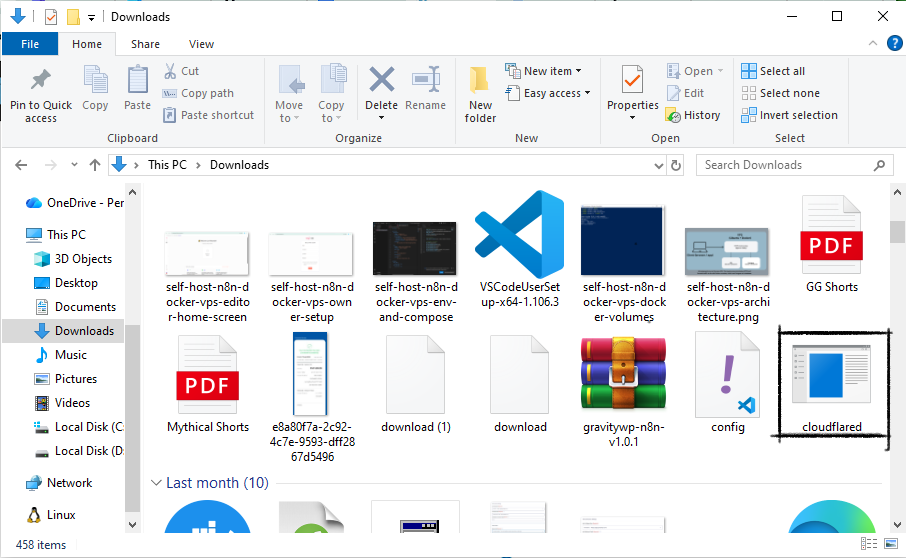
Then we downloaded the official cloudflared binary for Windows from Cloudflare and saved it in the Downloads folder. To make life easier in PowerShell, we renamed it to cloudflared.exe.
At that point, we had:
- n8n listening locally on port 5678
cloudflared.exesitting inC:\Users\ADMIN\Downloads
That’s all you need for the basic Quick Tunnel pattern.
Step-by-step: exposing localhost:5678 with Cloudflare Tunnel (Windows)
You can adapt these steps to macOS or Linux. The only thing that really changes is how you install cloudflared.
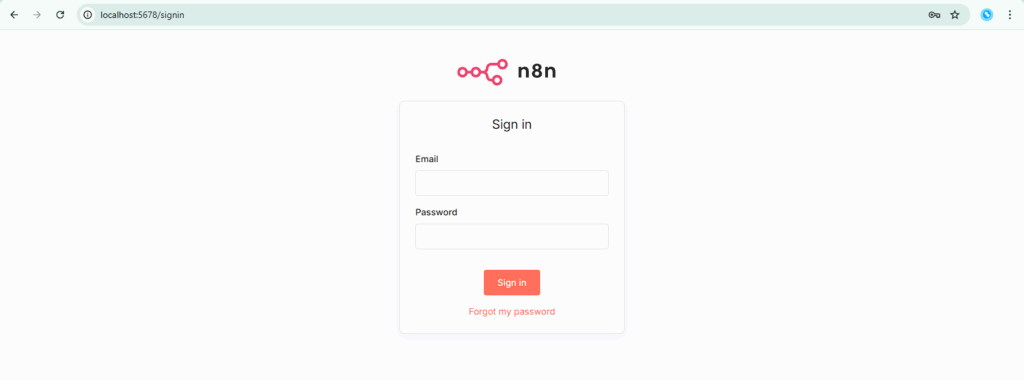
1. Confirm n8n is live on localhost
Open your browser and go to:
http://localhost:5678
If you see n8n’s login or owner setup screen, you’re ready. If not, start your n8n Docker container or process first. There’s no point creating a tunnel to a port that isn’t serving anything.
You can keep that browser tab open; it’s your “local view” of n8n.
http://localhost:5678 before exposing it with Cloudflare Tunnel.2. Open PowerShell in the folder where cloudflared lives
Press Win + E, go to your Downloads folder, then click in the address bar and type:
powershell
Press Enter. PowerShell should open with a prompt like:
PS C:\Users\ADMIN\Downloads>
You can quickly confirm cloudflared exists with:
dir cloudflared*
If you see cloudflared.exe listed, you’re in the right place.
3. Start a Quick Tunnel to your local n8n
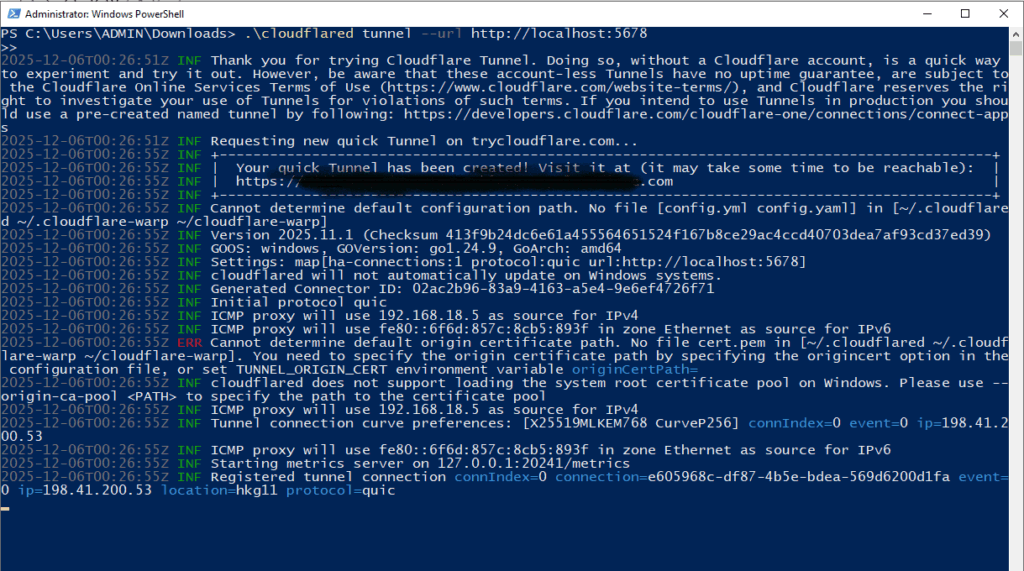
In that PowerShell window, run:
.\cloudflared tunnel –url http://localhost:5678
The command is the important part here. It follows Cloudflare’s own Quick Tunnel example format (cloudflared tunnel –url http://localhost:port), just with n8n’s default port of 5678 instead of their usual 8080 demo.
You’ll see several lines of output:
- A legal notice thanking you for trying Cloudflare Tunnel and explaining that tunnels without a Cloudflare account have no uptime guarantees and are covered by Cloudflare’s Online Services Terms of Use.
- A line saying it is requesting a new Quick Tunnel on trycloudflare.com.
A box that looks like this:
+——————————————————————————————–+
| Your quick Tunnel has been created! Visit it at (it may take some time to be reachable): |
| https://anticipated-sees-suit-portland.trycloudflare.com |
+——————————————————————————————–+
As long as this PowerShell process is running, that URL forwards traffic to http://localhost:5678.If you close the window or press Ctrl + C, the tunnel disappears and the URL stops working.
cloudflared tunnel --url http://localhost:5678 and returning a temporary trycloudflare.com URL.4. Open the trycloudflare URL and log in to n8n
Copy the generated URL from PowerShell and paste it into your browser. It will look something like:
https://anticipated-sees-suit-portland.trycloudflare.com
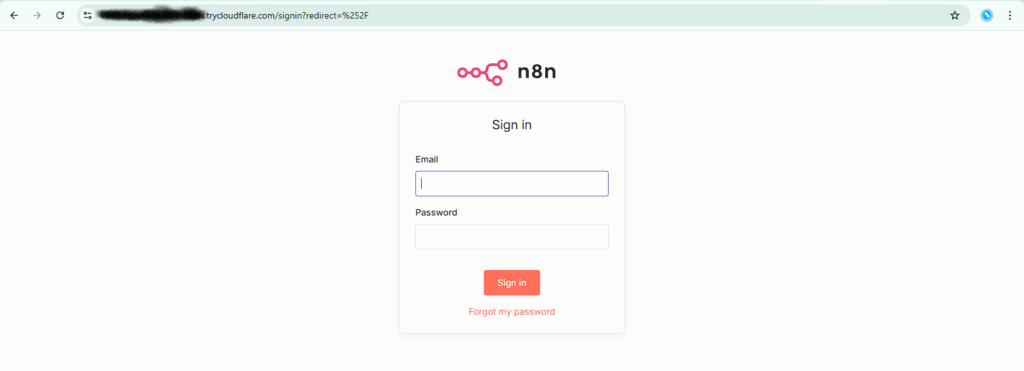
If everything is wired correctly, you should see the n8n login or owner setup screen, just as if you had opened http://localhost:5678. The difference is that you’re now connected over HTTPS through Cloudflare’s edge network.
From here, you can log in with your usual n8n owner account and use the editor normally. We did exactly that during our test and confirmed that the interface is fully usable over the tunnel.
https://…trycloudflare.com URL created by Cloudflare Tunnel.Why Chrome sometimes shows a “Dangerous” warning
In our session, Chrome displayed a red “Dangerous” indicator when we visited the trycloudflare.com URL.
That warning does not mean n8n itself is malicious. It comes from Google’s Safe Browsing system, which tracks domains and URLs that have been used in phishing and malware campaigns. Because some attackers have abused trycloudflare links in the past to hide their infrastructure, certain *.trycloudflare.com URLs can end up on a blocklist. When that happens, Chrome warns you even if your specific tunnel is just pointing to a local dev tool.
From a security perspective, the right move is to always treat those warnings seriously. In this specific case, we knew:
- We had just created the tunnel ourselves.
- We controlled the local machine and Docker containers on the other end.
- We weren’t sharing the URL publicly.
So we accepted the risk for this short, internal testing session. You should not share these URLs with clients or treat them like production endpoints.
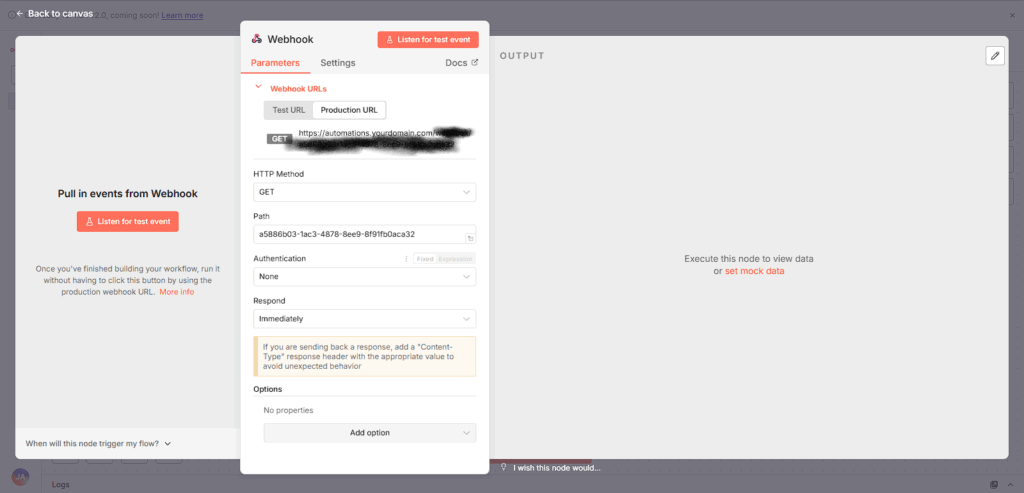
Using the tunnel URL for n8n webhooks
Once you are logged into n8n over the tunnel, webhooks work exactly the same as on any other instance.
You can create a new workflow, add a Webhook node, switch it to use the Production URL, and then copy that URL. Instead of a localhost address, you’ll see a URL that starts with your trycloudflare.com host, for example:
https://anticipated-sees-suit-portland.trycloudflare.com/webhook/...
You can paste that into any external tool:
- A GravityWP n8n Connector feed in Gravity Forms
- A test webhook configuration in some SaaS app
- A manual HTTP request from Postman or curl on another machine
The flow is:
- The external app sends a request to the trycloudflare.com URL.
- Cloudflare receives the HTTPS request on their edge.
- cloudflared forwards it over the tunnel to your local http://localhost:5678.
- n8n receives it as a normal webhook and triggers the workflow.
While we tested, we could see each incoming request in n8n’s Executions list, just like on a normal remote server.
Limitations and risks you need to be honest about
This approach is super handy, but it comes with hard boundaries.
First, Cloudflare clearly states that Quick Tunnels have no uptime guarantee and are meant for experiments or previews. The tunnel lives only as long as your cloudflared process is running. There is no SLA, no stable URL you can rely on for weeks, and no promise that Cloudflare won’t rate-limit or cut off heavy use.
Second, you are exposing your local n8n instance to the public internet behind that URL. Anyone who gets the link can reach your login page and try to brute-force it. That means you should only use strong credentials, avoid leaving anonymous endpoints open, and shut the tunnel down as soon as you are done testing.
Third, the Chrome “Dangerous” warning is a reputational hint. Even if you know this particular tunnel is safe for you, the fact that the domain has been abused in the wild is a good reminder: this is a developer tool, not a polished customer-facing endpoint.
Finally, this is not a replacement for proper hosting. For real projects, you still want n8n Cloud, a one-click host, or a VPS with Docker and a reverse proxy. Quick Tunnels are a bridge, not a home.
When this technique makes sense (and when it doesn’t)
Cloudflare Tunnel is worth using when you:
- Are building or debugging workflows on a local n8n instance.
- Need to hit a webhook from a real external environment, like a live WordPress site or third-party API.
- Don’t have a VPS available yet, or don’t want the overhead of provisioning one just to test a small flow.
It is not the right approach when you:
- Need predictable uptime and a stable URL.
- Are handling sensitive or regulated data.
- Are giving URLs to clients, team members, or external partners as part of a “real” integration.
In those scenarios, a VPS-based setup (Option 2 or 2b) or n8n Cloud is the correct, grown-up choice.
In those scenarios, a VPS-based setup (Option 2 or 2b) or n8n Cloud is the correct, grown-up choice. This Cloudflare Tunnel n8n shortcut is only for short-lived, development-time testing.
Our Premium add-ons for Gravity Forms
List Dropdown
Add a Dropdown Select with choices to a column or multiple columns in a Gravity Forms List Field.
Advanced Merge Tags
This Gravity Forms Add-On adds extra Merge Tag modifiers (and a lot of power). From the most common used functions like capitalize and length to changing date formats.

Entry to Database
Integrates Gravity Forms with internal or external databases, offering flexible mapping of form fields to database columns and real-time synchronization between entries and database rows.

API Connector
Connect Gravity Forms to External API's: Query the API using form field values and automatically fill other form fields with the API response.
Read tutorials about

How to Create a Public Submission Business Directory in WordPress (Gravity Forms + GravityView)
Build a moderated business directory where users submit listings through a form, admins approve entries, and approved businesses appear in a searchable GravityView directory.

How to Create an Event Workshop Registration + Waitlist System in WordPress
This guide shows how to set up a workshop registration + waitlist system in WordPress: register attendees until capacity is reached, waitlist the rest, approve entries, and auto-promote people when a seat opens using Gravity Forms, Gravity Flow, and GravityView.

Gravity Flow Form Submission Step Tutorial
The Gravity Flow Form Submission step pauses a workflow until another form is submitted, then continues once the handoff is complete. This guide shows how to connect two forms, prefill fields with mapping, send the correct secure link, and troubleshoot the most common “workflow didn’t move” issues.

Gravity Flow Delete an Entry Step Tutorial
The Gravity Flow Delete Entry step lets you trash or permanently remove Gravity Forms entries as part of a workflow. This guide covers the key settings, scheduling options (delay or date-based), and safe testing tips so you can follow retention and privacy rules with confidence.