Gravity Forms has CSS Ready Classes to style your form fields. Using these classes, you can easily create more advanced layouts for the fields in your forms. Excellent idea, however, the problem is you always need to remember what the exact class name is. Now with this CSS Ready Classes selector, you don’t need to remember. Simply click on a button to launch the pop-up and choose the class you want to add.
Add your custom CSS
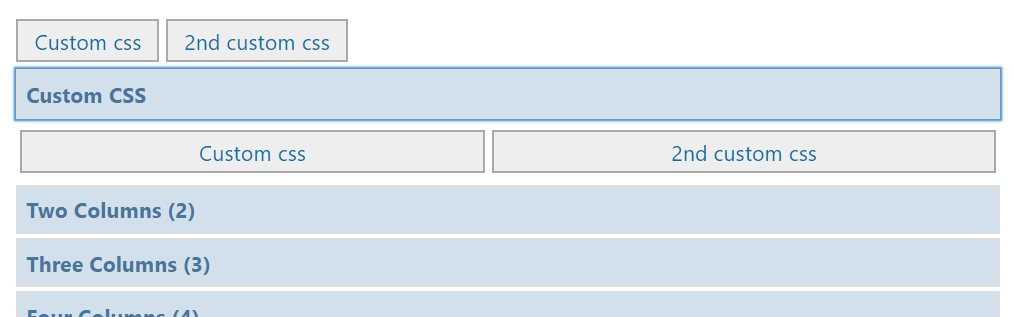
You can add your own CSS to the GravityWP – CSS Selector easily in your functions.php file. Just add the following code there. It adds quick buttons and an accordion on top of the modal. That way you can put easily your own CSS in the layout you want.
// Add custom css: quick buttons and accordion at the top of the GravityWP - CSS Selector modal
function my_custom_gwp_css_selector_add_css() {
    $html .= "<div class='gwp_quick_links'>
    <a class='gwp_css_link' href='#' rel='css_class' title='Insert css_class'>Custom CSS</a>
    <a class='gwp_css_link' href='#' rel='css_class_2' title='Insert css_class_2'>2nd Custom CSS</a></div>
    <li>
    <a class='gwp_css_acc_link' href='#'>Custom CSS</a>
    <div class='gwp_css_accordian'>
    <a class='gwp_css_link' href='#' rel='css_class_3' title='Insert css_class_3'>3rd Custom CSS</a>
    <a class='gwp_css_link' href='#' rel='css_class_4' title='Insert css_class_4'>4th Custom CSS</a>
    </div>
    </li>";
    return $html;
}
add_filter( 'gwp_css_selector_add_custom_css', 'my_custom_gwp_css_selector_add_css' );
Using the CSS Selector
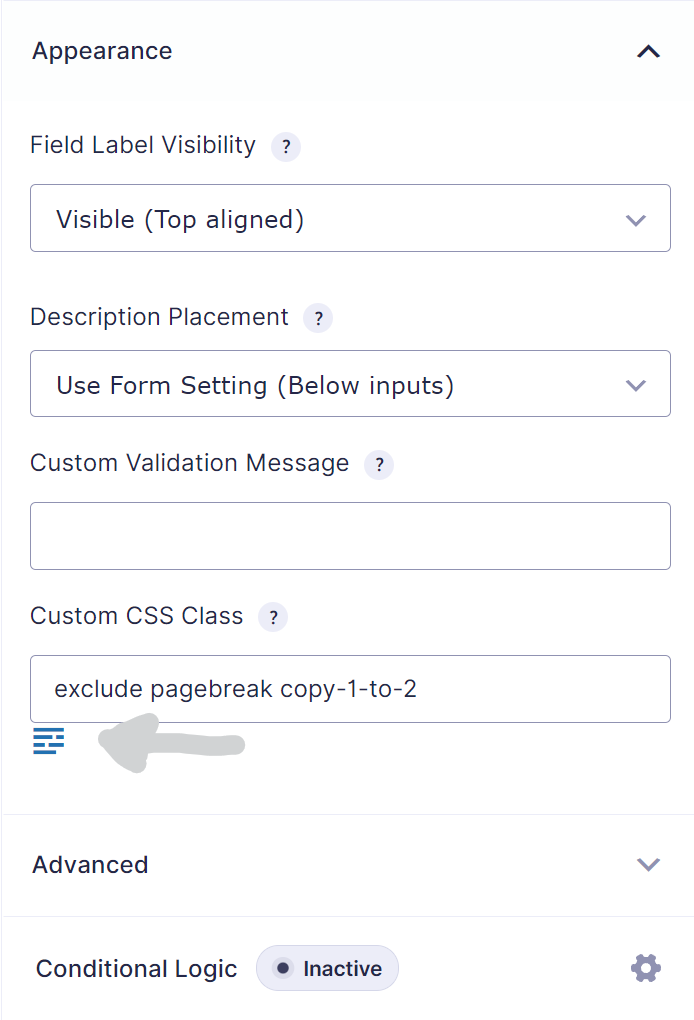
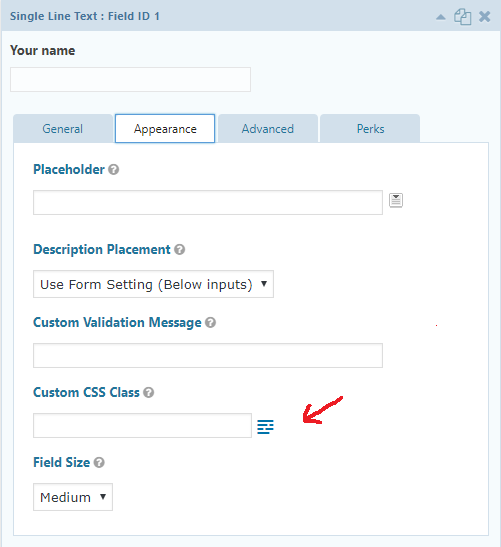
Edit your form in the Form Builder. Then select the field you want to add the CSS Ready classes to. You can add the classes in the input field ‘CSS class name’ under the ‘Appearance’ tab. In the next steps you can find the most commonly used classes. They pretty much speaks for themselves, however a more detailed description is available at the Gravity Forms documentation site. Good to know:
- You can use more than one class for one field.
- You can also add your own classes.
Overview of available CSS Ready classes in Gravity Forms
This paragraph gives an overview of the possible CSS ready classes which can be used in Gravity Forms.
List Classes
- gf_list_2col
- gf_list_3col
- gf_list_4col
- gf_list_5col
- gf_list_inline
- gf_list_height_25
- gf_list_height_50
- gf_list_height_75
- gf_list_height_100
- gf_list_height_125
- gf_list_height_150
Gravity PDF
- exclude
- pagebreak
GP Copy Cat
copy-1-to-2
Other Classes
- gf_scroll_text
- gf_hide_ampm
- gf_hide_charleft
- gf_section_right
- gf_invisible
Deprecated (only 2.4 and earlier)
Halves (2 Columns)
- gf_left_half
- gf_right_half
Thirds (3 Columns)
- gf_left_third
- gf_middle_third
- gf_right_third
Inline (Fluid One Line)
- gf_inline
Quarters (4 columns)
- gf_first_quarter
- gf_second_quarter
- gf_third_quarter
- gf_fourth_quarter
If you’re (old) theme doesn’t support Gravity Forms 4 quarters CSS, you can add this code to your style.css file: WebEndevSnippets.
Read tutorials about

Gravity Flow Form Submission Step Tutorial
The Gravity Flow Form Submission step pauses a workflow until another form is submitted, then continues once the handoff is complete. This guide shows how to connect two forms, prefill fields with mapping, send the correct secure link, and troubleshoot the most common “workflow didn’t move” issues.

Gravity Flow Delete an Entry Step Tutorial
The Gravity Flow Delete Entry step lets you trash or permanently remove Gravity Forms entries as part of a workflow. This guide covers the key settings, scheduling options (delay or date-based), and safe testing tips so you can follow retention and privacy rules with confidence.

Gravity Flow Update Fields Step Tutorial
The Gravity Flow Update Fields step pulls values from another entry and writes them into the current entry, so your workflow can route using “live” data. This tutorial covers source form selection, entry lookup with filters and sorting, field mapping, and quick testing.

Gravity Flow Update an Entry Step Tutorial
The Gravity Flow Update Entry step lets you update an existing Gravity Forms entry using a stored Entry ID and field mapping. This guide shows a simple parent-child setup where a Task Tracker workflow pushes status updates back into the original Request Form entry.