Do you want to show data from your Gravity Forms in a (complex) Bar Chart? There is only one plugin you should use: GF Chart. You can easily make Bar charts (even very complex ones) from the data visitors of your website filled in on your website.
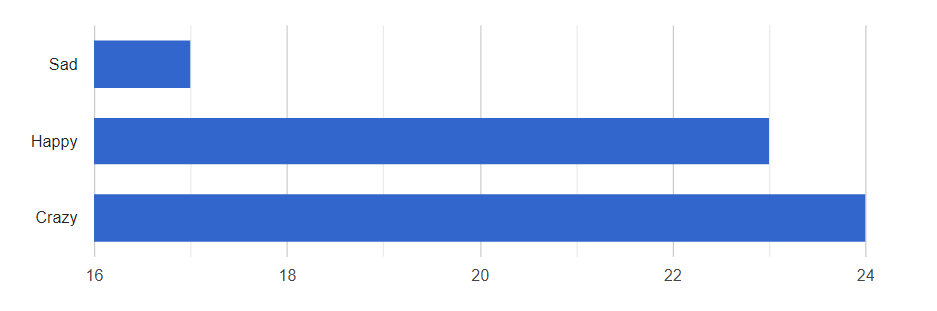
Example Bar Chart GFCharts
How to make a Complex Bar Chart with GFChart?
Just install the plugin and make a Gravity Form with a radio button or drop down field. In the WP-admin area go to ‘Forms ->’Charts/Calculations’. Add a new Chart and select the right form. You can use GF Chart with many other fields as well, but for this example, we use a Radio Button as basis.
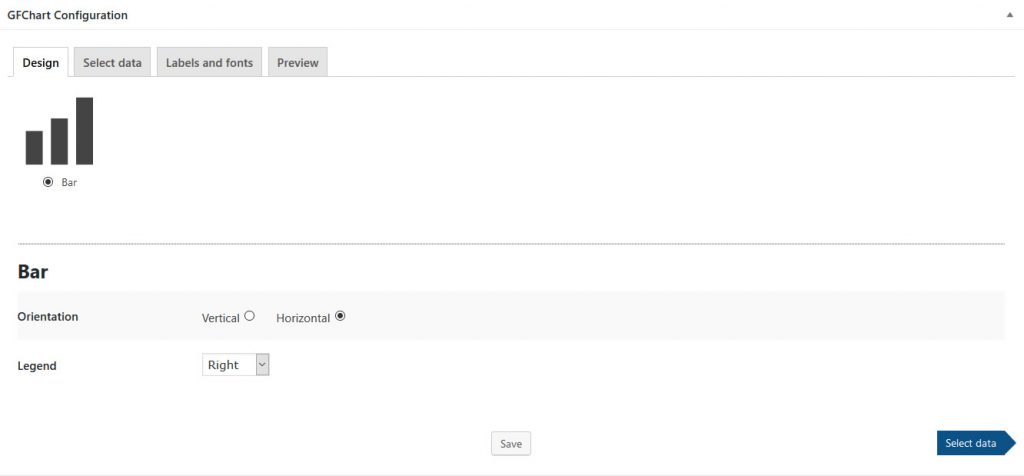
Step 1: Design
You choose for the Bar and for the Horizontal option. There is an option to choose for where to place the legend relative to the Bar chart.
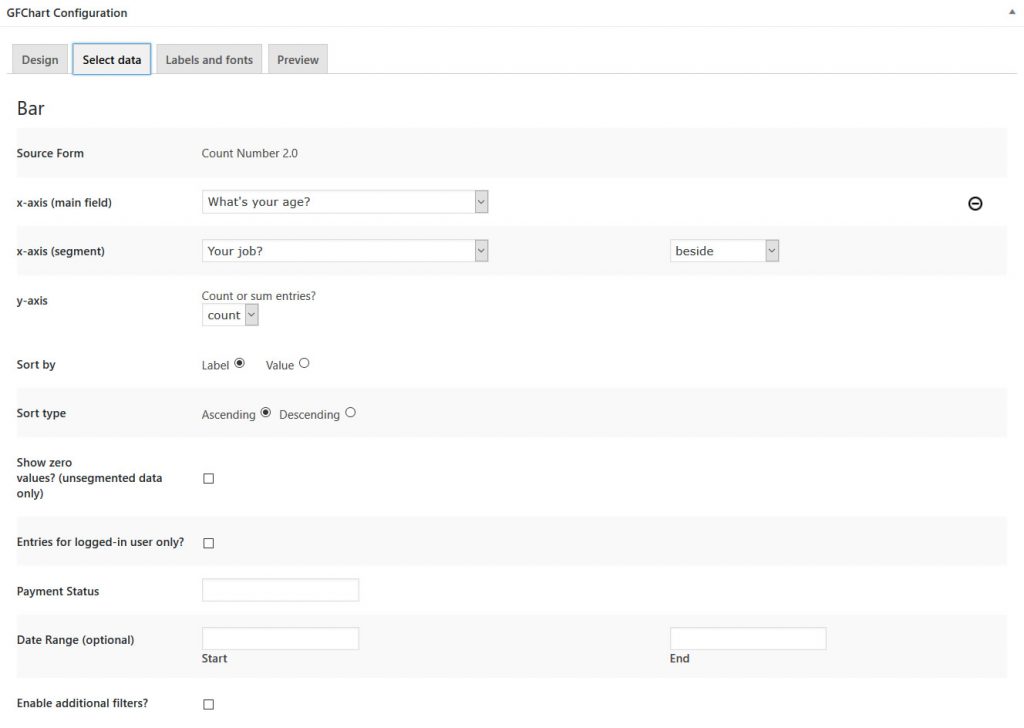
Step 2: Select Data
Which field(s) should be the basis of your bar chart? There are different options to specify, but that is not needed to go into. If you are a professional user of Gravity Forms, it’s nice to have these extra options!
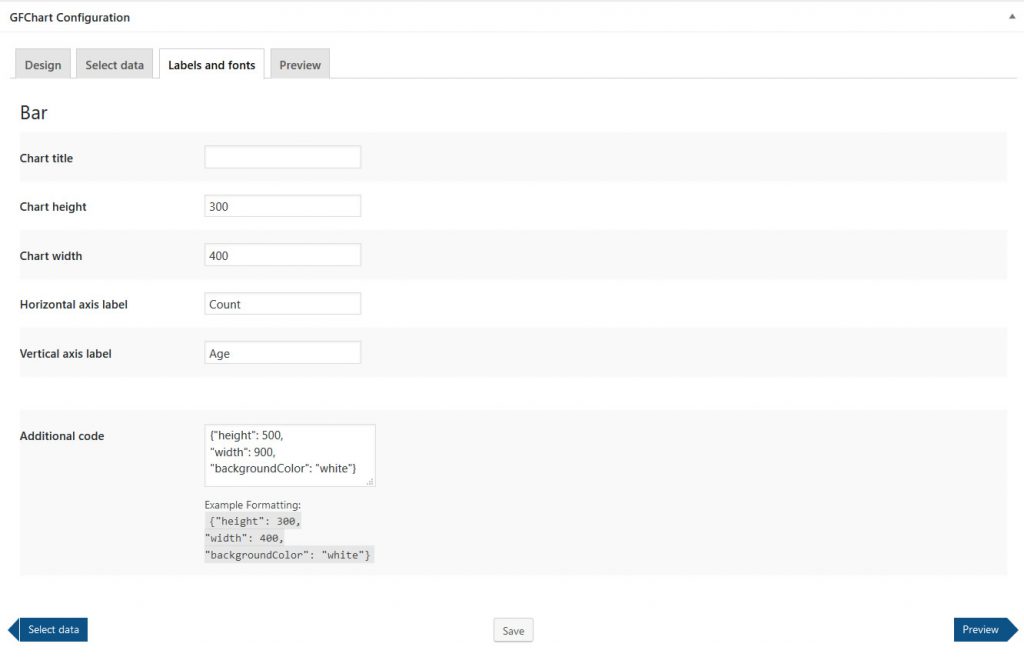
Step 3: Configuration
The Gravity Forms Charts plugin gives you some options to style your Bar Chart, like height and width.
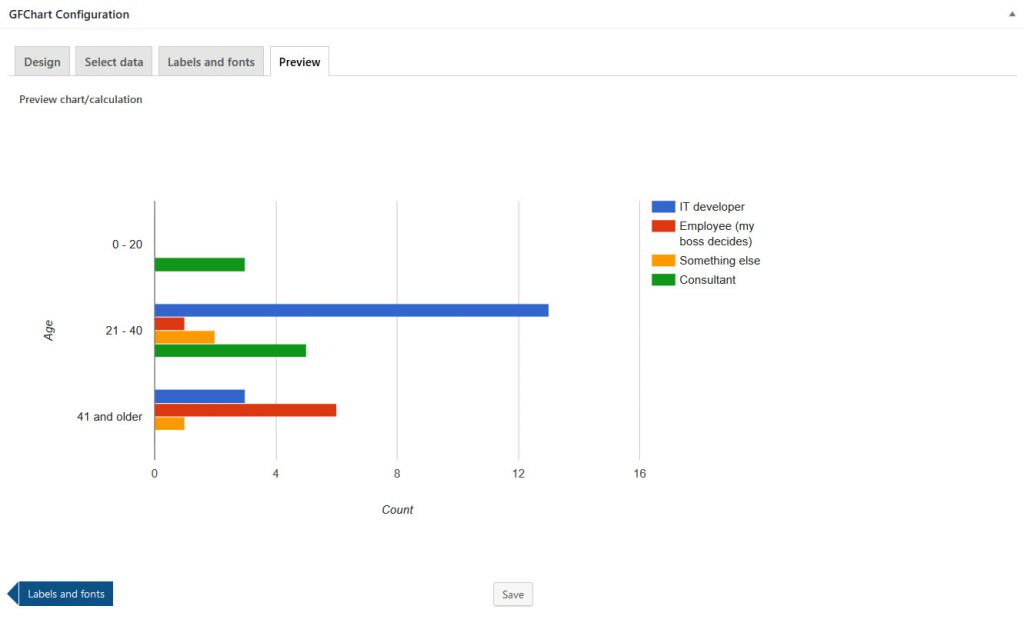
Step 4: Preview
GF Charts gives you on the spot a preview of the chart you’re making. Not satisfied? Change it in the previous steps. Satisfied? Use the simple shortcode to place it anywhere on your website.
Our Premium add-ons for Gravity Forms

Advanced Merge Tags
This Gravity Forms Add-On adds extra Merge Tag modifiers (and a lot of power). From the most common used functions like capitalize and length to changing date formats.

n8n Connector
Connect Gravity Forms to n8n and automate your workflows with secure, flexible, and powerful webhooks. Go beyond simple notifications and build advanced, two-way automations.

API Connector
Connect Gravity Forms to External API's: Query the API using form field values and automatically fill other form fields with the API response.

JWT Prefill
Fill forms with data you can trust. Prefill Gravity Forms fields with a secure token instead of links with editable url parameters, so your data is accurate, tamper-proof, and ready to use.
Read tutorials about

Gravity Flow Form Submission Step Tutorial
The Gravity Flow Form Submission step pauses a workflow until another form is submitted, then continues once the handoff is complete. This guide shows how to connect two forms, prefill fields with mapping, send the correct secure link, and troubleshoot the most common “workflow didn’t move” issues.

Gravity Flow Delete an Entry Step Tutorial
The Gravity Flow Delete Entry step lets you trash or permanently remove Gravity Forms entries as part of a workflow. This guide covers the key settings, scheduling options (delay or date-based), and safe testing tips so you can follow retention and privacy rules with confidence.

Gravity Flow Update Fields Step Tutorial
The Gravity Flow Update Fields step pulls values from another entry and writes them into the current entry, so your workflow can route using “live” data. This tutorial covers source form selection, entry lookup with filters and sorting, field mapping, and quick testing.

Gravity Flow Update an Entry Step Tutorial
The Gravity Flow Update Entry step lets you update an existing Gravity Forms entry using a stored Entry ID and field mapping. This guide shows a simple parent-child setup where a Task Tracker workflow pushes status updates back into the original Request Form entry.

