Do you want to duplicate multiple Gravity Forms fields at once? Or edit many titles of different fields in one overview? Than you should really consider to use the Bulk Actions Pro plugin for Gravity Forms.
Edit multiple Gravity Forms field
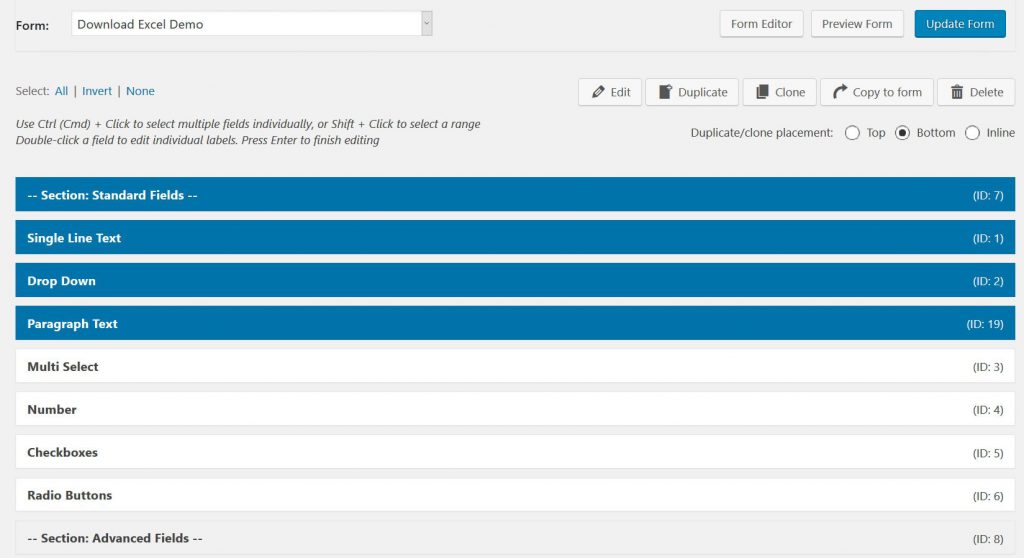
Bulk Actions creates a different visual (and very functional) way to show your Gravity Forms fields. Normally every field takes a lot of space and you are scrolling down a lot. With Bulk Actions you see only the field titles and can click multiple fields to perform cloning, duplicating or editing actions on them.
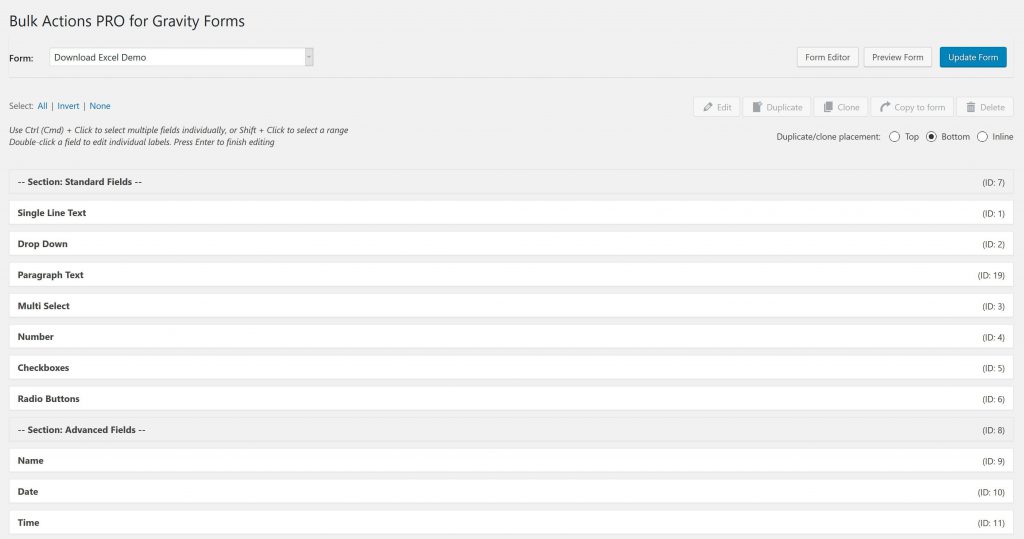
If you compare this with the normal UI for Gravity Forms, you will see that the the above Bulk Actions overview is much more compact.
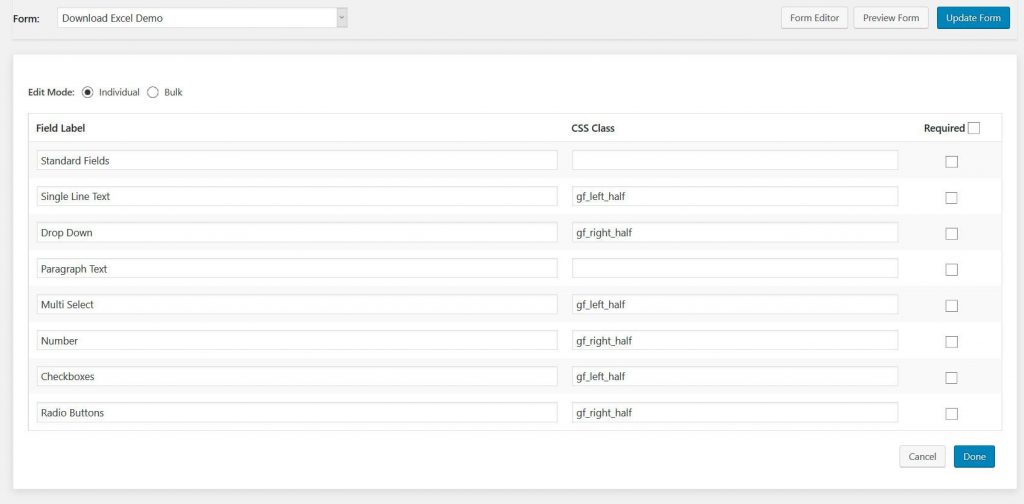
Edit multiple titles at once
Bulk Actions makes it possible to edit multiple field titles at once. Very convenient. We use our Download Excel from the front-end Form to demonstrate. Select Gravity Forms fieldsUse Ctrl (Cmd) + Click to select multiple fields individually, or Shift + Click to select a range.
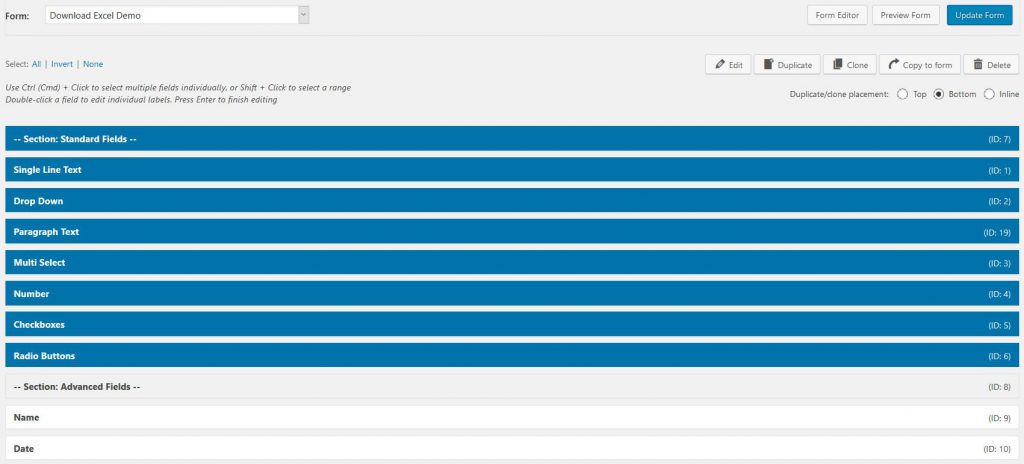
Click edit (and change title / CSS class / Required in bulk)You can easily change the Field Labels of Gravity Forms for multiple fields, the CSS class(es) and if the field is required. Providing a perfect visual overview to change the most important information per field.
Duplicate multiple fields Gravity Forms
Bulk Actions makes it possible to duplicate multiple fields at once. Very convenient. We use our Download Excel from the front-end Form to demonstrate. Use Ctrl (Cmd) + Click to select multiple fields individually, or Shift + Click to select a range.
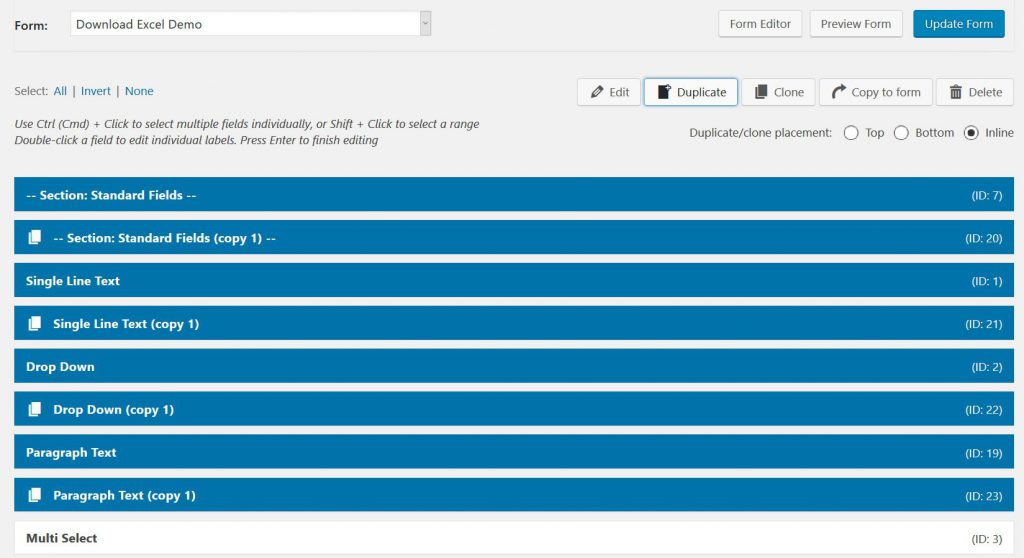
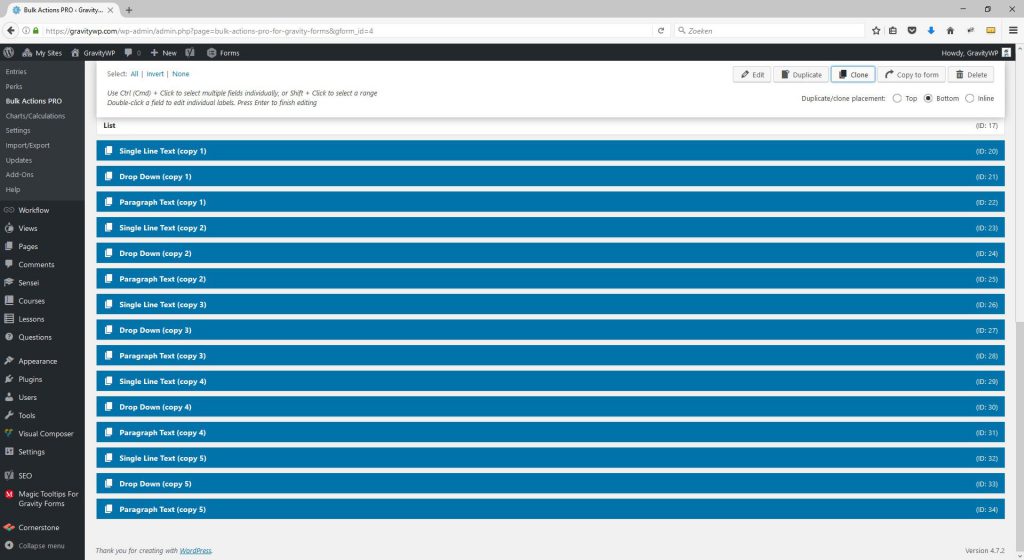
Then hit ‘Duplicate’Notice that we changed the standard option to ‘Inline’ duplicating. There are three different ways: Top: The selected Gravity Forms will be duplicated and pasted to the Top of the form. Bottom: This places the duplicated fields at the Bottom of the form (nice when you are building your form from scratch). Inline: the copied fields will be pasted under the fields that are being copied. It’s easy than to loose the selection and click only the fields you want to change the position of and put them in the right place. Saves really a lot of time. Note: when copying, Bulk Actions will add (copy 1) or (copy 2) to the fields. Before saving, it’s not possible to duplicate duplicated fields.
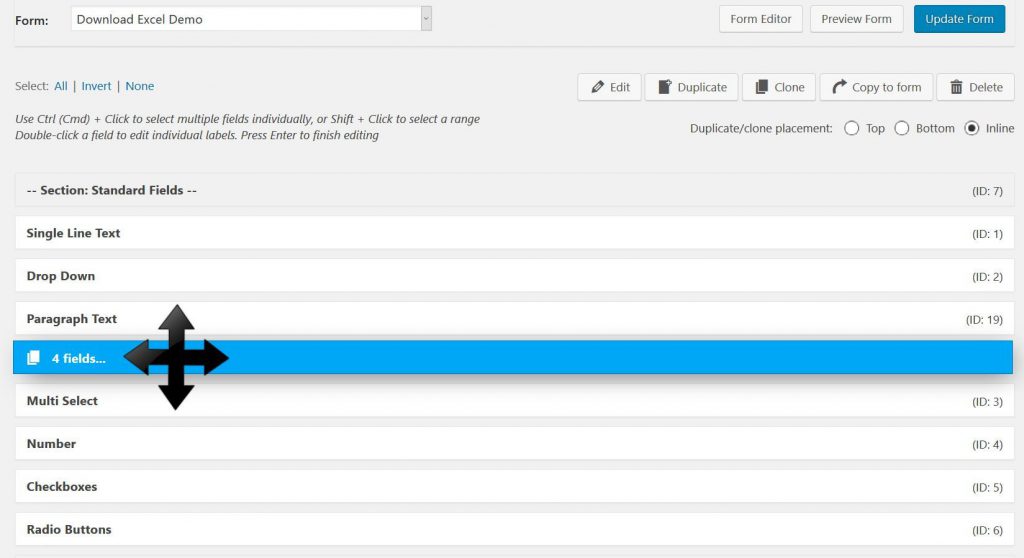
Move the selected fields to the desired location
Select all the fields you want to use and move them to the preferred position. You can easily select and move the fields as a group around your form and put them exactly where you want them.
Clone Gravity Forms Fields multiple times
Choose how many ‘clones’ you want from your Gravity Forms fields
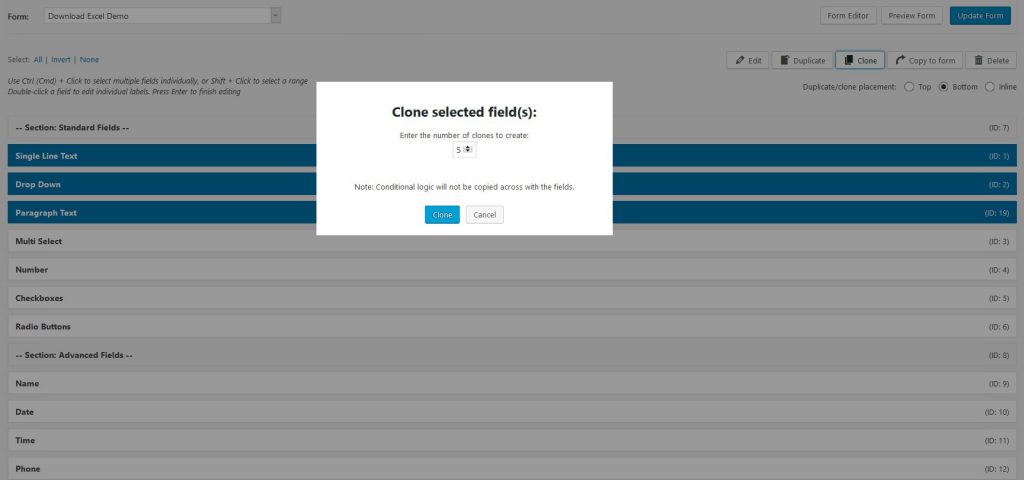
These clones are pasted at the bottom of the form
Read tutorials about

Gravity Flow Form Submission Step Tutorial
The Gravity Flow Form Submission step pauses a workflow until another form is submitted, then continues once the handoff is complete. This guide shows how to connect two forms, prefill fields with mapping, send the correct secure link, and troubleshoot the most common “workflow didn’t move” issues.

Gravity Flow Delete an Entry Step Tutorial
The Gravity Flow Delete Entry step lets you trash or permanently remove Gravity Forms entries as part of a workflow. This guide covers the key settings, scheduling options (delay or date-based), and safe testing tips so you can follow retention and privacy rules with confidence.

Gravity Flow Update Fields Step Tutorial
The Gravity Flow Update Fields step pulls values from another entry and writes them into the current entry, so your workflow can route using “live” data. This tutorial covers source form selection, entry lookup with filters and sorting, field mapping, and quick testing.

Gravity Flow Update an Entry Step Tutorial
The Gravity Flow Update Entry step lets you update an existing Gravity Forms entry using a stored Entry ID and field mapping. This guide shows a simple parent-child setup where a Task Tracker workflow pushes status updates back into the original Request Form entry.