Set up the feed to send Gravity Forms submissions to a n8n workflow
Once you have set up your first n8n connection, you are ready to create a Gravity Forms n8n feed. The feed is where you configure how a specific form interacts with your n8n workflow. You can create multiple feeds for a single form and use conditional logic to control which one runs.
Prerequisites
- You already created at least one n8n connection in WordPress.
- Your n8n workflow has a Webhook trigger set to Test or Production (match this later in the feed).
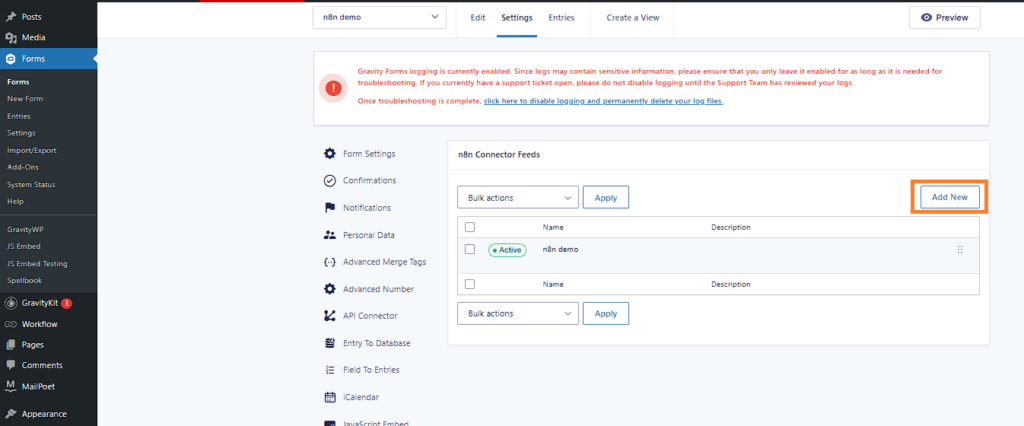
Step 1: Open the Gravity Forms n8n feed list
- In Form Editor, go to Settings → n8n Connector to open the feed list.
- Click Add New.
This will take you to the feed list for this form.
Step 2 – Configure your Gravity Forms n8n feed
Gravity Forms n8n feed settings
This first section establishes the basic connection for your feed.
- Name – e.g., “Send New Lead to CRM”.
- n8n Configuration – choose the global connection you created.
- n8n Webhook Path – e.g.,
/webhook/my-unique-workflow-trigger. - n8n Webhook Connection Mode – select Test or Production to match the Webhook node in n8n (the node exposes both URLs).
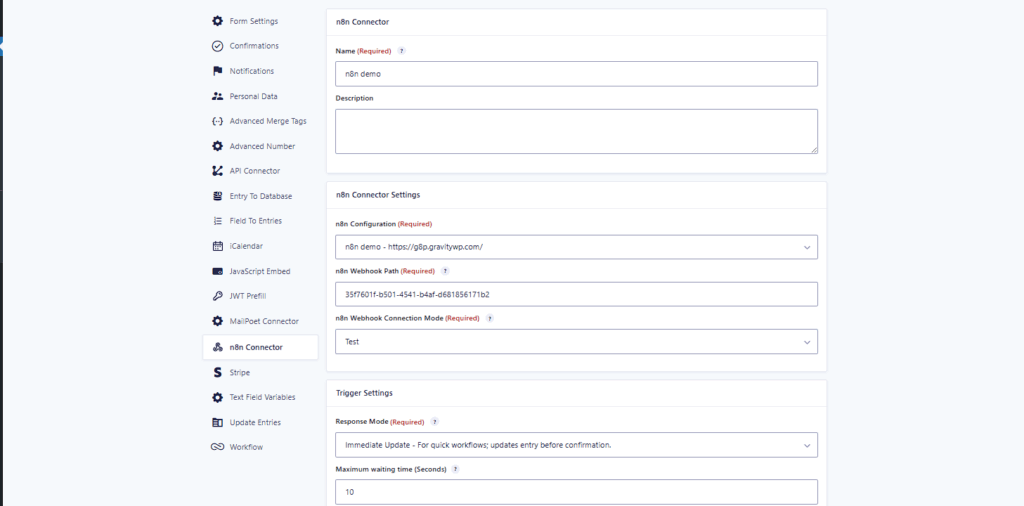
Choose a response mode for the Gravity Forms n8n feed
Pick how the feed interacts with your workflow and when it can update the entry:
- Trigger Only – fastest; sends data and doesn’t wait.
- Immediate Update – waits briefly and updates before confirmation (use only for quick flows).
- Delayed Update – best for longer flows; submit now, update the entry later.
Tip: In n8n, Webhook responses can be immediate or returned after your flow finishes. Align this with your chosen Response Mode.
Step 3 – Map data
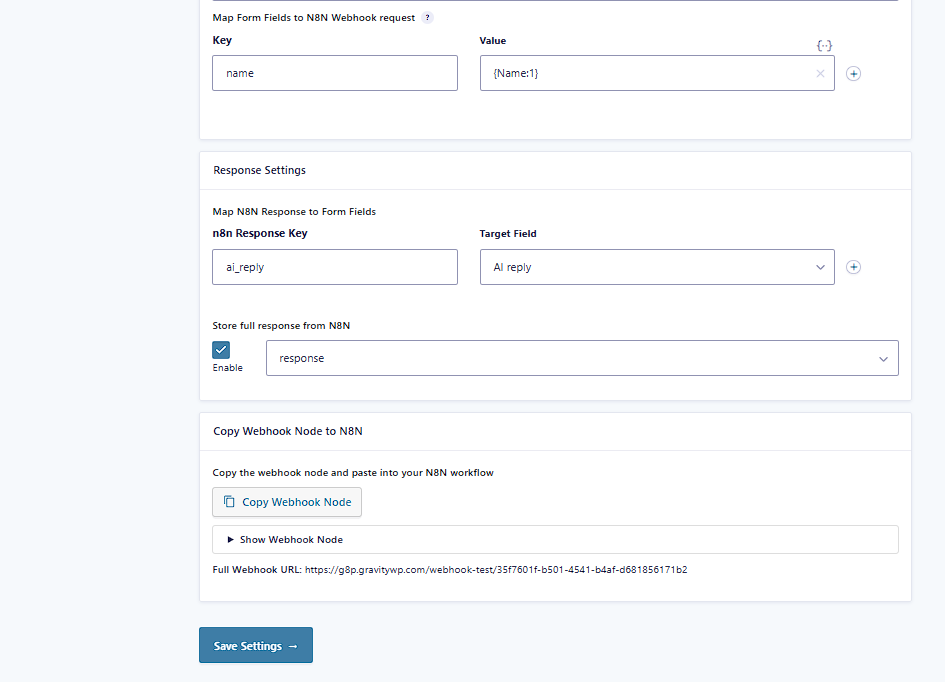
Map form fields to the n8n Webhook request
Define the JSON payload your Webhook receives:
- Left column = JSON key (e.g.,
email,full_name). - Right column = form value (any field), or choose Add custom value to use merge tags for advanced data. See Gravity Forms merge tag docs if needed.
(Optional) Response Settings
If you chose Immediate or Delayed Update:
- Map n8n Response to Form Fields – map keys from the response JSON back to target fields.
- Store full response from n8n – save the raw JSON to a Text field for testing/debugging.
Step 4 – Copy Webhook node for your Gravity Forms n8n feed
After you save the feed, a JSON block appears at the bottom.
- Click Copy Webhook Node.
- In n8n, right-click the canvas → Paste.
- The Webhook node appears with the correct path and JWT credential preselected; connect it to the rest of your workflow.
- n8n Webhook node reference (Test/Production URLs, response timing). n8n Docs
- n8n JWT credentials reference (secret / private key options).
Related developer references (optional)
- Gravity Forms feed-based add-ons (GFFeedAddOn).
- Managing add-on feeds via GFAPI / REST API v2.
What you’ve built
You created a Gravity Forms n8n feed, chose the right response mode, mapped request/response fields, and pasted a pre-configured Webhook node to finish the loop.